BeFunky’s Online Background Remover: Edit & Remove Backgrounds In One Click
Ever wish you could erase the background of your photo with a click? Good news for you then: BeFunky’s Background Remover makes that – and more – totally possible! Built entirely by our in-house team, the Background Remover uses artificial intelligence to automatically detect the main subject in your image and create a transparent background in just a few seconds.
And since this amazing technology is integrated with so many of BeFunky’s other photo editing tools and effects, it makes selective photo editing of multiple images a breeze. We’ll show you how it works, plus a few of our favorite ways to get creative with the best online background remover available.
One-Click Background Remover Tutorial
First, let's learn how to remove the background of any image. Then, we'll go over some other use cases for the tool. Click here to head directly to BeFunky’s Cutout tool. (The actual Background tool is better for starting with a blank background, rather than isolating a subject and creating a transparent background.)
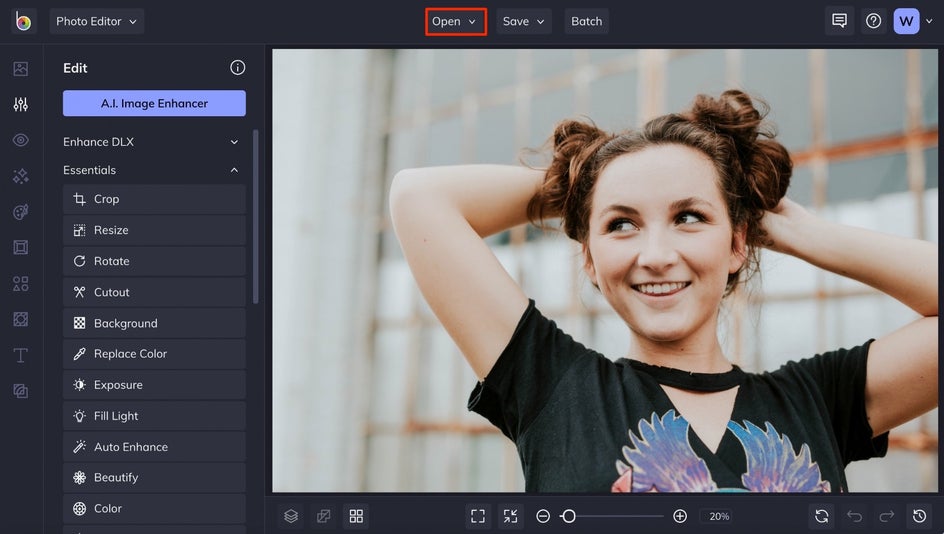
Step 1: Upload an Image
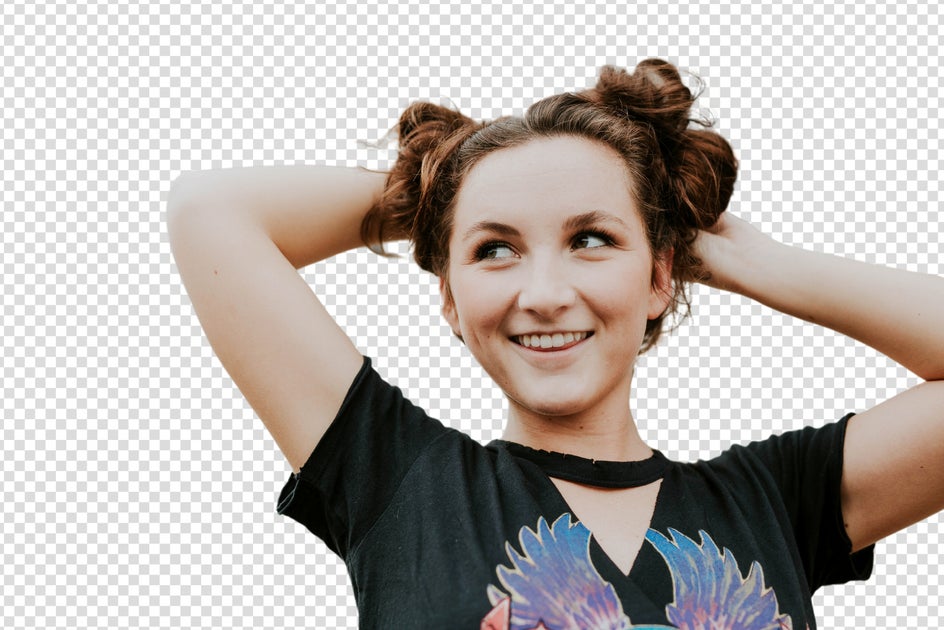
Click the Open tab at the top of the page to upload an image. Images with a clearly defined subject work best.
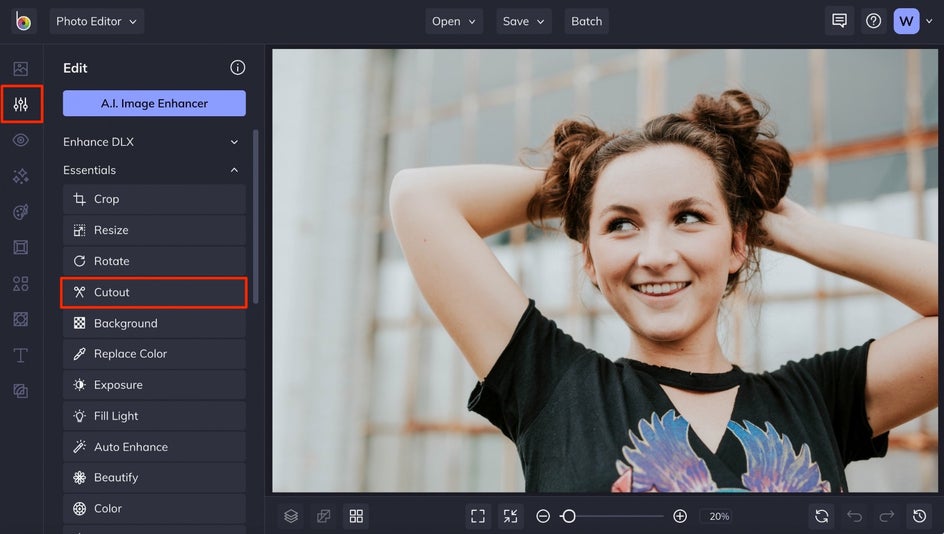
Step 2: Find the Cutout Tool
If you're not already there, the Cutout tool can be found in the Edit tab on the left. It has everything you need to cut out objects and remove an image's background.
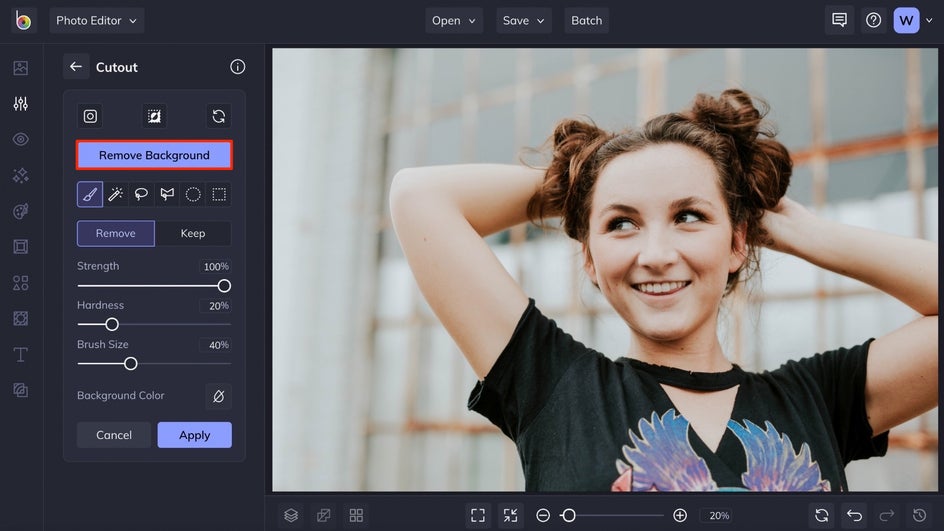
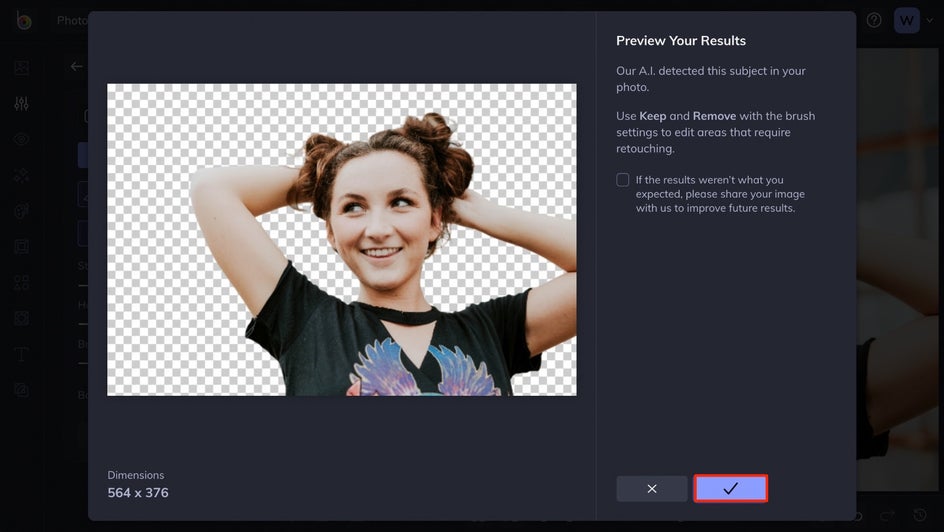
Step 3: Remove the Background
Click the Remove Background button. The tool will then aim to detect the main subject in your photo and erase the background behind it in just a few seconds!
You’ll see a preview of your image with the background removed. If it looks perfect, click the Apply button. If your image could still use more erasing, click Apply and then use the Cutout tool brushes to continue removing the background manually.
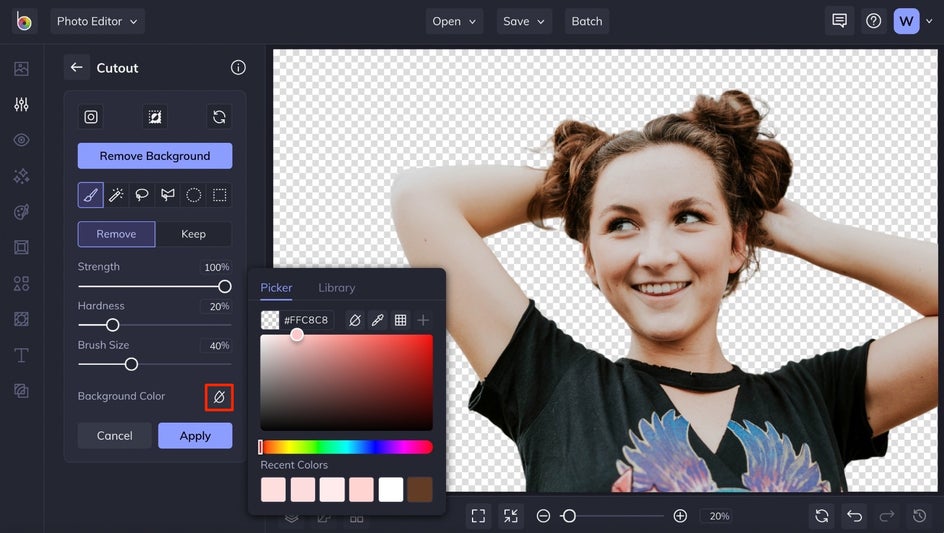
Step 4: Customize the Background
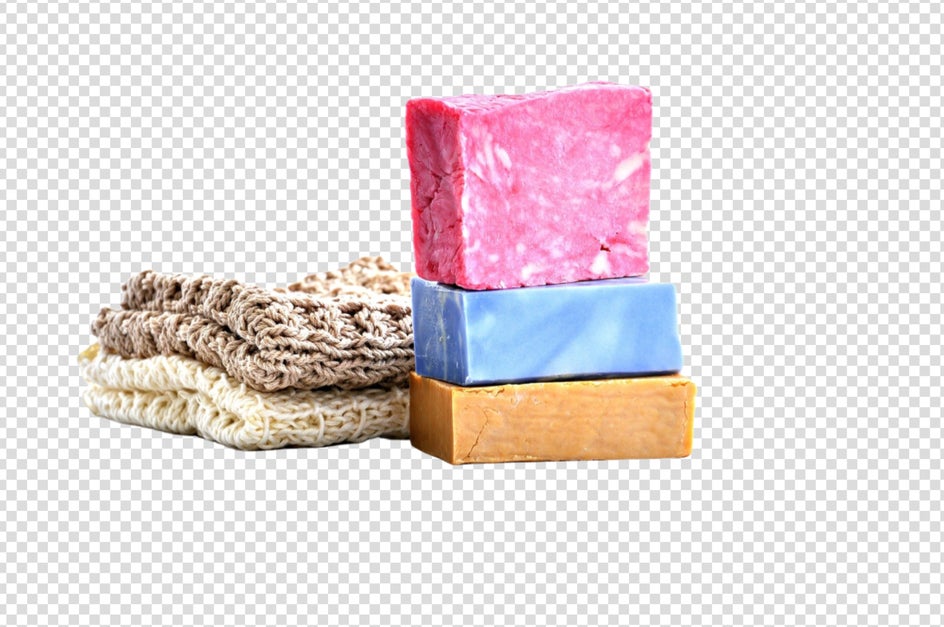
Any removed area of your image will look like a checkerboard, which means it’s transparent. If you wish to replace the background with a solid color, click the box next to Background Color in the Cutout tool menu and select a new hue. To keep it transparent, make sure that the No Color option is selected.
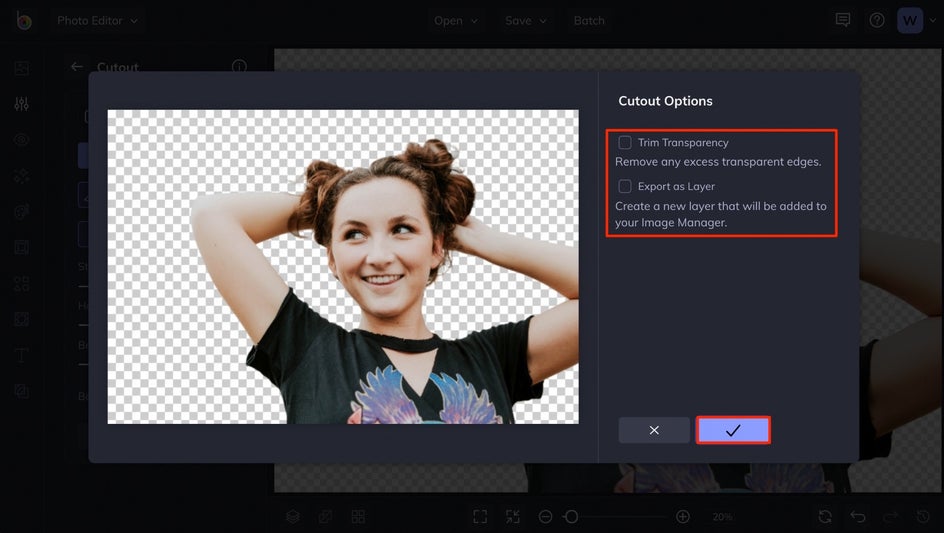
When your background has been removed and replaced to your liking, click Apply in the Cutout tool menu. This will bring up a Cutout Options menu for you to make a few more selections. Choose Trim Transparency if you want to trim any excess areas that have been removed around your subject. You can also choose Export as Layer if you want to make this cutout a brand new layer that will be additionally saved to the Image Manager.
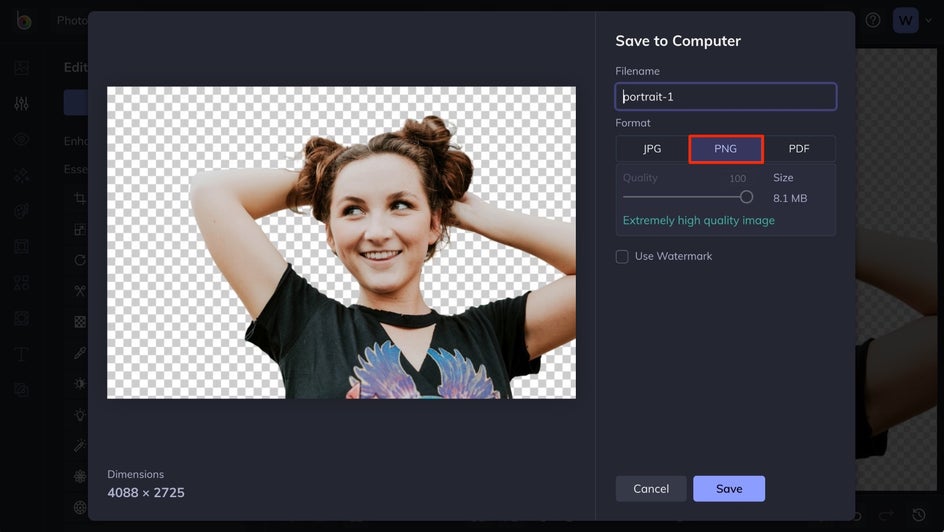
Step 5: Save Your Image as a PNG
Now that you’ve successfully removed the background of your photo, you can continue editing as much as you’d like. When you’re ready to save, click the Save button at the top of the page.

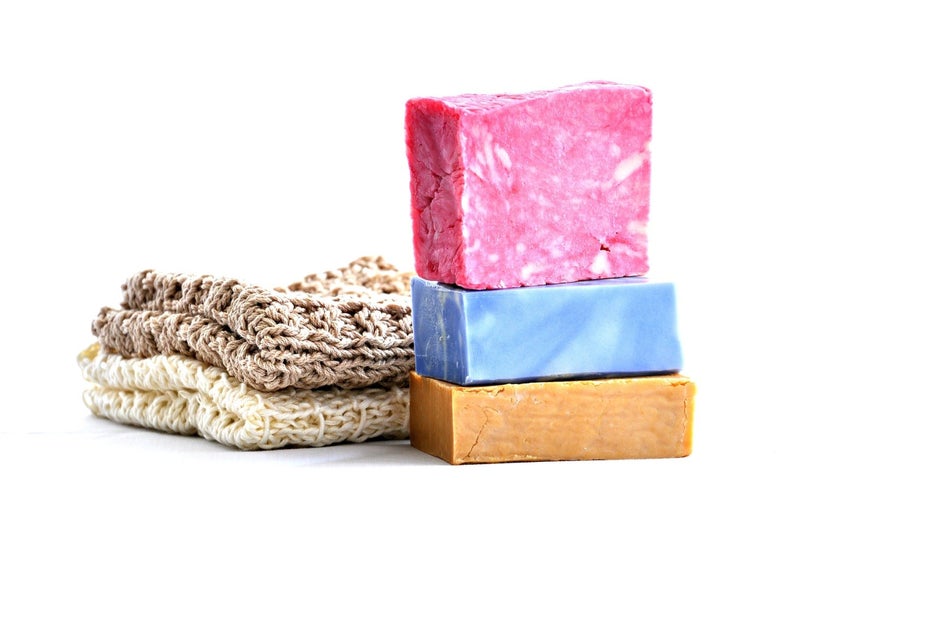
You’ll be presented with many different formats for saving your work. To keep the background transparent, it’s important to choose the Computer option and select PNG format. Other formats will end up saving the background as plain white instead of transparent.
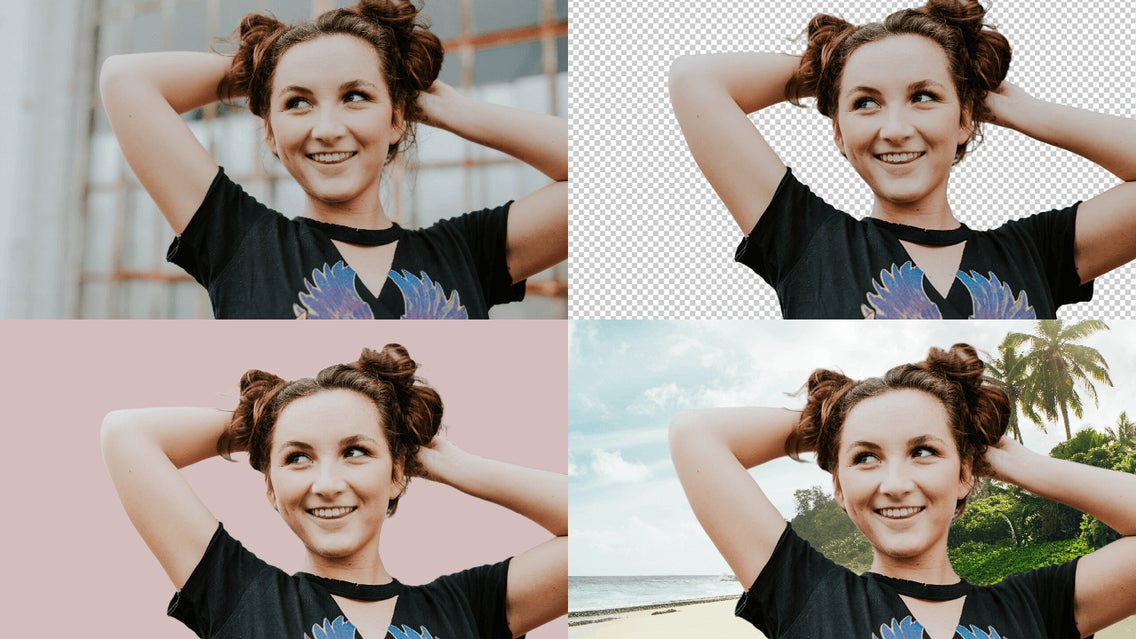
Background Remover Results
And voila – removing image backgrounds has never been this easy!
Keep in mind that BeFunky’s automatic Background Remover works best on an original image that has a clearly defined subject for the A.I. to detect. But if your image needs a little more work, there are plenty of fine-tuning options within the Cutout tool to remove the background from images with ease. (We suggest trying the Magic Brush to get those hard-to-reach places!)

Background Remover Inspiration
Whether you need to erase or replace your image background, the Background Remover is going to be your new go-to. Here are a few more creative ways to use this A.I-powered tool:
Utilize Transparent Backgrounds for Your Brand
A transparent background allows you to create cohesive product photography, website graphics, and logos that stand out. Brand marketing has never been easier! A transparent background can be trimmed and exported as a layer to then be applied to both print and digital materials.
Replace Backgrounds With Solid Colors
In some cases, adding a solid-colored background is the best way to make your main subject pop, especially when it comes to portraits and product photography.
With our Background Remover, you have your choice of any background color imaginable – even the ability to match a color in your image. After removing the background with the Cutout tool, simply select Background Color and replace the transparent background of your original image with a new hue.


Use New Background Images to Create Layered Scenes
One of the great things about our Background Remover is that it’s available to use on image layers! This makes it easy to find the perfect background, add an image layer on top, then remove the background of the image layer to place your subject in a new scene. Perfect for creating memes and realistic-looking photo manipulations. And with so many options in our Stock Image library, you can really set the scene wherever you want.


Remove Backgrounds in Seconds With BeFunky
Feeling inspired yet? As you can see, it's easy to remove the unwanted background of any photo while maintaining your subject's definition. Try out the Background Remover for yourself!