How to Use the Background Remover to Create Engaging Marketing Materials

Since we are in the digital age, a strong marketing strategy is necessary to promote your goods and services whether you have a brick-and-mortar or an eCommerce site. Not only do you need to create digital ads to promote your business, but you have to create social media posts for engagement, and email assets for communication.
If you’ve ever tried to use your product photography in marketing materials, you will know how frustrating finding the right backgrounds can be. Sometimes, you don’t have the funds for fancy photo shoot sets. Or, you need to remove something from the foreground of your image quickly and easily. Luckily, BeFunky’s Background Remover is the perfect tool for removing backgrounds to create effective marketing assets. In this tutorial, we'll teach you how to create unique marketing materials in minutes by using this tool!
How to Create Marketing Materials With the Background Remover
First, you'll want to choose one of BeFunky’s many templates in the Graphic Designer. For this tutorial, we will be creating a large rectangle web ad for a local thrift shop. Before you start removing backgrounds, customize the template to fit your brand by adjusting the background color, typeface, and copy.
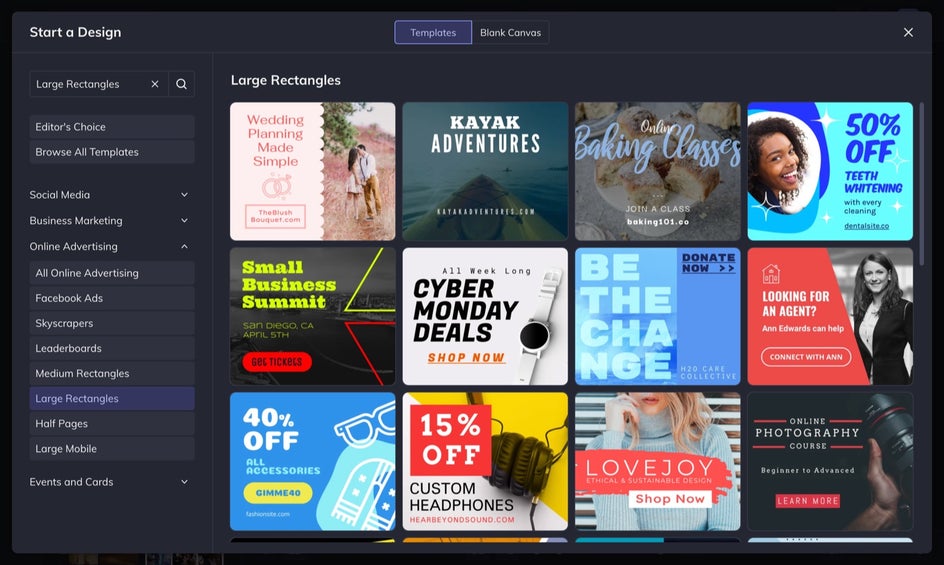
Step 1: Add a Photo to Your Canvas
Next, click on the Image Manager tab to upload your image via drag and drop or by clicking the Computer or ... buttons. Then, click on its thumbnail and select Add as Layer.
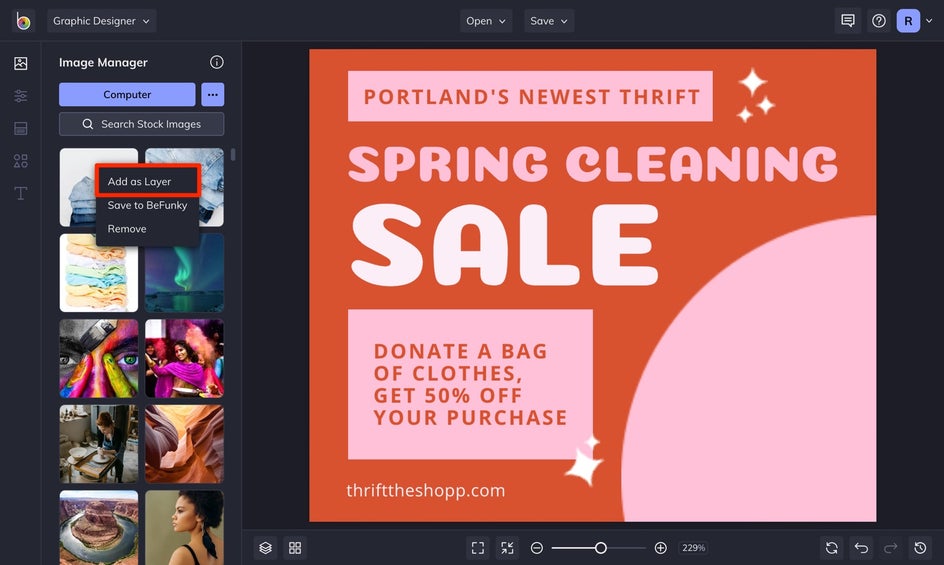
Step 2: Use the Background Remover
With your photo selected, click Cutout in the Image Properties menu, followed by Remove Background, and let the A.I. do its thing. You will be able to preview your results before pressing the checkmark button.
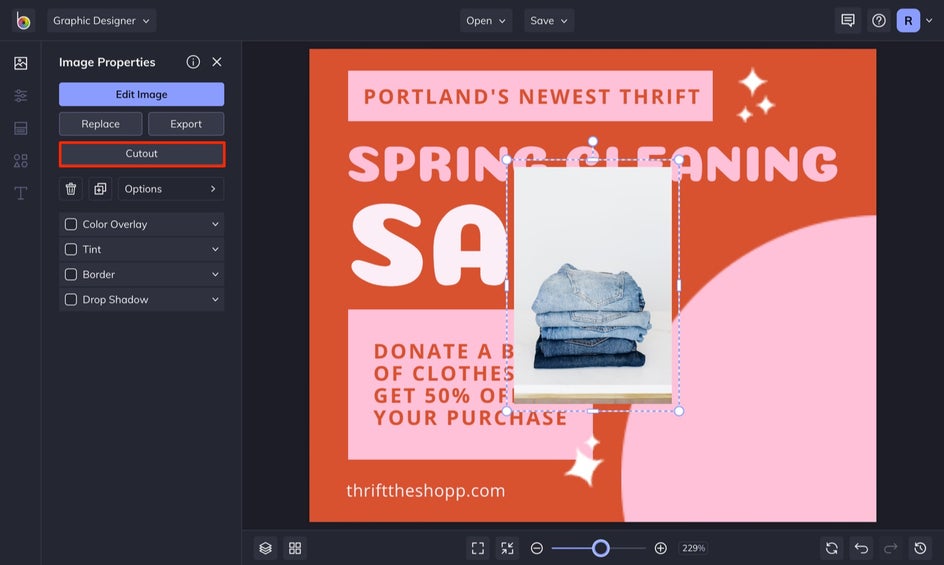
Step 3: Make Adjustments, If Necessary
If there are some spots that need editing, use the Keep and Remove tabs to customize which areas of the original image show. This is great to use when working with hard edges or fine details like hair.
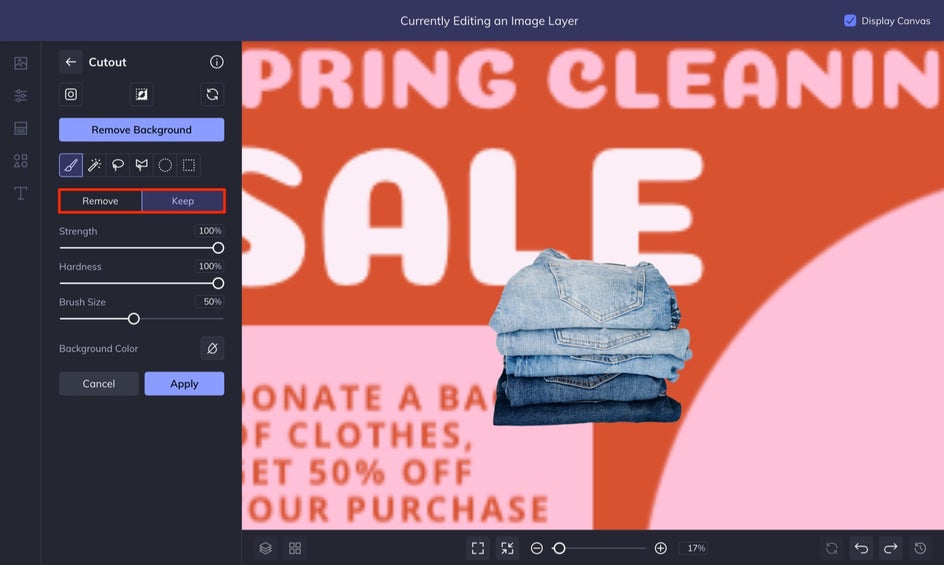
When you are all finished, be sure to click the Apply button. If you want to crop out the now empty background, select Trim Transparency. Then, select Export as Layer so that you can use the edited clip in your other marketing materials or campaigns. Again, click the blue checkmark when you're done.

Step 4: Customize Your New Layer
Once you export your image as a new layer, you are able to freely place it on your canvas. Resize your image by pulling outward on the corners or rotate it by hovering over the middle nodule, clicking, and moving your cursor either right or left.

You can add a drop shadow or tint to your image to help it stand out more. You can also move your image in front of or behind other elements in your design by opening the Options menu and selecting Move Backwards or Move Forwards.
Step 5: Save Your Design
Once you are all finished, head to the Save tab to save your graphic to your computer or BeFunky. Make sure to select the best export settings for your design. Since this is a web ad, saving it to our computer as a JPG or PNG would be best.
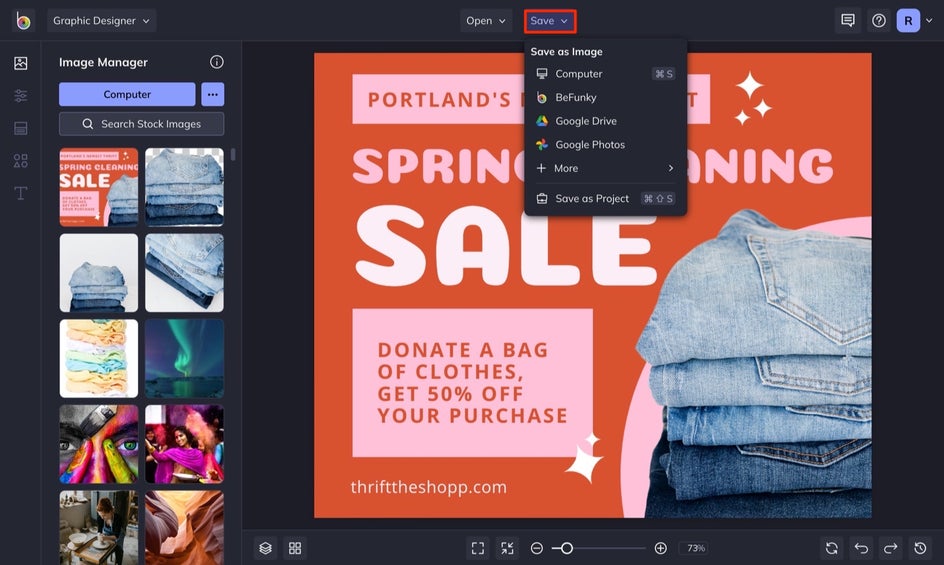
If you aren’t quite finished with designing, you can click Save as Project to come back and finish later. This is also a great option if you want to reuse your template for future campaigns.
Easily Remove Backgrounds for Your Marketing Needs
Not only were we able to showcase some clothing for our sale, but we can use this tool in order to promote more expensive clothes and accessories that come in that we want to sell in our online marketplace.

Whether you need to create ads, social media posts, or email campaigns, being able to remove backgrounds is a powerful tool for all your business and marketing needs. In just a few clicks, you can remove pesky backgrounds and flawlessly add eye-catching images to your designs. Try BeFunky’s Background Remover on your next marketing project to see how easy it truly is!


