Everything You Need to Edit Product Photography
eCommerce is more popular than ever before, and since online purchases are heavily influenced by visuals, having high quality product photography is ultra important. Customers who are buying online don’t often get the chance to hold the product in person, feel the materials, and determine the quality in a tangible way, so they depend on product photography to make a decision. If the thought of editing product photos is overwhelming to you, fear not. We’re about to show you some serious game changers when it comes to the editing process!
Whether you’re just starting out in the eCommerce world or you’re looking for an easier way to achieve the brand aesthetic you want, BeFunky’s Photo Editor has everything you need to edit those product shots easier than ever. In fact, our AI-powered tools are so intuitive, they’ll automatically detect the product in your image and let you edit it independently of the background! That way you can adjust your product’s exposure, sharpen details, edit colors, and so much more, all while leaving the background untouched. Need to edit the background only? Use our automatic Background Remover to create colorful or transparent backgrounds for your product shots, all in a single click. When it comes to selling online, we’ve got your photo editing completely covered.
Edit Product Photography More Selectively Than Ever
In the Edit tab of BeFunky’s Photo Editor, you’ll find all the tools you need to emphasize the products in your shots by adjusting exposure, colors, sharpness, and so much more. We made our intuitive AI technology available in most of these tools, which means that with the click of a button, you’ll be able to automatically detect the product in your image and apply those editing tools selectively, leaving the background completely alone!
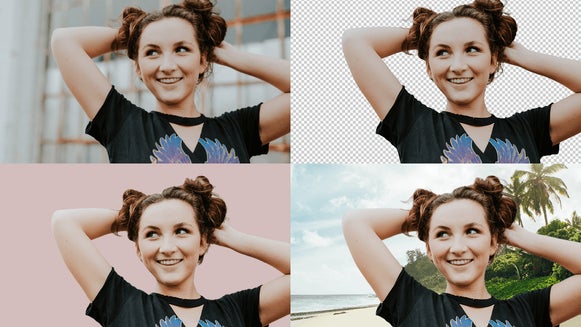
If your products are looking perfect but your image background could use some editing, our automatic Background Remover uses AI to detect the background around your product and replace it with transparent background or any solid color you could ever dream of. Now you can truly do anything you're envisioning for your product shots, all in a few clicks! Here are some of our favorite ways to edit selectively:
Create Product Color Options
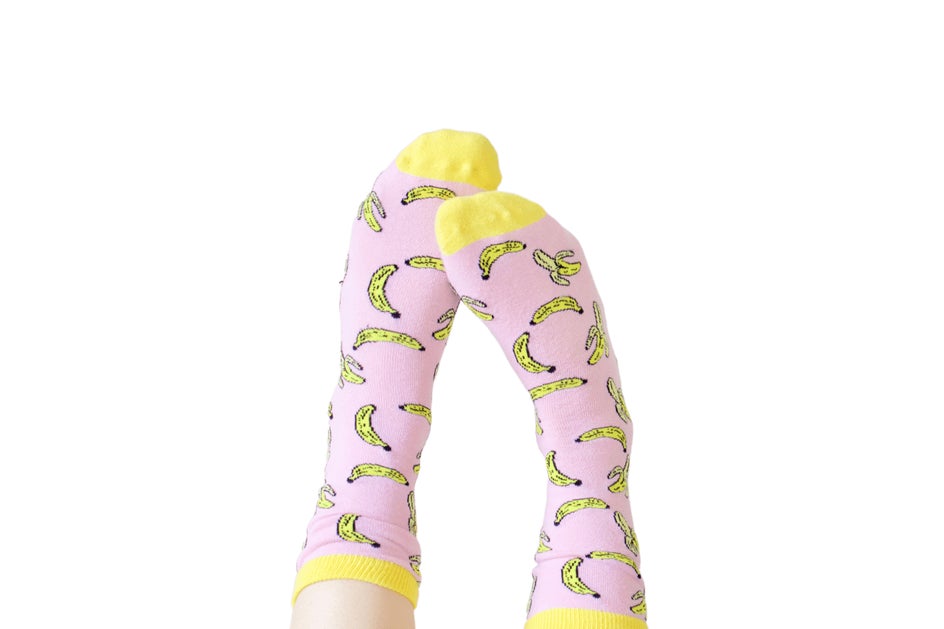
If you've ever wanted to use the same product photo to show all the different color options in your offering, now you can! Just use the Isolate Subject button in the Erase mode of our Color tool to mask the product in your image, then adjust different color options like Hue, Saturation, and Temperature.
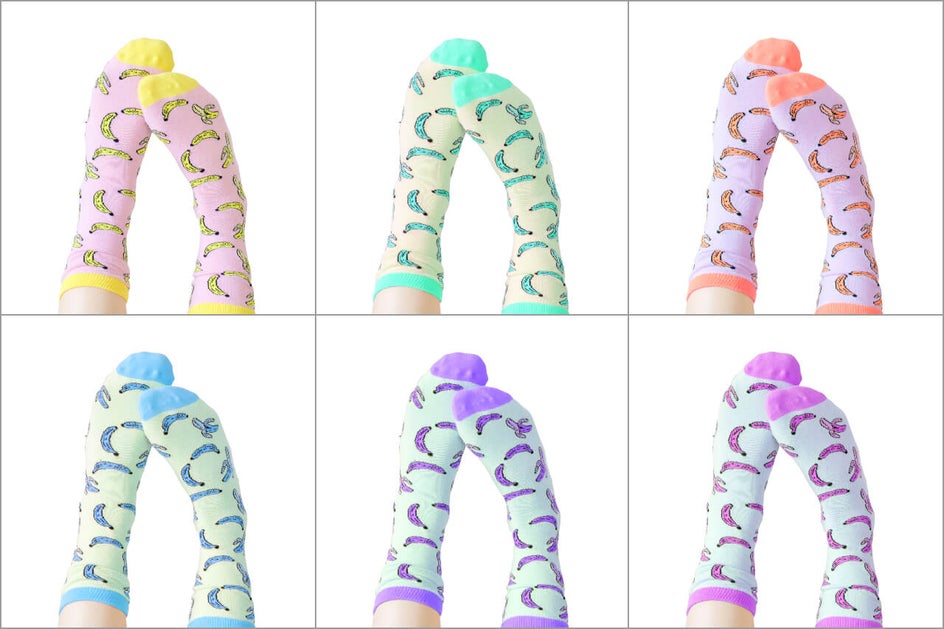
With the ability to isolate the product in your image in just one click, every color adjustment you make will only be applied to the product without affecting the background.
Remove and Replace Image Backgrounds
Whether you need to create a transparent background for your product photography or want to replace a busy background with a solid color, the Background Remover in our Cutout tool will help you get the look you're going for. In one click, it detects the subject (or product) in your image and removes the background around it.
Some eCommerce sites (like Amazon) require pure white or transparent backgrounds to keep everything looking cohesive, and the Background Remover is the perfect tool to ensure you meet those requirements. It's also ideal for creating colorful backgrounds to showcase a look all your own!
Use Photo Editing Tools Selectively
Need to balance the exposure of your product and keep the background as-is? Or color correct a background only? Any of the tools in our Edit menu that have an Erase mode come with an Isolate Subject button. Select it to mask the product (or the background) and adjust away!

These intuitive tools make it easier than ever to edit your product photography without having to learn (or pay for!) complicated software. And if you're looking to get creative with your product photography for ads and otherwise, you can even use this masking technology with most of our Photo Effects, Textures, Artsy Effects!
How to Selectively Edit the Product in a Photo
Editing the product in your photo independently of its image background is easy in BeFunky. First, upload a photo into our Photo Editor by selecting the Open button at the top of the page and choosing the image file, or simply drag-and-drop the image into the interface. Then click one of our tools in the Edit menu. For this tutorial, we'll be using the Color tool.
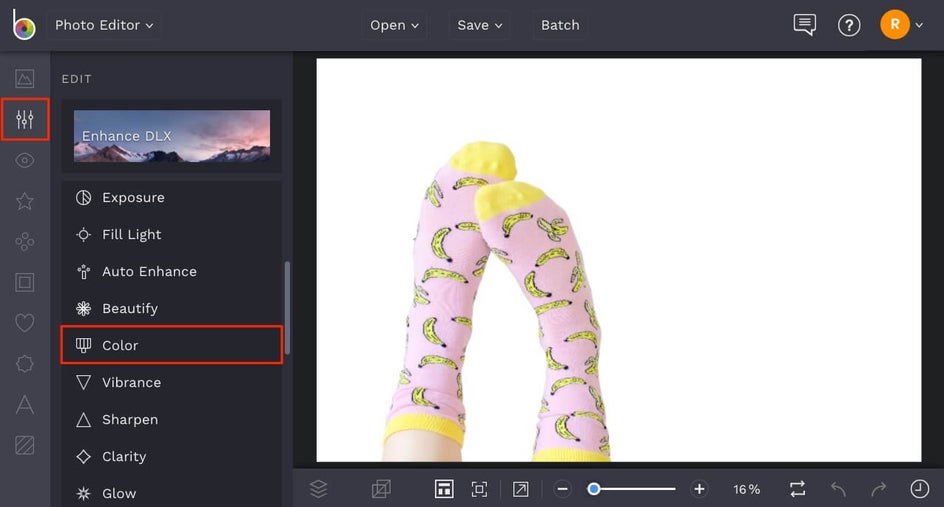
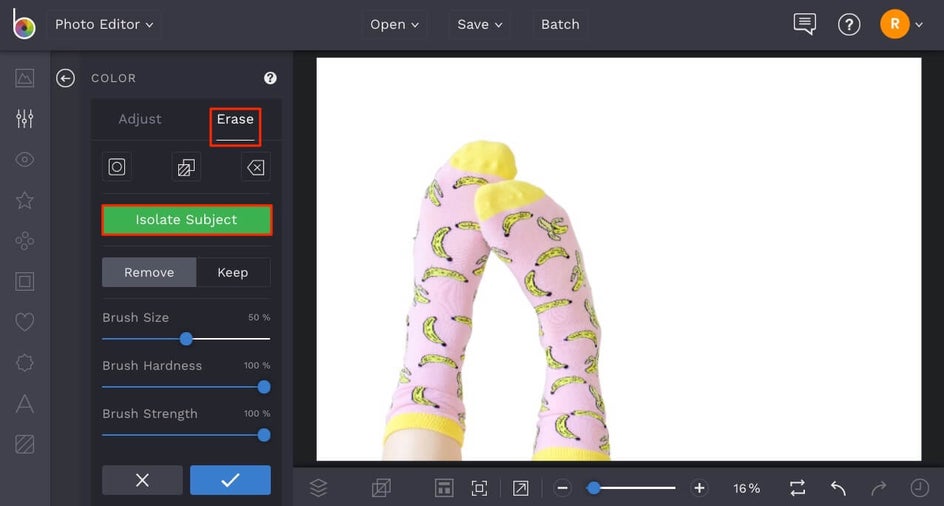
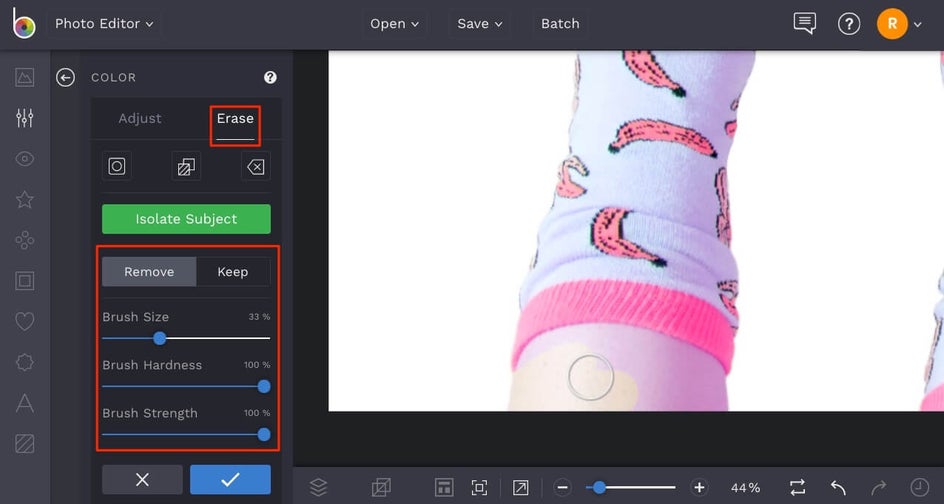
Any of our photo editing tools with an Erase tab in its menu will feature an Isolate Subject button. In the Color tool, simply click Erase (next to Adjust) and choose the Isolate Subject button to let our AI detect the main subject in your image.
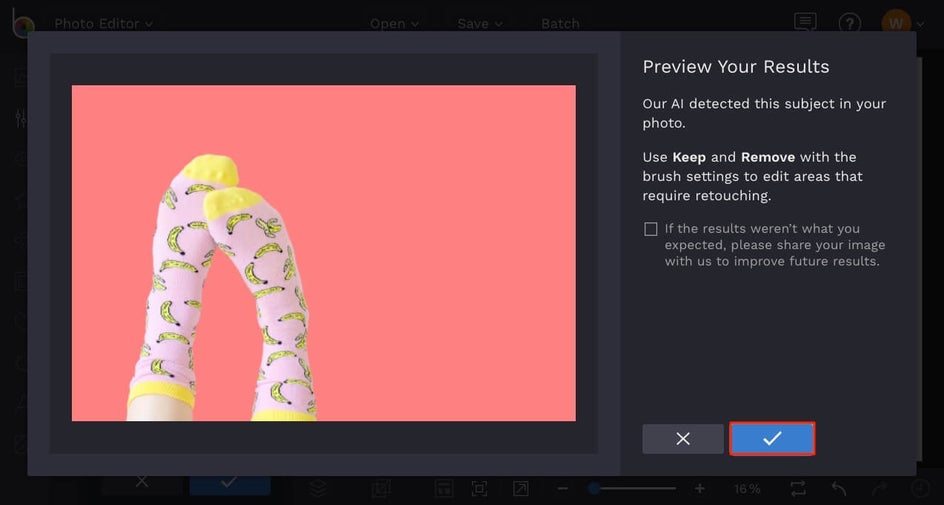
After clicking Isolate Subject, a preview will appear to show you the subject our AI detected in your image, masking everything around it in red.
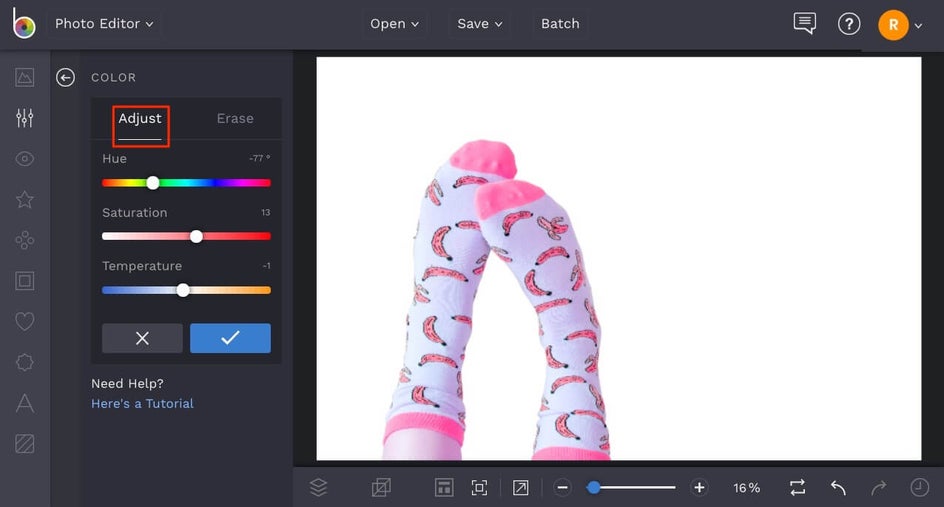
If the subject in your image wasn't fully detected or there are additional areas you need to mask, you can always do detail work with the Keep and Remove brushes in Erase mode after clicking the blue checkmark. Once you're happy with the mask, click back over to the Adjust tab in the Color tool to adjust Hue, Saturation, and Temperature. These sliders come in handy whether you're color correcting a product or changing the color of it completely.
Like we mentioned before, if there are areas that need some additional touching up mask-wise, you can head back to the Erase tab at any time and remove the edit from any part of your image. In our photo example, we need to remove the effect from the portion of the leg to make this edit look more realistic. To remove the effect, select the Remove button, adjust the Brush Settings, and paint over the area. Alternatively, you can paint back the effect by selecting the Keep button and painting over the area.
Now that the product is perfectly masked, make any additional changes in the Adjust tab until you love what you see. In the Color tool, the Hue slider will change the entire color scheme of the product as you adjust it. The Saturation slider will add more intensity to the colors in your image if you slide it to the right, and less intensity (or more muted colors) if you slide it to the left. Adjusting the Temperature slider to the left makes the colors cooler in tone, while sliding it to the right makes the colors warmer in tone.
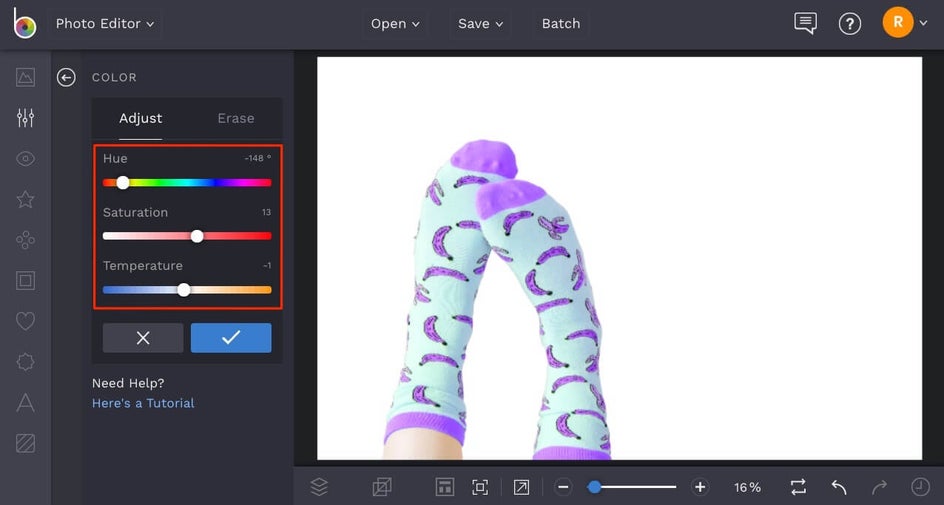
Once your colors are looking perfect, click the blue checkmark to apply everything. From here, you can continue editing your product photography however you'd like!

Keep in mind that any tool that features an Erase mode will have an Isolate Subject button for selective photo editing, so whether you want to change the color of a product, brighten it, or detail it in any way (while leaving the background as-is), be sure to use the Isolate Subject button if it's available!
How to Selectively Edit Backgrounds
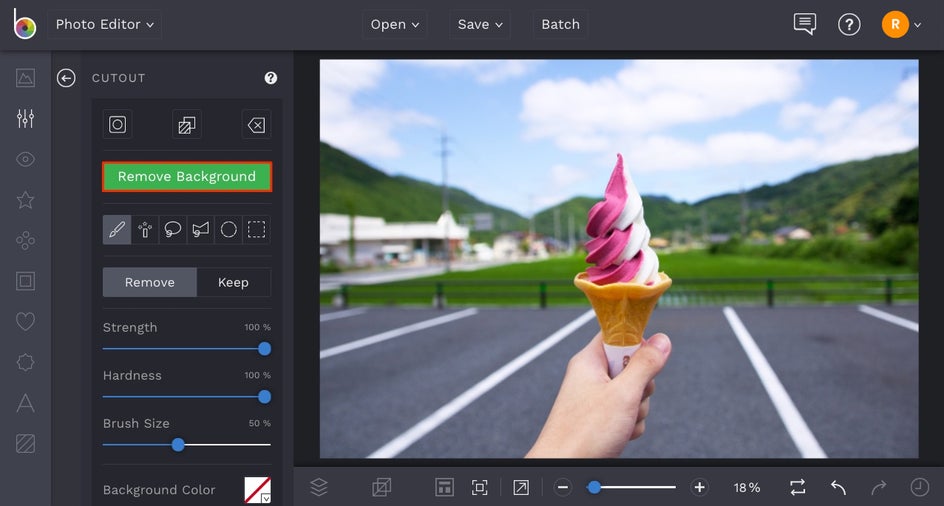
For all the times you need to create a professional looking solid-colored or transparent background for your product photography, our Background Remover has you covered. To try it, head to BeFunky's Photo Editor and upload your image, then select the Cutout tool from the Edit menu on the left.
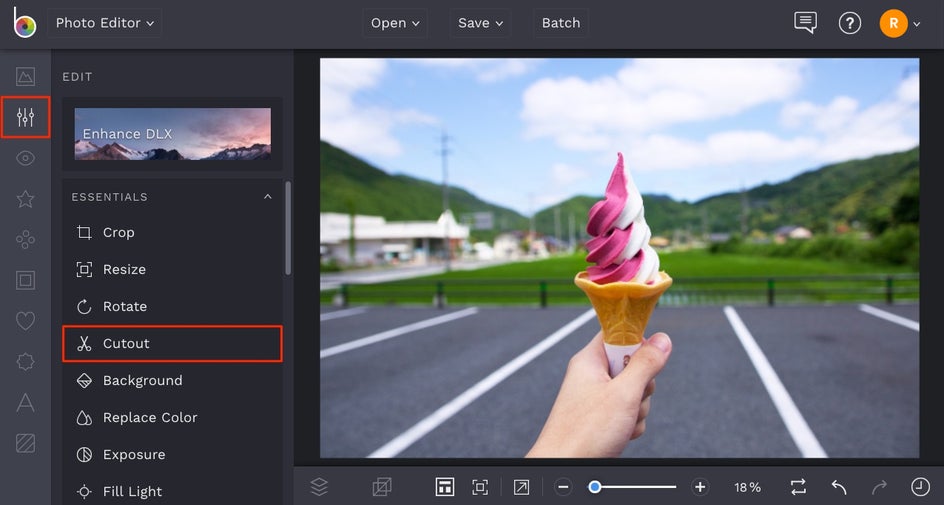
Once there, click the Remove Background button. This will prompt our AI to detect the subject in your image (in this case, the product) and remove the background around it.
A preview will appear to show you the subject our AI detected in your image. Click the blue checkmark to continue.
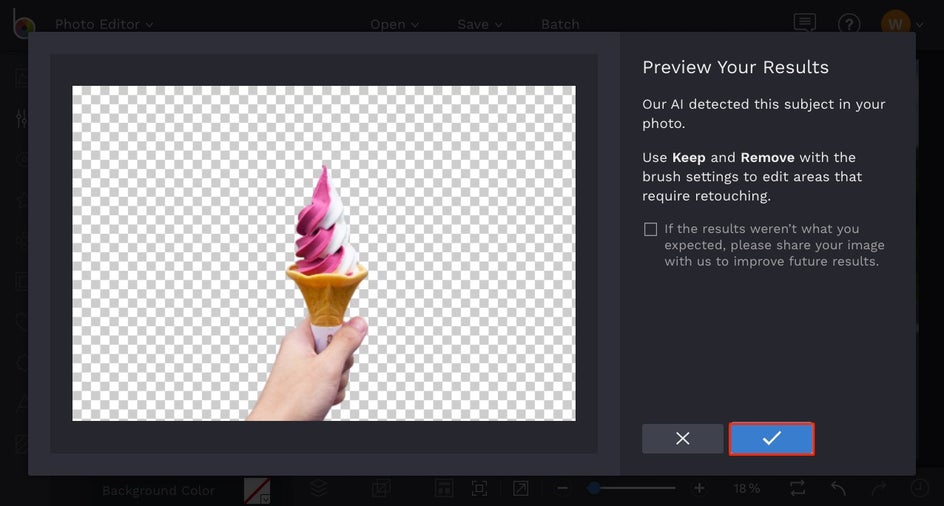
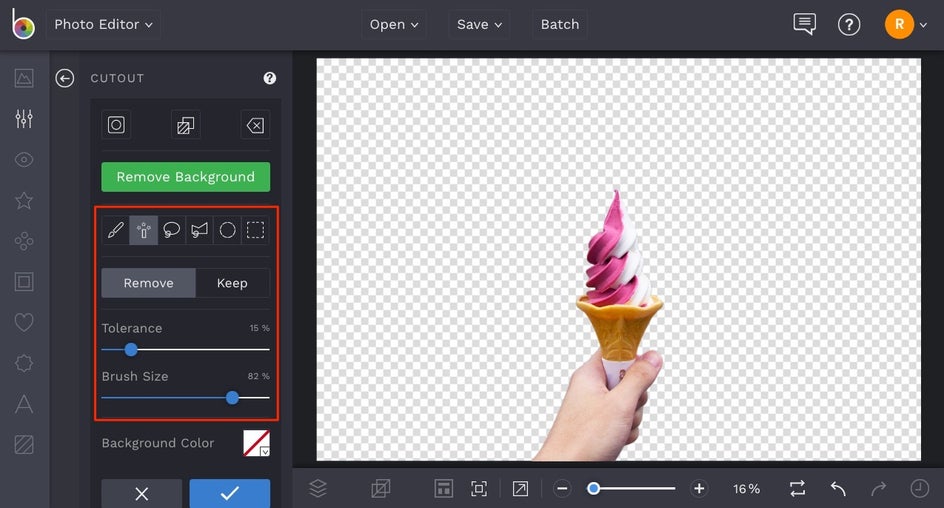
Keep in mind that if you need to do any additional detail work (like paint in areas of the product that were removed or erase more of the background), you can easily use the brushes in the Cutout tool to do so.
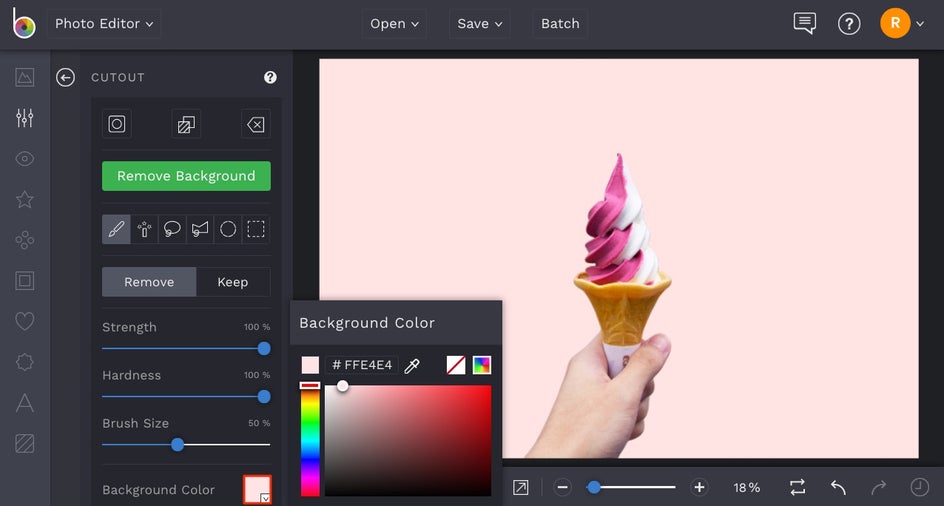
If you'd rather have a solid colored background, click the Background Color tile and choose a new hue from the color palette that appears. Feel free to type in a HEX color code if you have one, or use the Eyedropper tool in the color palette to choose a hue that exists on your image.
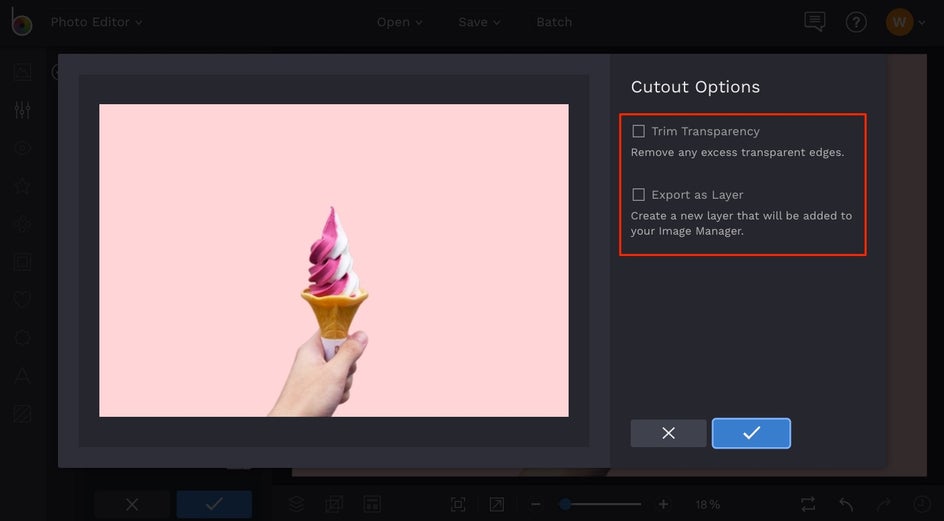
When your background is looking perfect, click the blue checkmark to apply the Cutout tool and choose your Cutout Options. You'll be able to Trim Transparency (get rid of the excess space around your product) and Export As Layer (add a copy of the cutout to your Image Manager). Choose your options and select the blue checkmark.
From here, you can keep on editing your image, add text, and more! When you're ready to save, click the Save button at the top of the Photo Editor and choose your destination.

With BeFunky, you've got everything you need to edit product photography and keep your online shop looking on-brand. These amazing tools (and so much more!) are available with a BeFunky Plus subscription, so be sure to upgrade and get access to all the tools and features you could need for the creative side of your business: all the customizable social media templates, collage layouts, photo editing tools, and beyond!