How To Fix Underexposed Images With The Levels Tool

While some of the best photography is captured in natural light, it’s not always a perfect shot perfect from the get-go. When you’re taking a photo of a landscape or person, you may have to underexpose your photo to ensure that the brightest parts (like a bright blue sky) can still be seen. In these cases, you might be reaching for the Exposure tool to brighten the shot in the editing process, but we’re about to shake your world with an even more powerful tool: Levels.
Contrary to the Exposure tool, which can quickly help you adjust the basics like overall brightness and contrast, the Levels tool gives you total control over the highlights, midtones, and shadows individually, all in one place. Even if the lighting was too dark or your camera settings were a little off while shooting, you can easily manipulate the light with Levels to help you create an image that still looks natural and balanced. All you need is a BeFunky Plus account and a little know-how - we’ll teach you all about how to use it next!
If you haven’t upgraded to a BeFunky Plus account, fear not! You can still edit with the Levels tool in preview mode. But be warned, after seeing how much control you’ll get over exposure, you’ll want to be part of the Plus crew forever. Let’s get to it!
Anatomy Of The Levels Tool
If you’re using the Levels Tool for the very first time, the options can seem a little overwhelming. Because it’s such a powerful tool for controlling exposure, there are quite a few options to choose from and sliders to adjust:
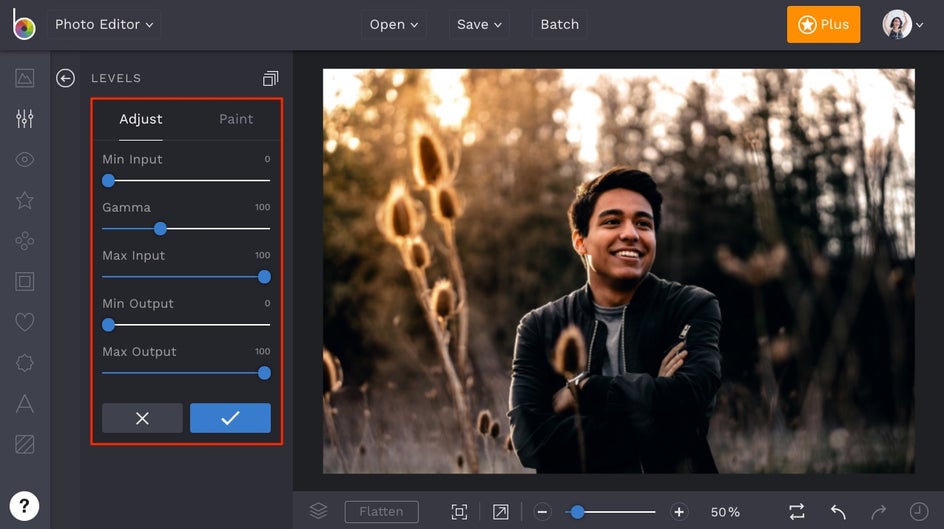
Before you go running back to the Exposure tool, we’re about to break the Levels tool down into something so simple that you’ll be able to easily understand the power that’s right at your fingertips! Here we go:
Input Sliders
There are two Inputs in the Levels tool menu: Min Input and Max Input. The Min Input slider controls all of your Shadows within the image, and you'll notice as you gradually increase it, the entire image will turn black. Slight adjustments will give you better control over darkening the shadows already represented in your image if that's what you wish to do.
The Max Input, on the other hand, controls all of the highlights within your image. Decreasing the slider will brighten all of the light sources in your photos, and you'll find that moving the slider entirely to the left will turn your image white. Harmony between each of the input sliders will let you control the overall shadows and highlights more precisely than the Exposure tool sliders will allow.
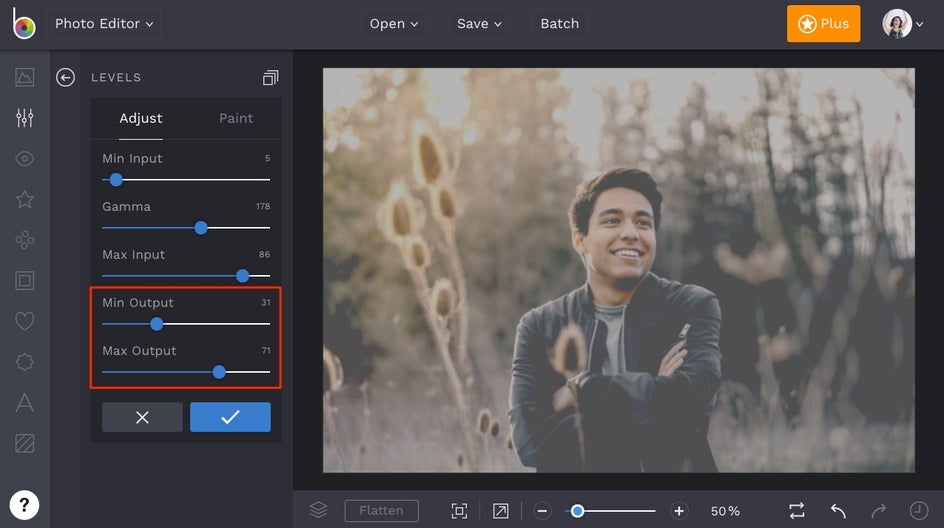
Output Sliders
Just like the Input sliders, there are two Output sliders represented in the Levels tool menu: The Min Output and the Max Output. These sliders will adjust the overall tonal range of your entire image, reducing the contrast of your shadows and highlights. For example, if you increase the Min Output slider, it will limit the intensity of the shadows in your photo, making the overall effect look brighter - almost like adding a white overlay. On the contrary, when you decrease the Max Output slider, it will limit the intensity of the highlights in your image, making the overall effect look darker - almost like adding a black overlay. Moving both sliders slightly inwards will allow you to achieve a matte effect, if that’s the look you’re going for.
Gamma Slider
The Gamma slider is sandwiched between the two Input sliders, and will control the overall exposure of your image. If you don't need a ton of fine tuning and simply want to brighten or darken the overall image, the Gamma slider is your go-to. Simply decrease the slider to darken the image, or increase the slider to brighten it. It's pretty failproof for making intuitive edits to exposure, taking all of the highlights and shadows into account.
Now that you know your way around the Levels tool menu, it's time to put it into practice! The best thing to keep in mind when editing with the Levels tool is to create harmony and balance between all of the sliders. We'll show you how everything works together to create one beautiful image next.
How To Edit Exposure With The Levels Tool
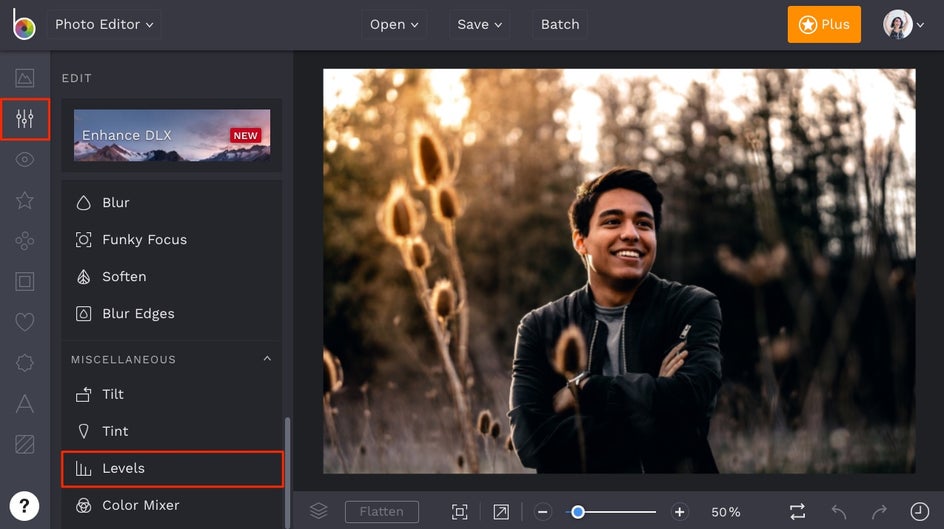
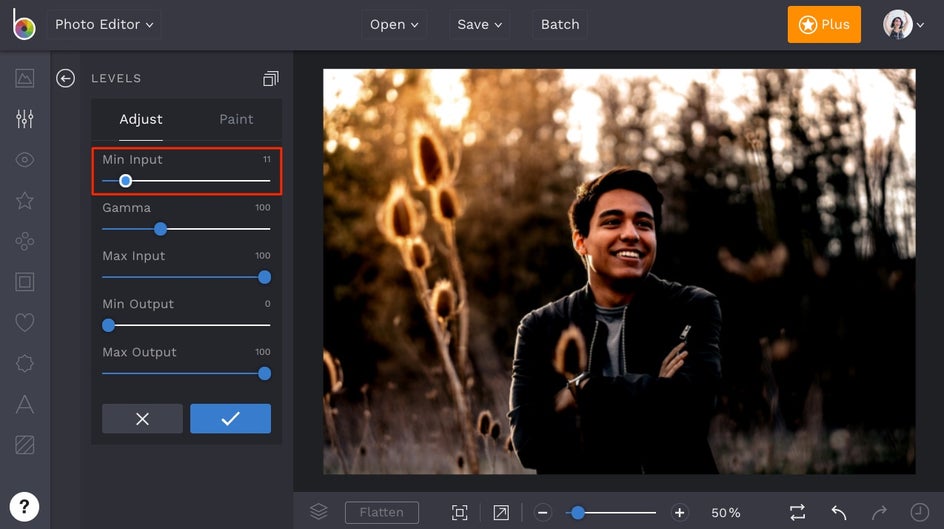
When you're ready to start balancing your exposure with the Levels tool, head to BeFunky's Photo Editor and upload an image by choosing a file from the Open button at the top of the screen, or simply dragging-and-dropping an image into the interface. Scroll down to the bottom of the Edit menu on the left and click on the Levels tool. The image we've chosen for this tutorial was taken at golden hour, but is underexposed. We'll show you how to fix the exposure and bring out all the important details.
Since golden hour photography is meant to be contrasty, we want to enhance some of the shadows within the image while brightening the highlights to reveal more of the subject's detail. To do this, make a slight increase in the Min Input slider to enhance the shadows. If your photo is overly bright, increasing the Min Input will add more shadows and contrast.
It may look like we have more than enough shadows going on, but using the Max Input slider to create balance between the highlights and shadows will be key to improving the overall exposure. Sliding the Max input to the left will enhance the highlights within the image, so if your photo is overly dark, this slider is a great starting point for you.

Now that we've created a little more harmony between the highlights and shadows, the Gamma slider will help intensify the effect. Sliding it to the right will create a darker image, but sliding it to the right will create brightness in the overall exposure and bring out all the fine details we were missing.
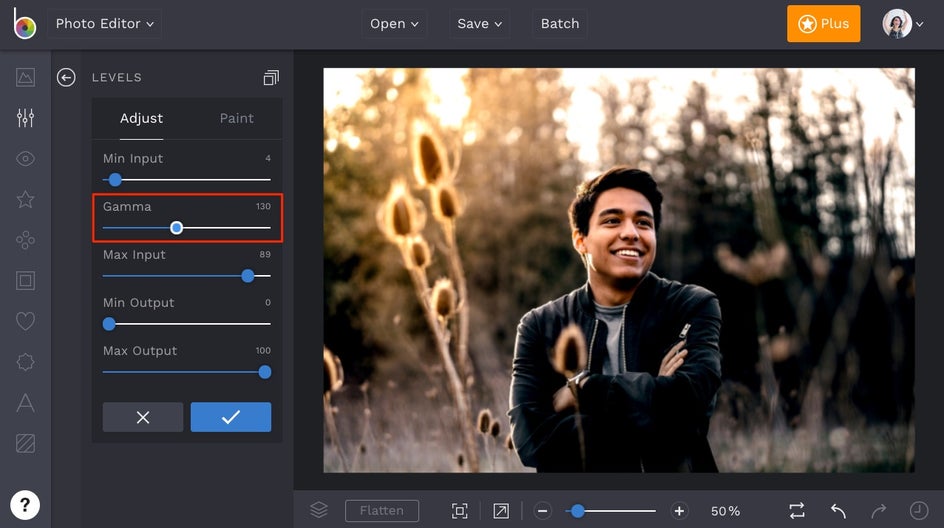
Notice how details in the subject's clothing and facial features are brought to the forefront, while the background details are also enhanced. The Gamma slider is a great starting point if your shadows and highlights are already balanced, and you only want to brighten the exposure in the foreground and background. Contrary to the Exposure tool, the Gamma slider in levels is way more precise when dealing with overall shadows and highlights.
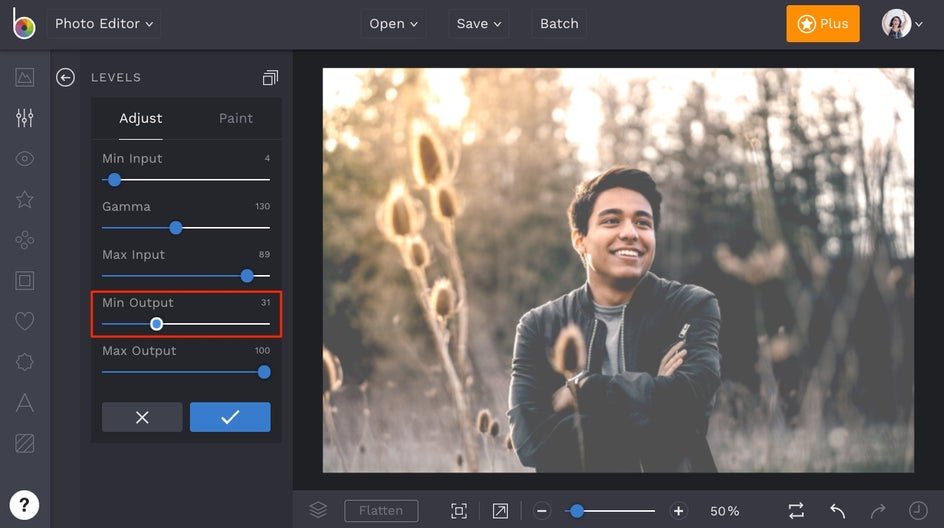
If a matte effect is what you're after, the Output sliders are perfect for creating it. Sliding the Min Output slider to the right will reduce the contrast of the shadows in your image, creating a bright matte look that's reminiscent of a white overlay. Increasing the slider all the way to the right will turn your entire image white, while making slight adjustments will bump up the opacity of the matte overlay in more subtle increments.
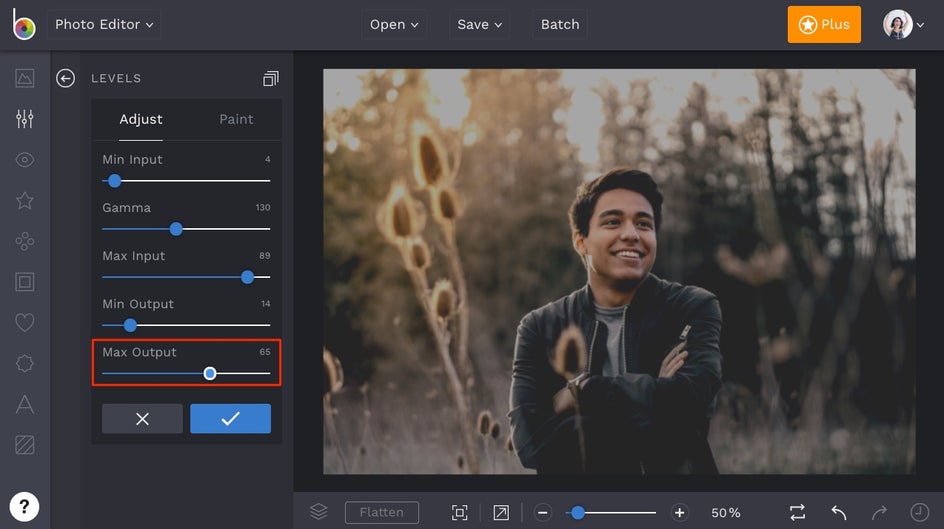
On the contrary, the Max Output slider decreases the contrast between the highlights in your image, thus creating a matte effect that's similar to adding a black overlay. Sliding the Max Output slider to the left will increase the opacity of the matte black look, and moving it entirely to the left will turn the entire image black.
If you're going for more of a matte gray look, you can create balance between the Min Output and Min Input sliders by moving each one slightly inward. This will create more of a gray overlay the closer to center each of the sliders goes.
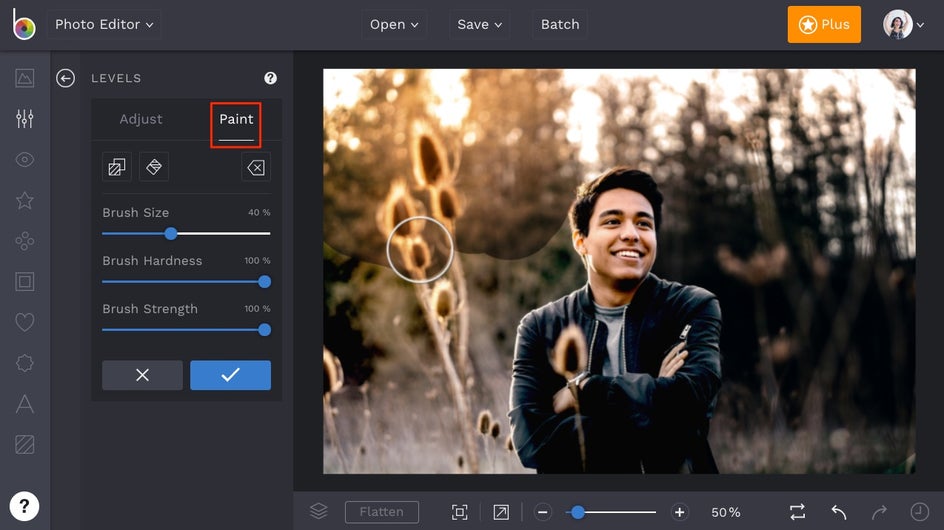
Let's say you only want to brighten the subject in the foreground while keeping the background the way it was originally. By using the Levels tool in Paint Mode, you totally can! Simply adjust all of the sliders to bring out the details where you want them (in this case, we've enhanced the exposure to bring out details in our main subject), then click on the Paint tab next to the Adjust tab. Adjust your Brush Size, Brush Hardness, and Strength, then use your mouse to paint over the areas where you didn't want to use the Levels tool. If you'd rather paint on the effect rather than remove it, click the Inverse icon (two overlapping squares) to revert the image back to original, then paint the Levels adjustments where you want them.
Once you feel like your edit is complete, click the Blue Checkmark to apply the enhancements. From there, you can keep on editing your photo with BeFunky's vast library of tools and effects, or you can click the Save button at the top of the Photo Editor to save your image.
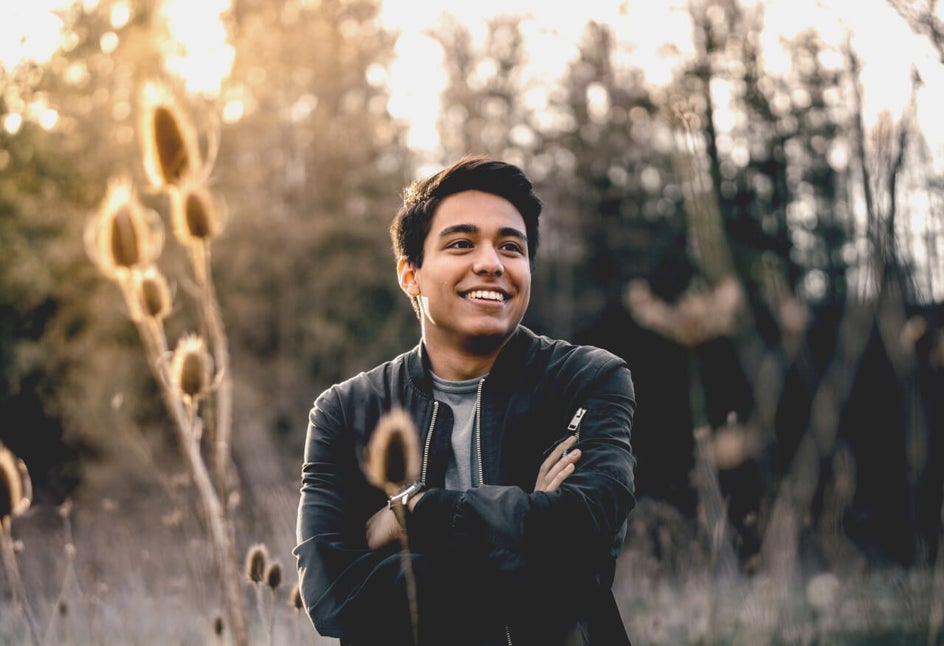
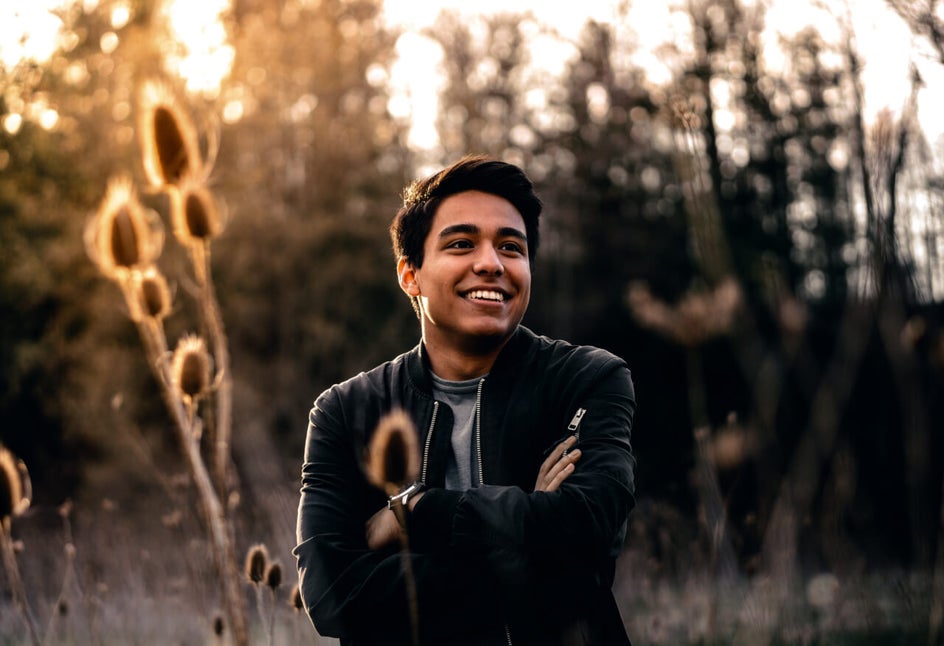
Before and After
Check out how the Levels tool dramatically fixed the exposure and made all the elements in this image look pristene:
Ready to try the Levels tool for yourself? Click the link below and go crazy!