Travel Photography 101: How To Capture Places
What’s the first image that comes to mind when you hear the term Wanderlust? If you have spent any amount of time on social media, you’ve seen feeds flooded with island getaways, mountain excursions, and people sunbathing on the most exotic of beaches. Travel photography is a part of our everyday culture and it inspires people’s future plans of exploration and their imaginations.
Having pictures of specific moments in your life help to bring you back to that place in time just by looking at a photo you took. Looking back through old photo albums on your phone or computer can even draw up the exact feelings you had in that moment, the temperature around you, the sounds, and the smells. Keeping these good memories are things that keep you thriving in your everyday life.

Whether you’ve got a trip planned or you want to practice travel photography in your own city, we’re sharing all our best tips for nailing the shots! And to take those photos up a huge notch, we’ll show you our favorite tools in our Photo Editor for enhancing them to wanderlust status. Let’s get started!
Tips For Taking Incredible Travel Photography
Traveling to a beautiful place is one of the most exciting things ever, but have you ever noticed that after you’re back home, if you don’t have any photos to reminisce on it’s easy to forget all the wonderful moments? When you do have images to help you remember, it’s so easy to imagine yourself back in that very time and space. This is one of the reasons travel photography is so important - each photo is like a living document of where you’ve been. That being said, these tips will help you capture those moments more beautifully and intentionally:
Venture Off The Beaten Path
When you are traveling to a place you’ve never been before, research some places you want to visit. If you are in a city that accommodates walking, walk to each destination and take your time getting there. Stop at any place, restaurant, building, or view that catches your attention along the way.

Try to schedule extra time into your days just for those unexpected photo opportunities. And don’t be afraid to wander off of the path and venture down alleys (safe ones!) or follow the advice from a trusted local.
Get a Different Perspective
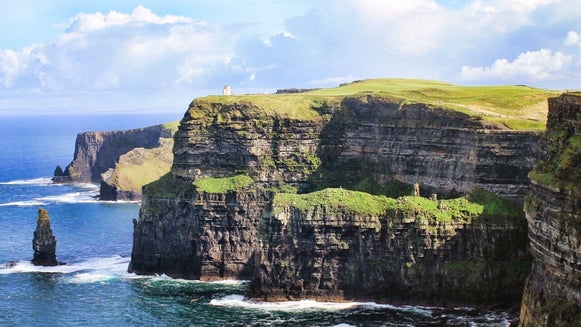
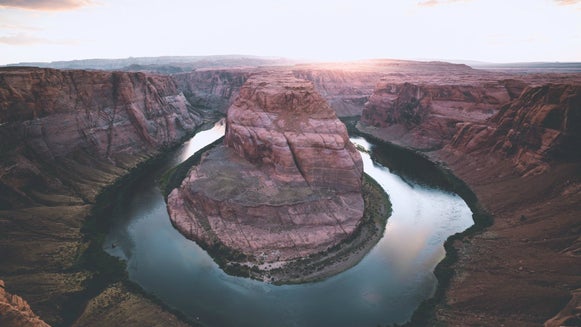
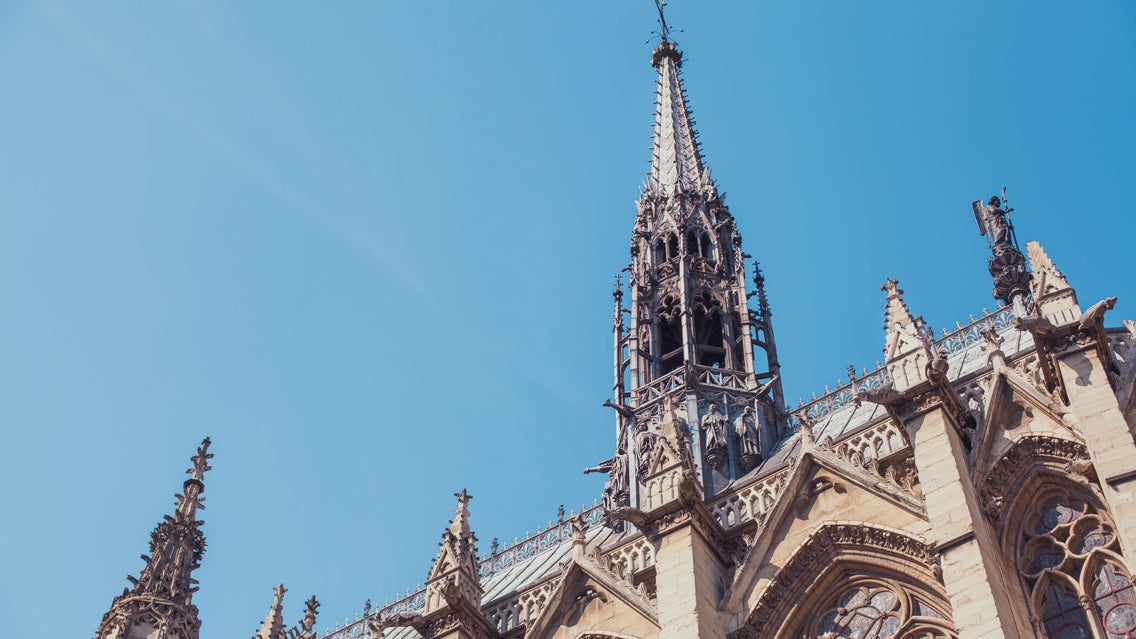
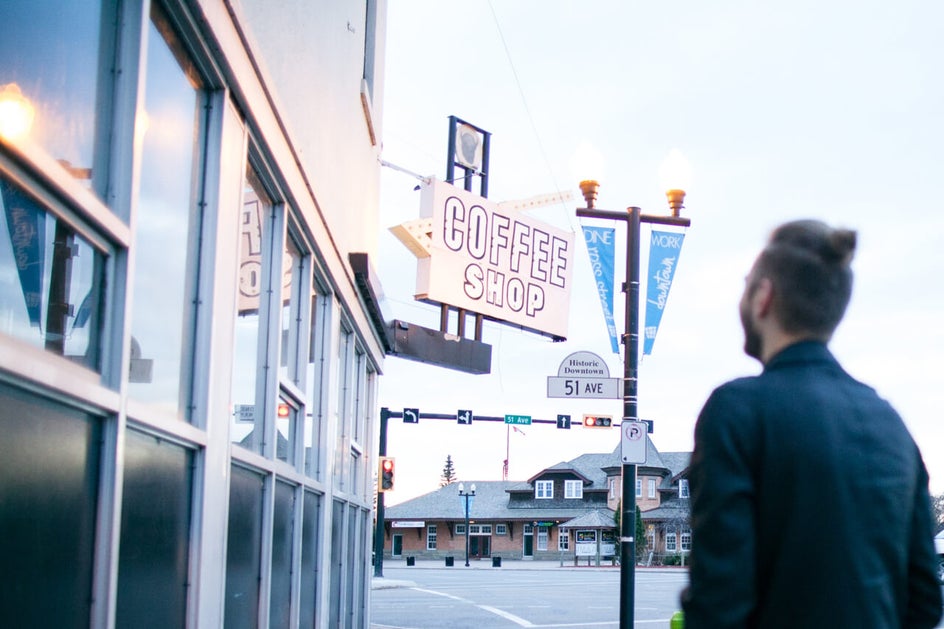
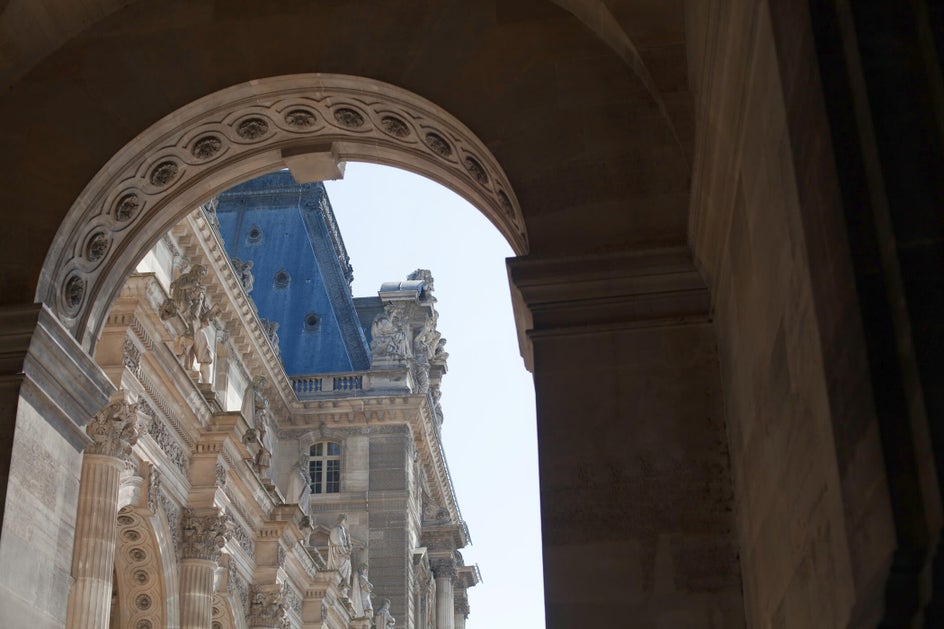
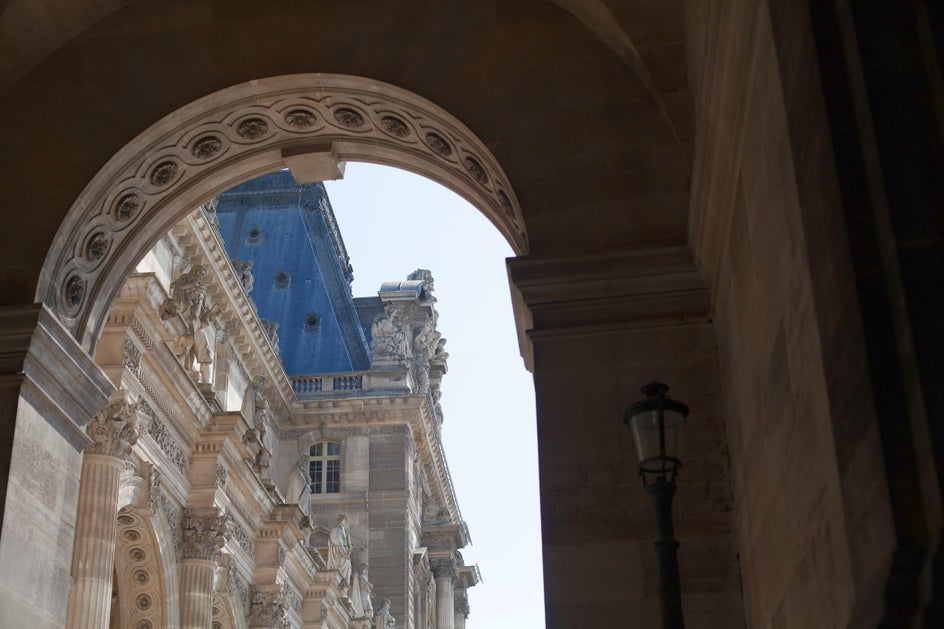
If you’ve seen one picture of the Eiffel Tower, you’ve seen them all. Travel photography should be innovative and engaging, so work your angles and find a unique point of view! The pictures below shows the same building as the focal point from two very different perspectives.
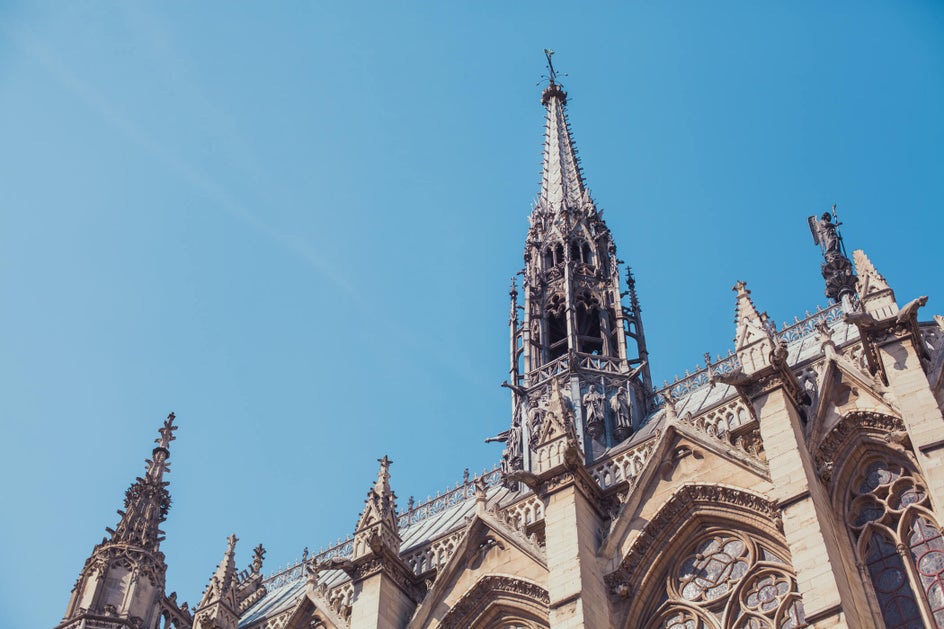
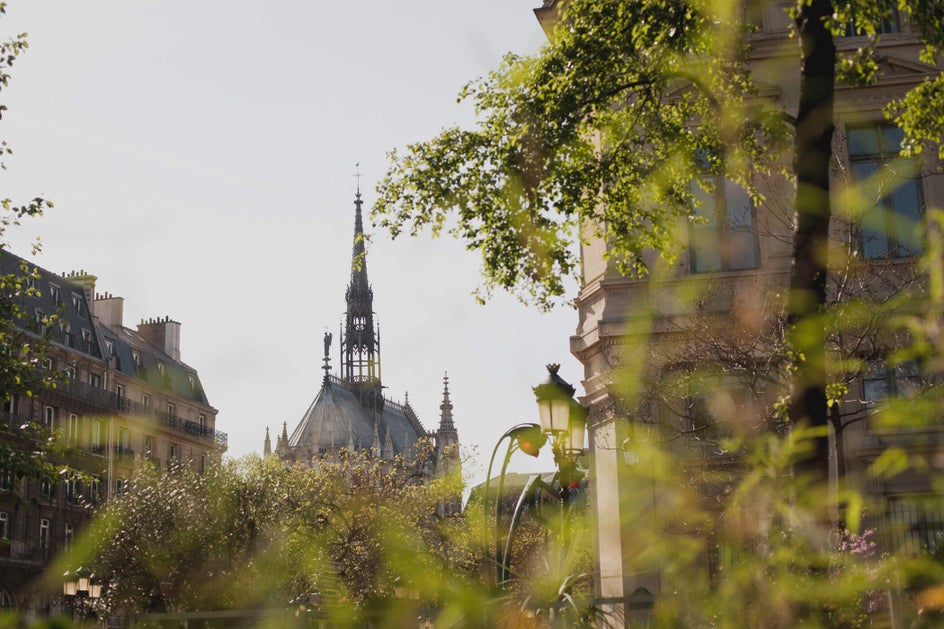
Once you arrive at the place you want to be, take some time walking around your subject to see it from a different perspective. If there are trees nearby, try using the foliage as a buffer in the foreground with your subject in the distance. See what happens when you lay on the ground and shoot upwards towards your subject to display its grand size.
When I started photographing, I was nervous about looking weird getting into certain positions on the ground, standing on objects like chairs, or squatting. Let me reassure you that all great photographers do this. Do what you have to do to get the shot and don’t worry about what other people think. There was a reason why Ansel Adams said, “a good photograph is knowing where to stand.”
Lighting and Time of Day
Match your lighting to your mood. This one is key, no matter if you are having a photoshoot in your hometown or are taking travel photographs around the world. Lighting can set the whole mood of your frame. Be mindful of the mood you want to capture and use the light for your benefit.

If you are trying to capture the romance of Paris, waiting until golden hour helps to bring alive certain elements you’re photographing that broad daylight wouldn’t.
Shoot In Your Own Backyard
When most people think of travel photography, they immediately imagine some place far off in other parts of the world. As practice, try taking photos like a travel photographer in your own city. Sometimes we don’t think of our hometown as a place to travel to, but not only will it help you prepare for taking epic photos in other places, your own city could easily give someone else a case of wanderlust!
Walk around your neighborhood and try taking unique photos of something you see every day, like your house, your favorite coffee shop, or the best viewpoint within walking distance. Practice capturing these places at different angles, at momentous times of the day, and in different weather conditions. Pretty soon you’ll be a pro!
Best Photo Editing Tools For Travel Photography
The process of creating a great photograph doesn’t end with pressing the capture button. To bring out all the important details of your images, fix problem areas, and enhance the overall mood of your photo, you’ll need BeFunky’s Photo Editor. The most important thing to remember when editing is to bring out the part of your photo that you want people to notice first. These are our favorite tools to help eliminate distractions and give your photos that dreamy wanderlust look:
The Crop Tool
Composition is everything in travel photography. What most people don’t realize before traveling to certain monuments or places around the world is that the reality of a monument’s surroundings often looks completely different. For example, the photos you often see of Taj Mahal is from one angle. The reason for this is because there is a lot of trash surrounding it. The Pyramids of Giza, which look like they are sitting in the middle of a desert, are backed right up into a city.
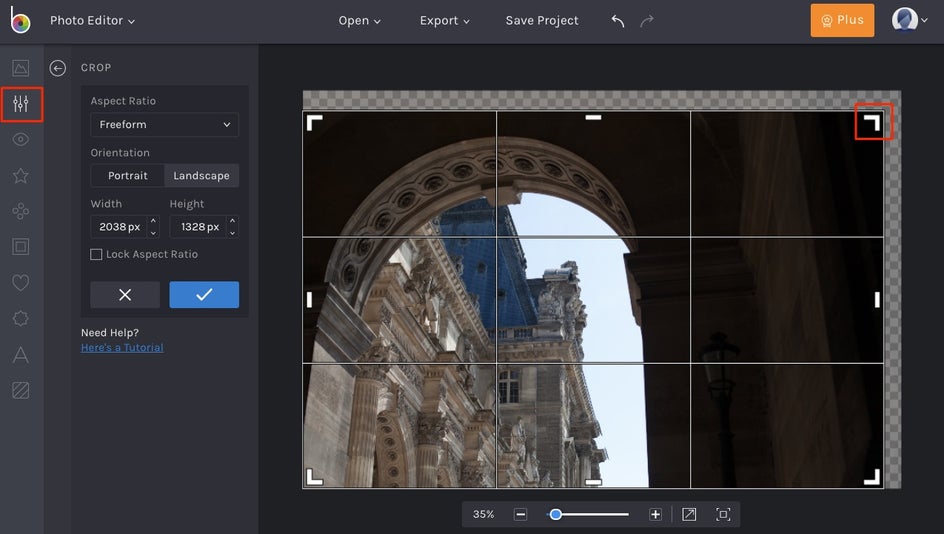
The Crop tool can help you to reposition your focal point or crop out some unwanted items in your shot. After selecting it from the Edit menu, drag and resize the Crop target to fit within the area you want to highlight. Everything outside of this target will be eliminated from the photo.
The Exposure Tool
To quickly enhance the brightness, shadows, highlights, and contrast of your photo, click on the Exposure tool in the Edit panel.
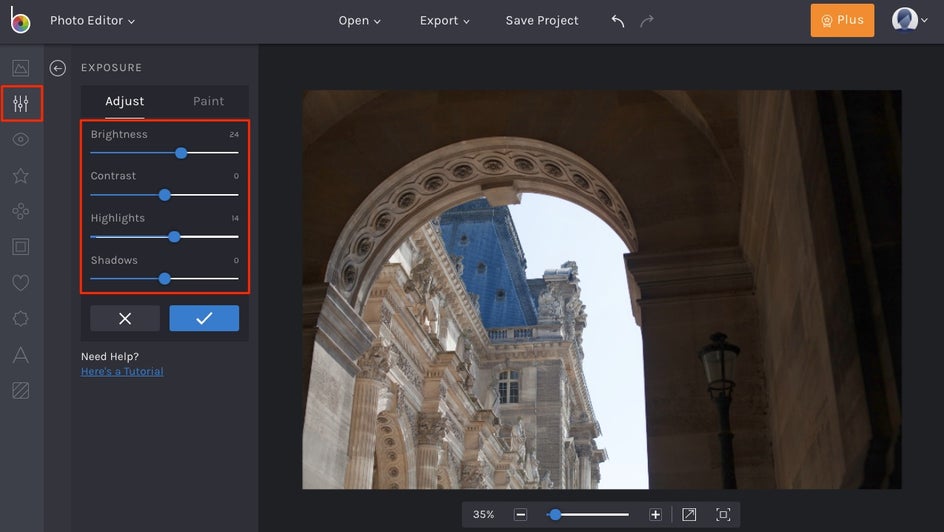
There are respective sliders to help you tweak the lighting and make the image really stand out.
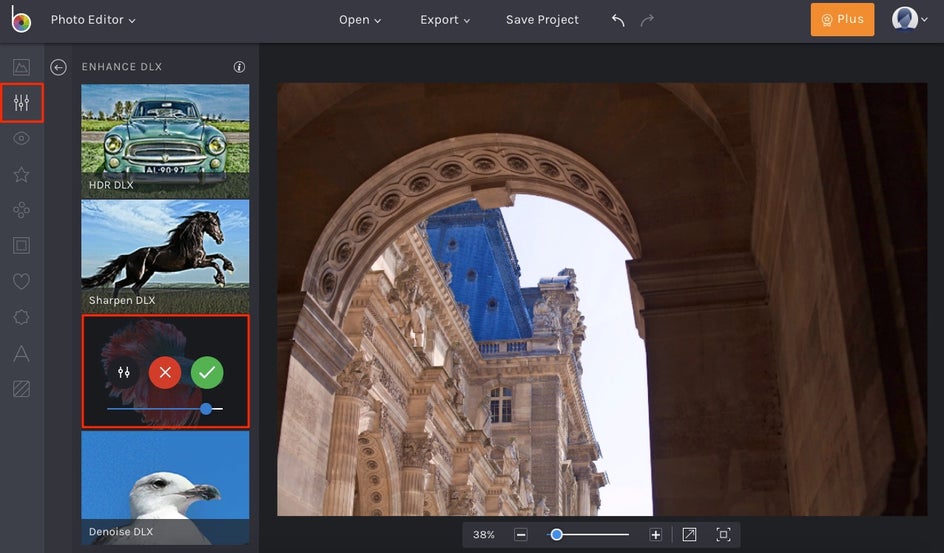
The Clone Tool
The clone tool is by far one of my favorites for travel photography. This tool makes it easy to remove unwanted objects in your photo and disguise those areas with another part. If you have a street light in your image that you feel is taking away from the overall shot, you can clone it out.
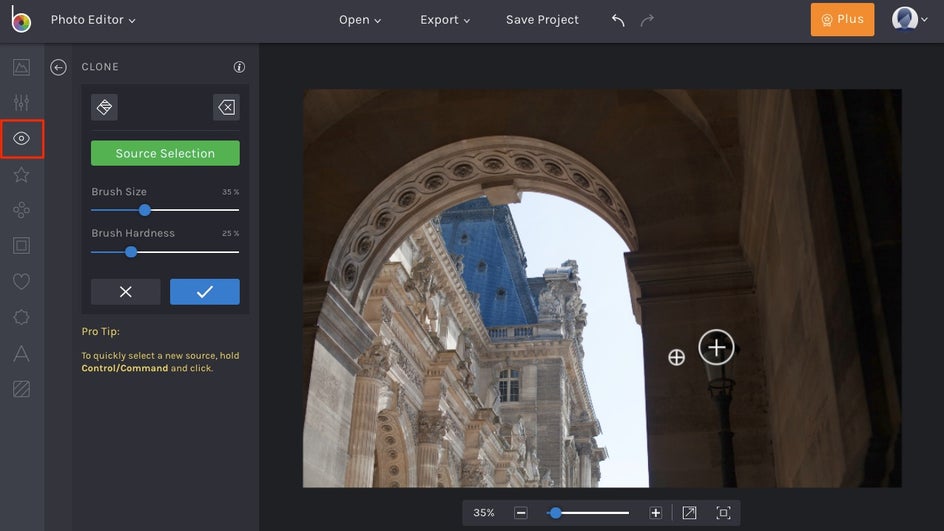
To use it, select Clone from the Touch Up tab in the menu on the left. A circular target will appear for you to select the area of the photo you want to use to cover up the unwanted area. Then an additional cursor will appear for you to click and drag over the unwanted object, painting over it with a different part of your image. See how this street lamp disappears?
Pro Tip: To undo certain areas of your Clone, select the Erase tool to paint over them. To start over completely, select the Reset button.
Vibrant Colors DLX
You’ll need a BeFunky Plus account for this one, but it’s so worth it! If you ever have images that look dull in the color department, the Vibrant Colors DLX tool will enhance all of the midtone colors in your image without oversaturating.
You can even use it in the negative scale to tone down the color in an overly saturated image.
Vignette
With your travel photographs, you want to draw your audiences eye to the focal point in your image. Using a vignette can be a very helpful tool to accomplish this, as it’ll slightly darken the edges of your photo to subtly direct the viewer’s gaze.
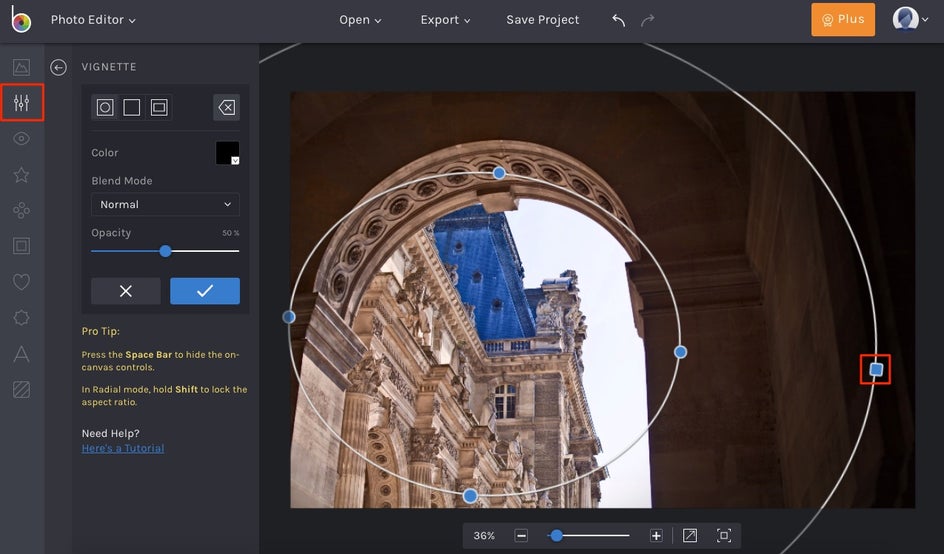
To use one, click on Vignette in the Edit tab and select the shape you want. Most vignettes are circular in nature, but you can get creative with square or linear vignettes if you want! Drag and resize the vignette target on your image so that the focal point is in the center, then adjust the Opacity, Color, or Blend Mode from the menu.
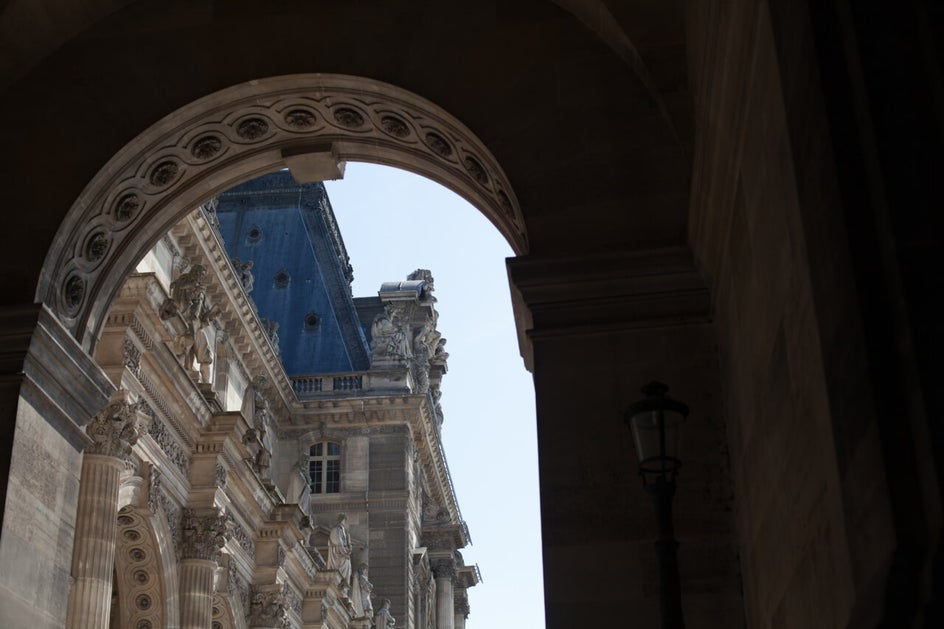
Final Results
With just a few simple edits, this photo looks incredibly wanderlust-worthy:

Have some photos from around town or abroad that need some BeFunky magic? Click the link below and edit them to perfection!