How To Create Perfect Flat Lay Photography
Unless you’re a stranger to the internet and social media, you’re probably seeing flat lay photography gracing blogs and Instagram feeds on the daily. A flat lay is simply a photo of objects arranged on a flat surface, captured from directly above. Some people refer to this angle as a bird’s eye view, and it’s a great way to showcase everything from product photography to your latest cup of tea.

Flat lay photography sounds like a pretty easy feat, but it’s quite the contrary! Since flat lays have objects laid out flat against a background, you can’t rely on a subject moving in front of you to create character and intrigue. In order to create movement, you have to master the lighting, object arrangement, layering, color, and texture.
While there is a rhythm to setting up the perfect flat lay, we’re here to show you everything you need to know - from setting the scene to editing your flat lay photos to perfection with BeFunky’s Photo Editor! Following the tips below, you’re about to become a pro at creating captivating flat lay photography. Let’s get started, shall we?
Five Steps To Capturing Perfect Flat Lay Photos
The ultimate goal of any flat lay (or photo in general!) is to tell a story. The objects you choose to set the scene will help convey the message you’re wanting to portray. The magic of flat lay photography is that it allows you to utilize many different objects in a unifying way. With your goals in mind, aim to choose objects of varying sizes and shapes and choose 2-3 unifying colors to create a cohesive environment for your shot. When you’ve determined your goals and have gathered the objects that will help you achieve it, follow these five easy steps:
Step 1: Find A Flat Surface
Flat lays can be captured on a dining or coffee table, a desk, couch cushion, your bed, or the floor. As long as the surface you’re shooting on is relatively flat, you’ll be starting off on the right foot.

Flat lay photography works really well when there are many items laid against a blank background, free of distracting patterns or textures. If the surface you are working on is not neutral in color or texture, find a baking sheet, use the natural texture of your table, or find a neutral colored piece of foam core to place over your flat surface.
Step 2: Arrange Your Objects
A great photograph creates movement within the frame. The way to create movement in a flat lay is through object placement and lighting.
For object placement, rather than placing all of your objects in the center of the shot with a border of negative space surrounding them, arrange your objects so that they overflow out of the frame and only parts of some objects are in the frame. This creates intrigue and encourages you to feel as though you are seeing a snippet of a larger scene, engaging the viewer’s imagination to think beyond the frame.
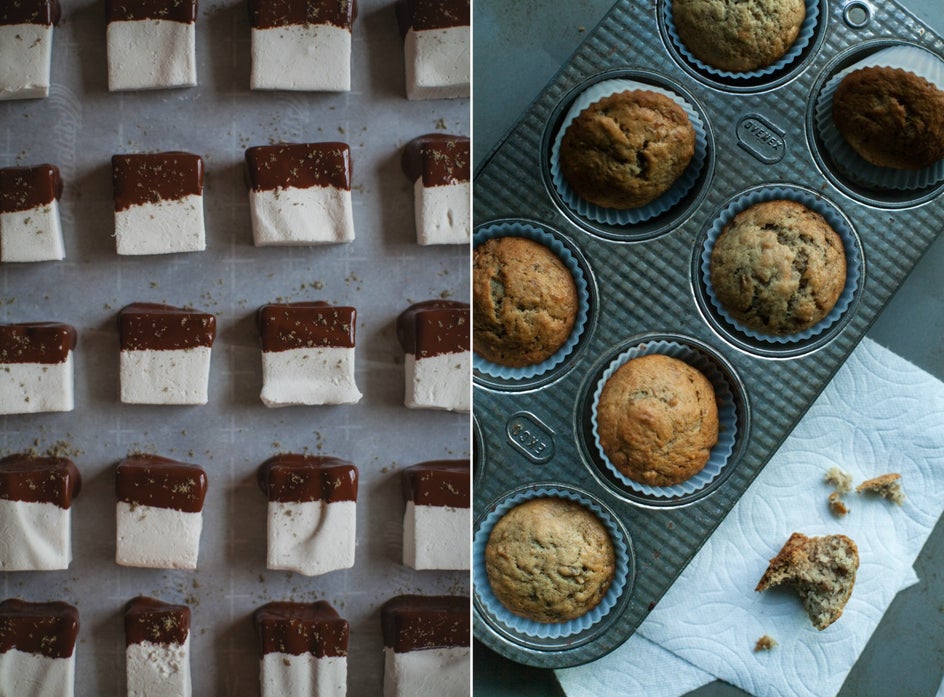
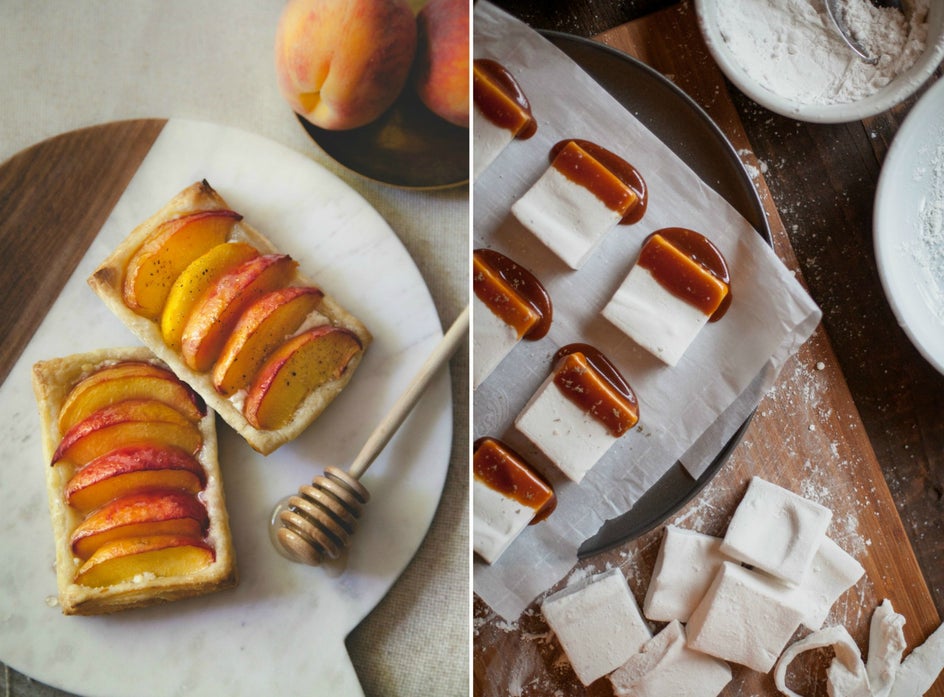
Depending on your objects, you can arrange them in a straight line, grid, follow the rule of thirds, or arrange them on an S-curve (as pictured in the muffin photo above). To create S-curve placement, arrange your main objects in the shape of an S and use smaller props to fill in the space along the S-curve. In the muffin photo, your eye naturally focuses on the brightest part of the frame, which is the paper towel and muffin crumb, then follows the S-curved path of the muffins tipped out of the pan.
Step 3: Harness The Power Of Light
Position your flat lay scene close to an open window or somewhere that receives a lot of natural light. Make sure to place yourself facing the light or stand to the side of the light. Light will allow objects to cast shadows on certain parts of your background, creating dimension so that it doesn’t appear too flat.
Looking at your scene, determine what you want the focal point of the shot to be. Make sure that the focal object is what your eye is drawn to first when taking the photo, being mindful of where you place it and how the light hits it.
Step 4: Create Depth With Layers
Layering is a great way to add depth and movement to your frame if it’s looking a bit too flat. You can create depth by stacking different sized plates and placing your main subject on top, adding in a towel or a cloth below your plate for even more added depth and texture. Alternatively, you can find objects that naturally sit closer to the camera and other objects that are shorter when laid out on your surface.

If you want to create depth and movement with objects that are similar in height, try using differing textures in the your shot beneath the main object. Adding items such as linen cloths or crinkled paper can give added intrigue as you create multiple layers.
Step 5: Get High
The key to a great flat lay is to capture the photo from an angle that is parallel to your flat surface. In order to do this, you must get directly above your subject. This may involve grabbing a step-stool or shooting your items on the ground to position your camera directly above your scene.
Now that you know how to capture flat lay photography in five easy steps, we’ll show you how to make them stand out by editing them in BeFunky’s Photo Editor!
How To Edit Your Flat Lay Photography
With your best shots from your photo session in tow, upload one of your favorites into BeFunky’s Photo Editor. A good starting point is adjusting the exposure, as this sets the tone for the rest of your editing choices. You’ll find the Exposure tool in the Edit menu on the left.
Using the sliding scales, you can adjust the Brightness, Contrast, Highlights, Shadows, and Fill Light until you achieve well-balanced lighting in your shot. If you’re going for a moodier look, try increasing the Shadows slider. If you want a light and airy photo, try increasing the Brightness and Highlights slightly.
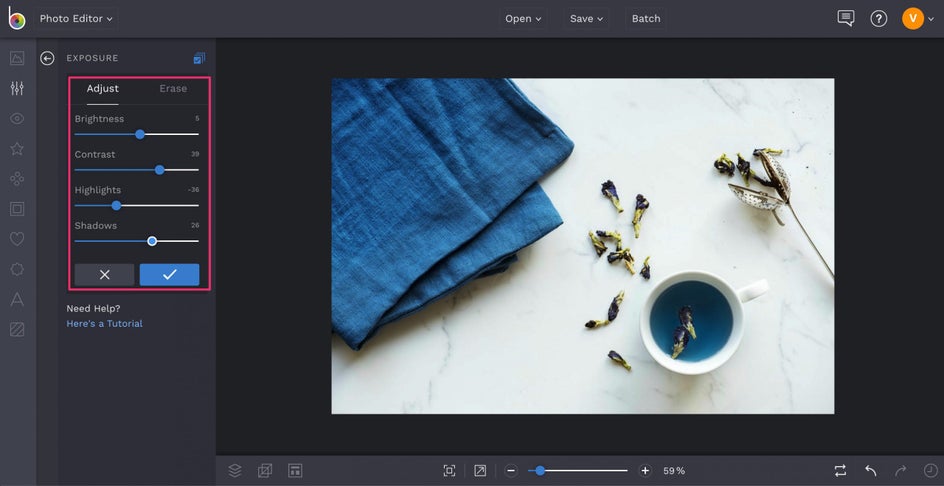
Pro Tip: Want even more control over the highlights, midtones, and shadows? Click on the Levels tool in the Edit menu and use the histogram and presets to get more detailed with your exposure adjustments.
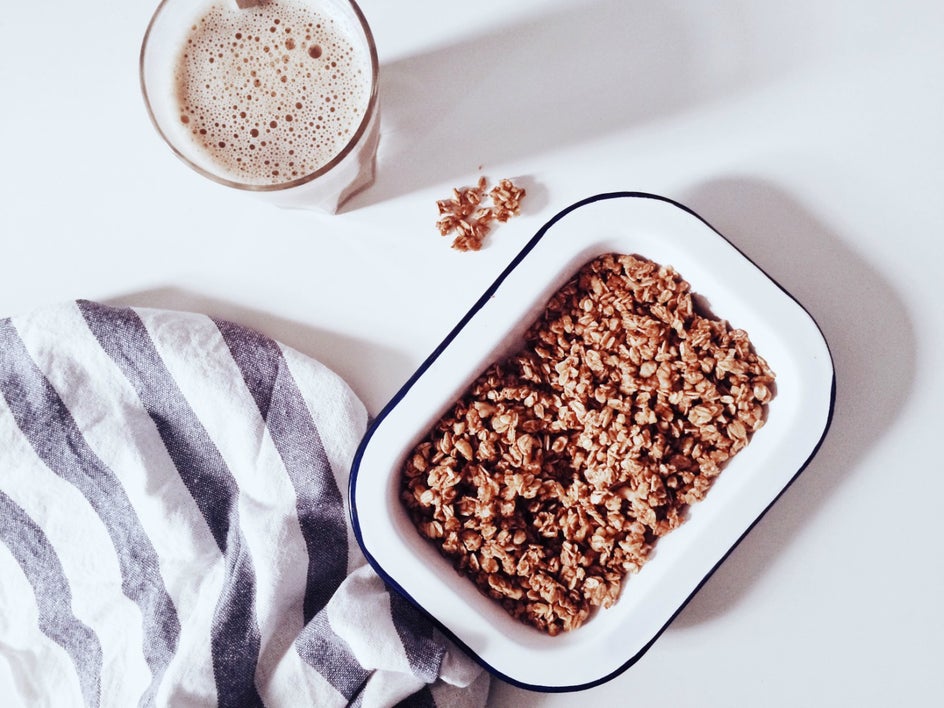
Once the exposure is looking perfect, select the Crop tool to realign and recompose your shot. Sometimes, you don’t realize (like above!) that the cutting board you used as your flat lay background doesn’t extend to the edges of your frame. Luckily, this is an easy fix! You can manually drag the crop target to eliminate anything outside of it’s area, or crop photos to a specific aspect ratio using the dropdown menu.
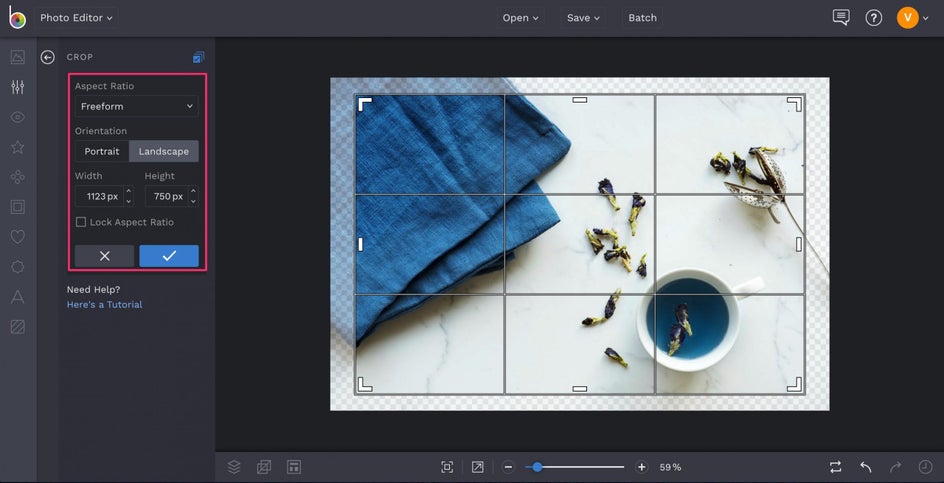
You’ll notice that the crop target is a grid. The lines within the crop target can help you narrow in on your composition and obey the rule of thirds - making sure the objects you want as your focal points line up where the gridlines intersect. Using the crop grid helps align these objects in such a way that they hit the rule of thirds suggestion on two planes, creating a more balanced photo.
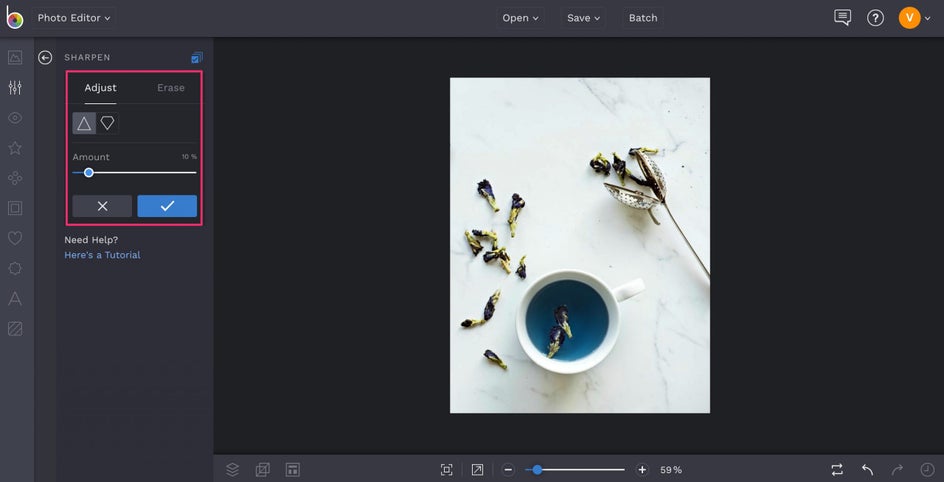
Next, it’s time to sharpen up your textures. BeFunky’s Sharpen tool is a must have when working with flat lays, as it helps to bring out the detail in certain parts of your frame and create dimension. You’ll find it in the Edit menu on the left, and once you’ve clicked on it you can use the sliding scale to increase the sharpness. Just remember that having a subtle hand with sharpening is good. Too much sharpening can produce an unrealistic look (and a dreaded halo effect around your objects).
Subtly darkening the edges of your photo is another great way to direct eye movement through the use of light. Clicking on the Vignette tool in the Edit menu will give you a vignette target shape (we’ve gone with a circular vignette) and you’ll notice that the areas outside of that target are slightly darker. You can adjust the size of your vignette by clicking and dragging the squares and circles of the target. You can also reposition the vignette by clicking and dragging from the center of the target.
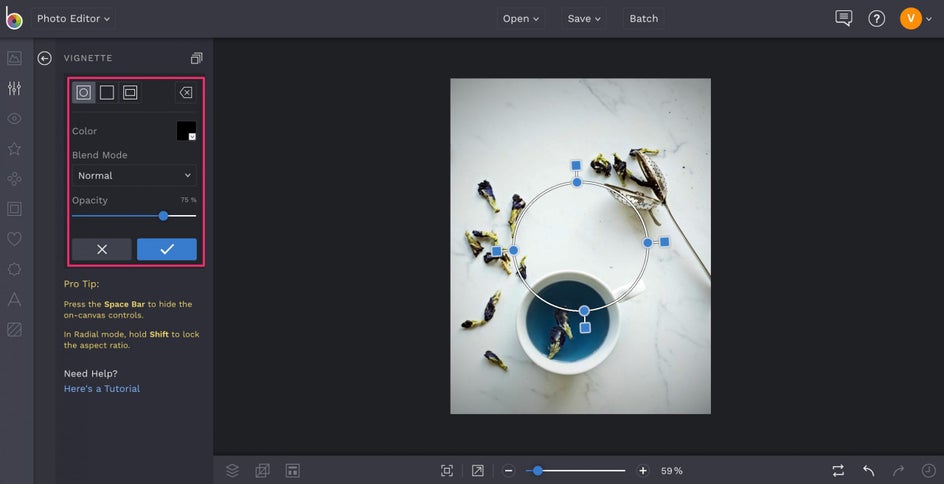
As a general rule of thumb, you should aim to make the focal point of your shot the center of the target, where everything around it is slightly darker. Adjusting the sliding scale for Vignette Amount will help you keep the darkening subtle.
Finally, if there are any unwanted objects in your shot, the Clone tool will be a lifesaver. You’ll find it in the Touch Up tab in the menu on the left (the eyeball icon). With it, you can virtually remove objects from photos that are distracting.
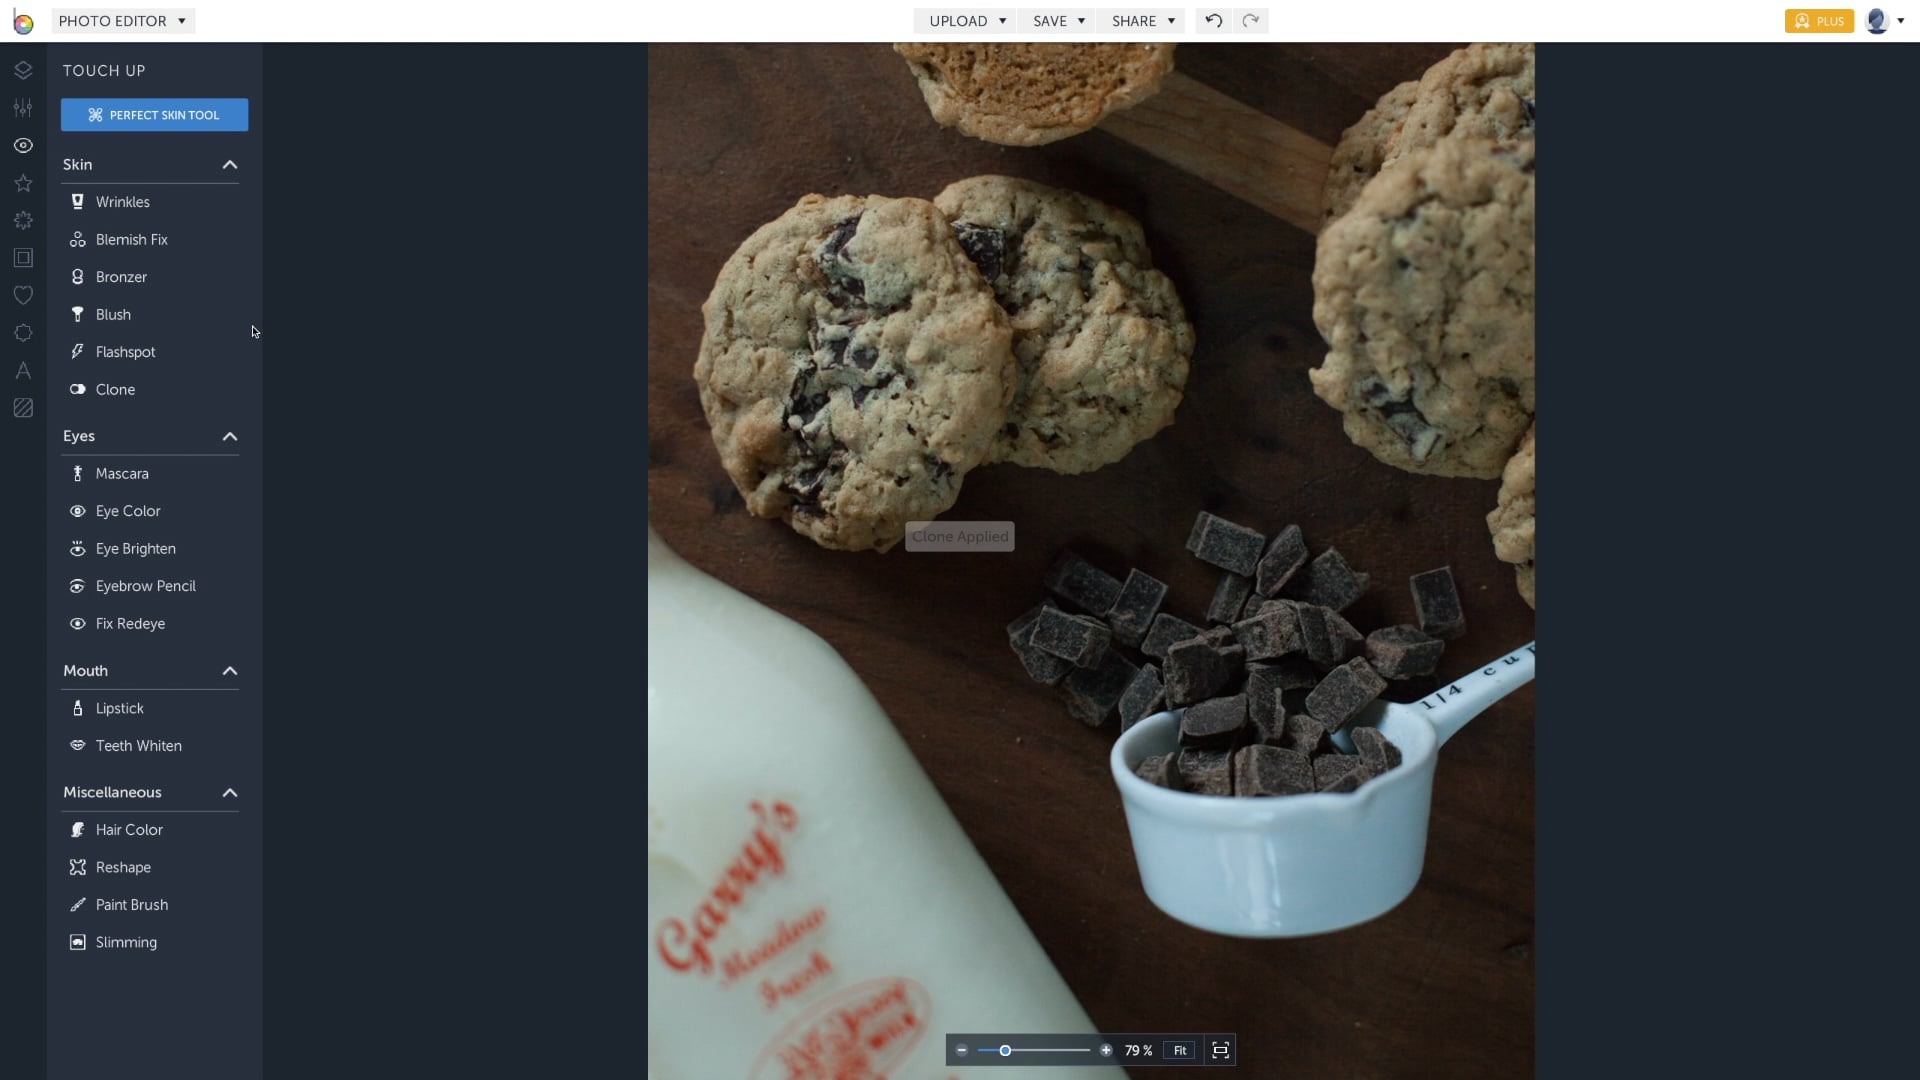
To use the Clone tool, hover over the area of your photo that will be replacing the area with the unwanted object. You can increase or decrease the brush size depending on how big or small your unwanted object is. The cursor with the cross will remain where you clicked as the ‘source’ and a new circular cursor will appear. With the second cursor, click and drag over your unwanted object until it’s gone!
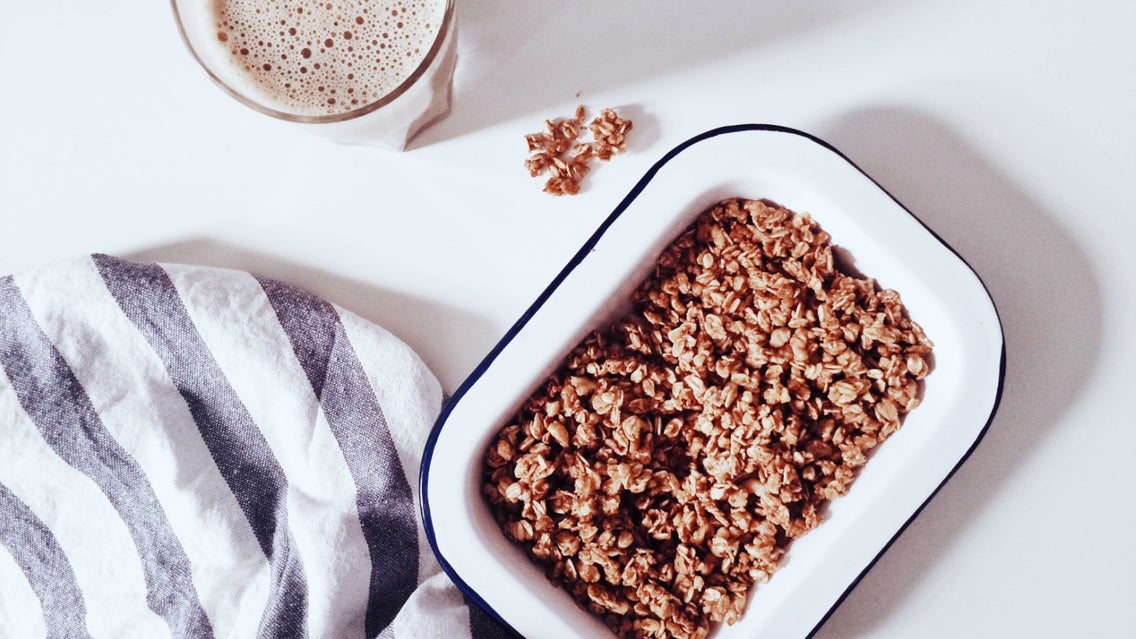
Final Image
Nailing your shot will certainly set you up for success, but look at how these simple edits make this photo shine:

Now that you know the secrets to capturing and editing perfect flat lays, you’ll be an unstoppable story teller! By knowing how to create movement, arrange objects, and enhance photos like never before, your flat lay photography will really shine. We can’t wait to see what you create!
editing post not using plugin