How to Remove An Unwanted Object From Your Photo

Sometimes, you can perfectly line up a photograph only to have an unwanted distraction enter the frame. Whether it’s your swoon-worthy holiday snaps, a meticulously planned photoshoot, or a special moment in time you can’t get back (like a proposal), no one wants their photo ruined by litter, unsightly signs, or that stranger strolling across the background.
Thanks to BeFunky, you never have to worry about anything crossing the path of your photo and spoiling it ever again! With our powerful Clone tool, located in the Touch Up tab of the Photo Editor, you can cover up unwanted objects in just a few simple steps. Keep reading to learn how!
How to Remove an Unwanted Object From a Photo
Ready to remove a distracting or unwanted object from your own image? Head to the Touch Up tab and open your image. This link will take you directly to the Touch Up section to begin.
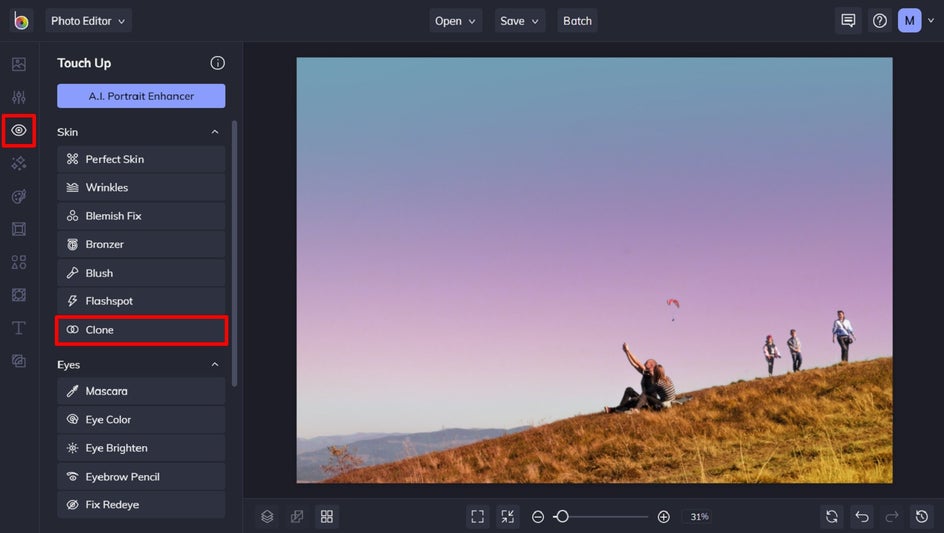
Step 1: Locate the Clone Tool
Click on Clone, located within the Skin category.
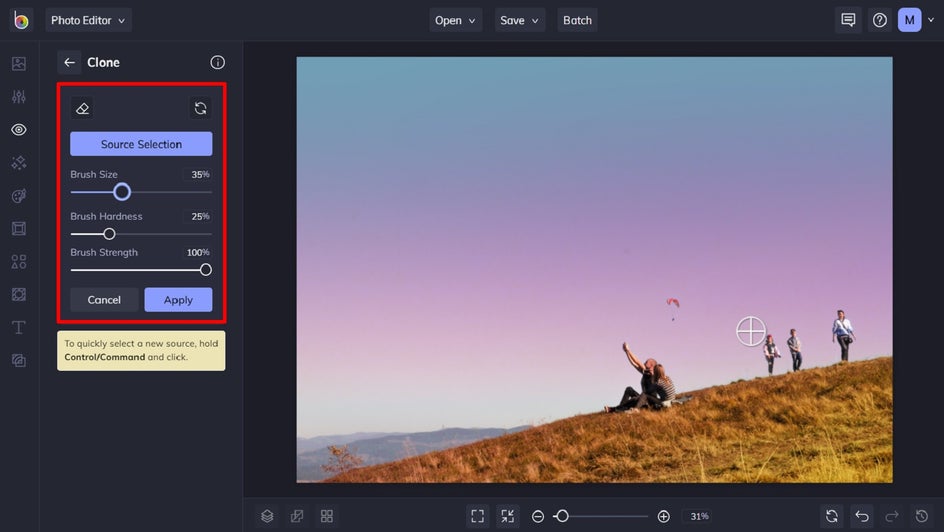
Step 2: Select Your Clone Source
Your clone source is the part of your photo you would like to replicate and then use to cover up the unwanted areas of your photo. You’ll notice when you hover your cursor over your image, a circular-shaped target will appear. This target will be used to select your source.
To get started, adjust the Brush Size so that your target is slightly smaller than the size of the area you want to cover up. You can also increase the Brush Hardness to create defined lines with your Clone tool, or decrease the Brush Hardness for softer blending.
Once your Clone tool has been adjusted to your liking, hover it over the part of your photo you would like to recreate. Generally, this will be the area that is directly next to, above, or below your unwanted area to create a more seamless look. When your target is perfectly placed, click your mouse. Once you do, a second circle will appear. This circle will then be used to select the part of your photo you’d like to cover up.
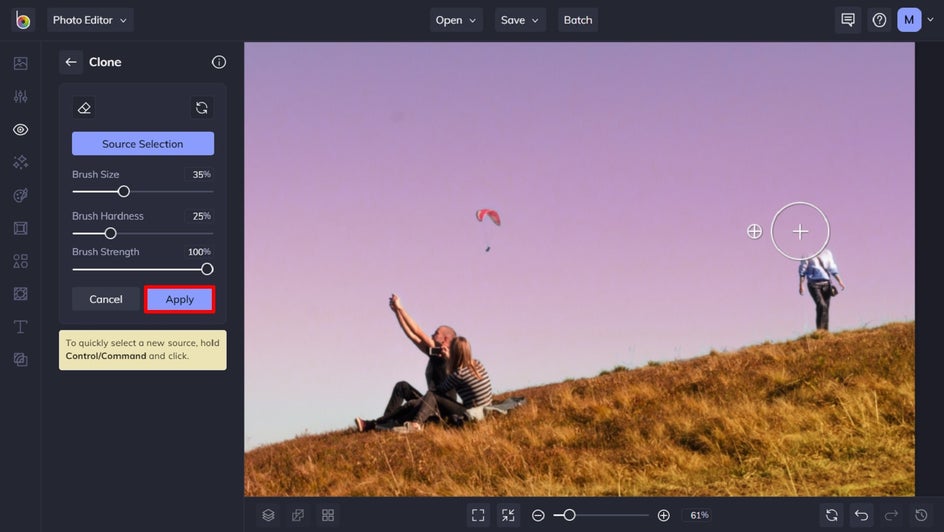
Step 3: Apply the Clone Brush to Unwanted Areas
Your two circles are now locked together and will move around your screen as one photo-editing tool. Remember, your first circle is your source and the second circle is meant to cover your unwanted area. When you’re ready, position your Clone tool so that the second circle is hovering over your unwanted spot. When you click your mouse, your source selection will be recreated over the undesirable section. You can hold down your mouse and drag it to continuously use the Clone tool, or you can get more detailed and cover up your unwanted area one click at a time.
If there is a range of colors or textures in the area you’re filling, you may need to select a new source every time the color or texture changes, in order to perfectly match the surrounding areas.
If you make a mistake, the Clone tool also has an Erase option, which will reverse the effects of the tool.
When you’ve finished removing your unwanted objects, simply click Apply to apply your changes.
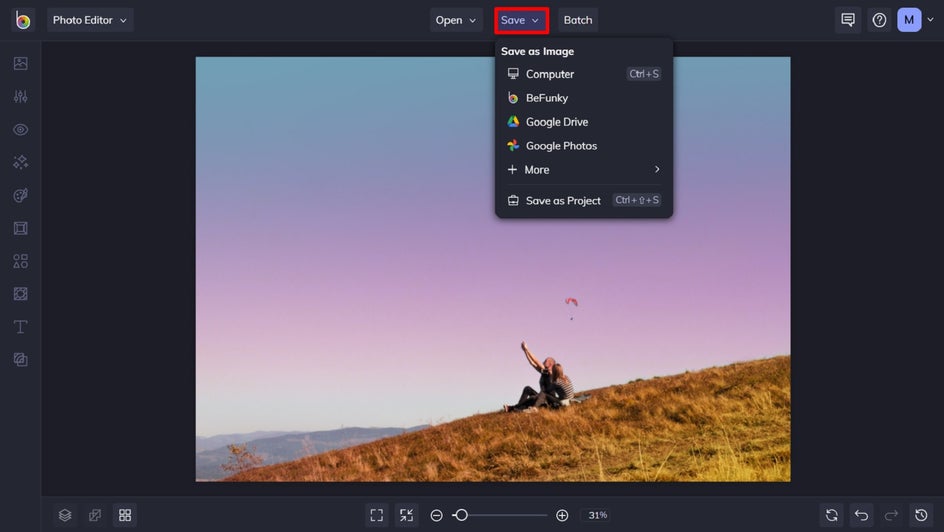
Step 4: Save Your New Photo
Finally, click Save at the top of the screen, then select your desired save location.
Final Results
It’s impossible to tell there were other people in this photo! The Clone tool is the easiest way to remove an unwanted object from a photo online – no professional editing skills required!


When Should You Use the Clone Tool?
While the Clone tool is perfect for removing unwanted objects in photos, there are also some other scenarios where it comes in handy. Let’s explore each of these below.
When the Crop Tool Can’t Help
Sometimes, you might be able to crop unwanted objects from the edges of your photo. If the unwelcome element is closer to your photo’s subject, however, then the Crop tool might not be able to help. Instead, cloning allows you to keep your image’s dimensions and composition, while removing the unwanted object.
To Fill Empty Spaces
If you’ve used the Cutout tool on areas of your image, you may be left with empty patches that need filling. The Clone tool can seamlessly recreate areas of your photo, such as your background, to seamlessly fill in these parts.
To Achieve Effortless Removals
Perhaps the best part about our Clone tool is the realistic way that it removes and then covers unwanted areas of a photo. The Cutout tool, on the other hand, is more suited to removing the background from a subject, as it removes entire elements from an image and replaces them with a blank or transparent background.
To Remove Text From Images Online
Need to replace the text within a sign or remove a logo from your photo? Perhaps someone has scribbled profanity on a wall within your background? The Clone tool doesn’t just remove objects, but text too, making it a super versatile feature.
Advanced Retouching, Simplified
Never let unwanted distractions ruin your photos again. Thanks to BeFunky’s Clone Tool, you can perfectly cover areas of your photo within just a few clicks! What photos will you perfect? Try the Clone tool for yourself to see just how amazing it is.