How To Erase A Photobomb With The Clone Tool

We’ve all done it, or it’s been done to us - the elusive photobomb! Just when you thought had a great snap of yourself on your beach vacay, you get yourself out of the sun where you can swipe through all your selfies and you notice some stranger(s) lurking in the background. Before you start frantically retaking those photos, we're here to tell you there's an amazing solution to erasing photobombs: BeFunky's Clone tool.
Whether you've got one photobomber to erase or several, BeFunky’s Clone tool can help you get rid of unwanted objects so that you can go right along your merry way, making all your followers jealous of the “secluded beach you had all to yourself.” It's so precise that no one will ever be the wiser!
What Does The Clone Tool Do?
BeFunky’s Clone tool works just like it sounds - it clones (aka copies) one part of your image and pastes it over another part of your image, essentially covering up those unwanted areas. It really comes in handy for getting rid of glaring objects like photobombs and stop signs, or small things like a stray crumb in your food photography or blemish in your selfie.
When using the Clone tool, you’ll be able to select the part of the image you want to use as cover-up, then paint it over the areas of your image you want to get rid of. It’s one of the most versatile tools in our Photo Editor, and it’s about to become your favorite! We’ll show you how it works next.
How To Erase A Photobomb With The Clone Tool
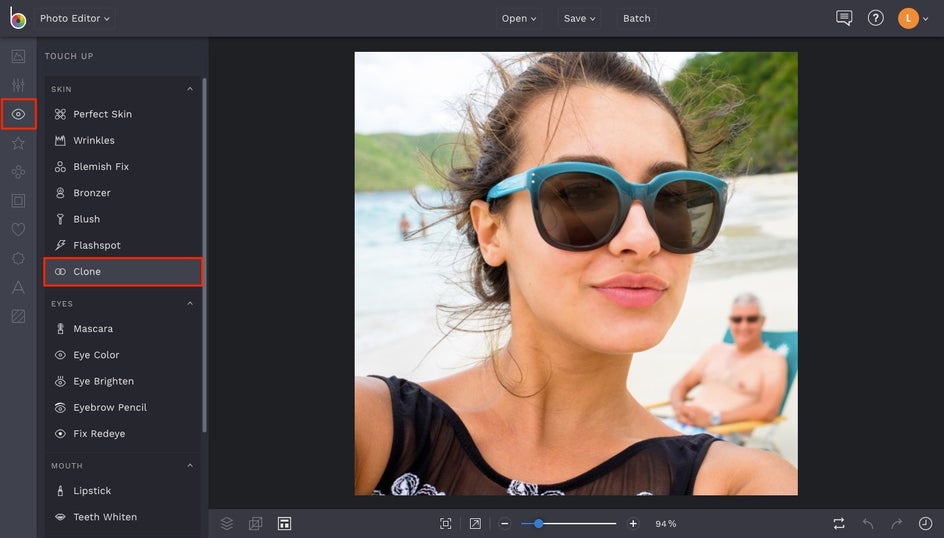
To get started, head to BeFunky’s Photo Editor and upload your photo using the Open button at the top, or simply drag and drop an image file into the interface. Next, open the Touch Up tab in the menu on the left and then select Clone.
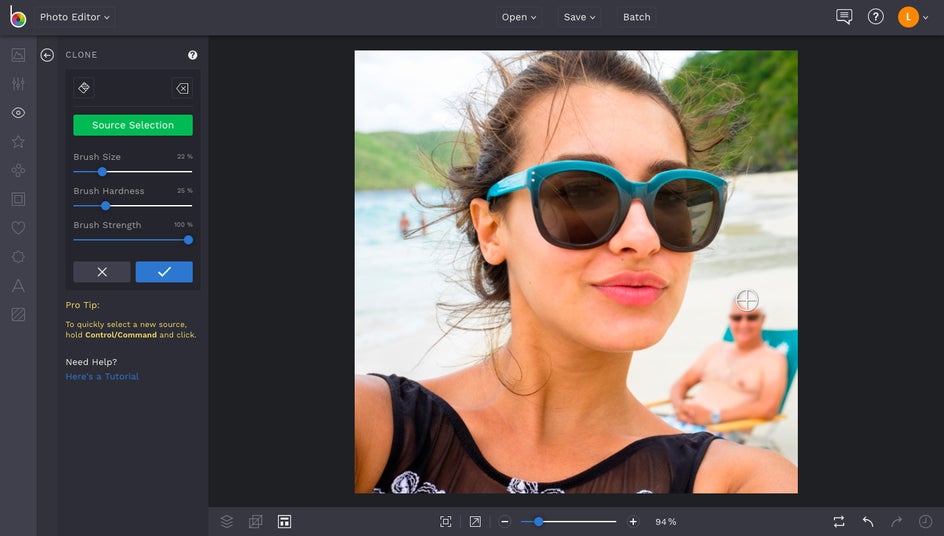
With the Clone tool menu open, you’ll notice a few sliders for Brush Size, Brush Hardness, and Brush Strength. Adjust your Brush Size to control the diameter of the brush, ensuring it’s large or small enough to cover up those unwanted areas. The Brush Hardness controls how sharp or soft the edges of the brush will be. Keeping it all the way to the right will create sharp edges around the areas you clone, while sliding it to the left will soften the edges. Finally, Brush Strength corresponds to the intensity of the brush. Keep it all the way to the right to ensure maximum strength for covering up your photobomb.

Now that you’ve got your brush adjusted just right, click on the Source Selection button or simply find the area of your image you would like as your source of the clone and click. The crosshairs of your brush will remain on the photo, indicating where your clone source is coming from. Next, click and paint with the second target that appears, covering up the photobomb as you go.
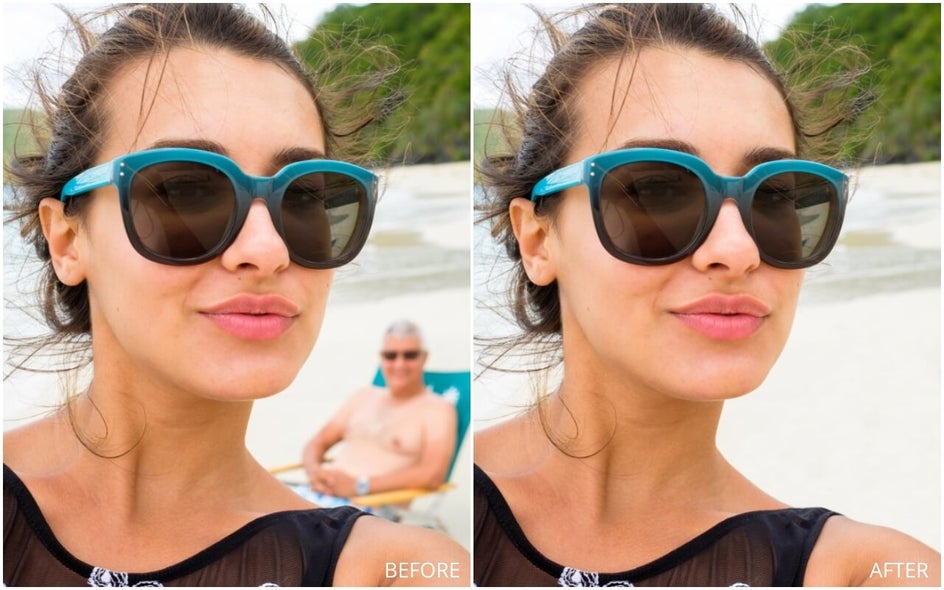
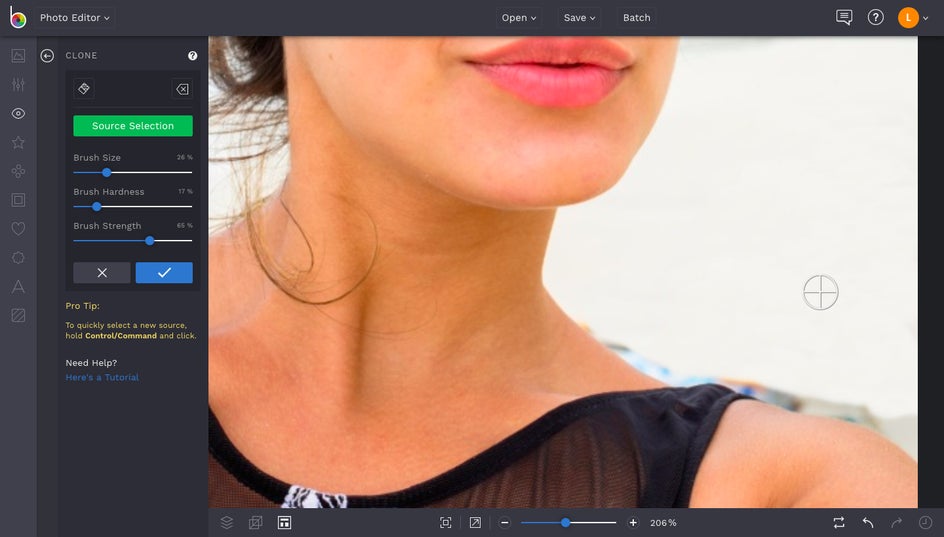
Depending on your image and the source area, you may need to make your source selection a number of times, cloning and source selecting as needed. To re-select the source, just click the Source Selection button again. For this image, we selected the sandy area of the beach behind grandpa as the source and painted downward with the second target, creating a larger source area to re-select as we went.

Pro Tip: Change your Source Selection and Brush Strength often to avoid making any obvious patterns in your cloned area.
As you get closer to your subject, zoom into your image for accuracy using the Zoom Bar at the bottom of the Photo Editor. Feel free to continue adjusting your Brush Size, Brush Hardness and Brush Strength in order to match the depth of field.
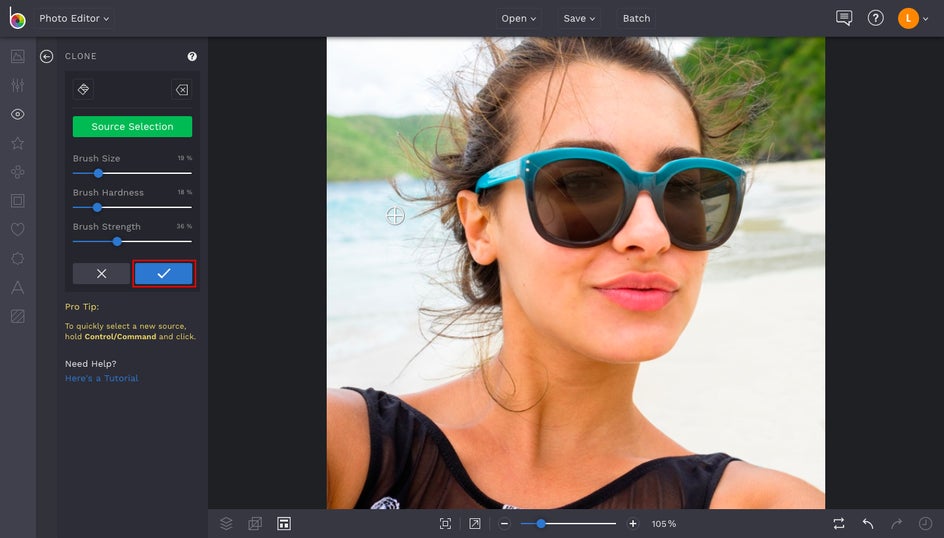
Once you’ve cloned your way through your image, select the blue check mark to record your correction.
From here, you can keep on editing your image with the other amazing tools in our Photo Editor. When you're finished editing, click the Save button at the top of the Photo Editor to save your work.
Final Results
So there you have it! A photobomb erased entirely with a little help from our Clone Tool:
Click the link below to start cloning today and easily make those silly photobombers (or any unwanted object!) disappear.