How To Capture Brilliant Christmas Light Photography
Christmas light traditions go back to before electricity was invented. Before electricity, households would light candles in windows and hang lit candles on their Christmas trees (talk about safety!). And guess who invented the first Christmas light display? None other than Thomas Edison. He and his apprentice are to thank for the little bulbs we use today. Ten years after their invention, they started being mass produced and the rest is literally history.
Christmas lights are now extravagant pieces of decoration both inside and outside of the home. People go all-out decorating their houses as well as decorating their holiday trees. Even though we don’t have anything new to invent here, our innovation comes from how we set up our displays.
Like they say, if there is no photographic evidence, it didn’t happen. Whether you’re trying to capture the spirit of the season in your next outing or you want to show off your own holiday display, we’ll show you how to properly photograph Christmas lights and edit them to perfection in BeFunky’s Photo Editor!
Camera Settings For Christmas Light Photography
Because most of your Christmas light photos will be in darker light scenarios, you’ll need to know the right camera settings to make those festive decorations pop. We’ll explain the three most important camera settings for shooting in low light scenarios: ISO, Aperture (or F Stop), and Shutter Speed (or exposure time). They work as a trifecta to help you get the most out of your photography.
ISO
When shooting in low light, you’ll need to adjust your camera settings to compensate for the lack of light. Keep your ISO as low as you can, around 400 or so. The higher your ISO the grainier your photos become, so don’t adjust this setting above 800.
Aperture
Like the ISO, you’ll want your aperture low, somewhere between f/2.8 and f/8 depending on the light scenario. Increasing your aperture number will decrease the amount of light that will come into your photo, but more of the photo will be in focus for those low light shots. It is important to adjust your shutter speed to allow more light into your photo once your aperture and ISO are adjusted - we’ll get to that next.
Shutter Speed
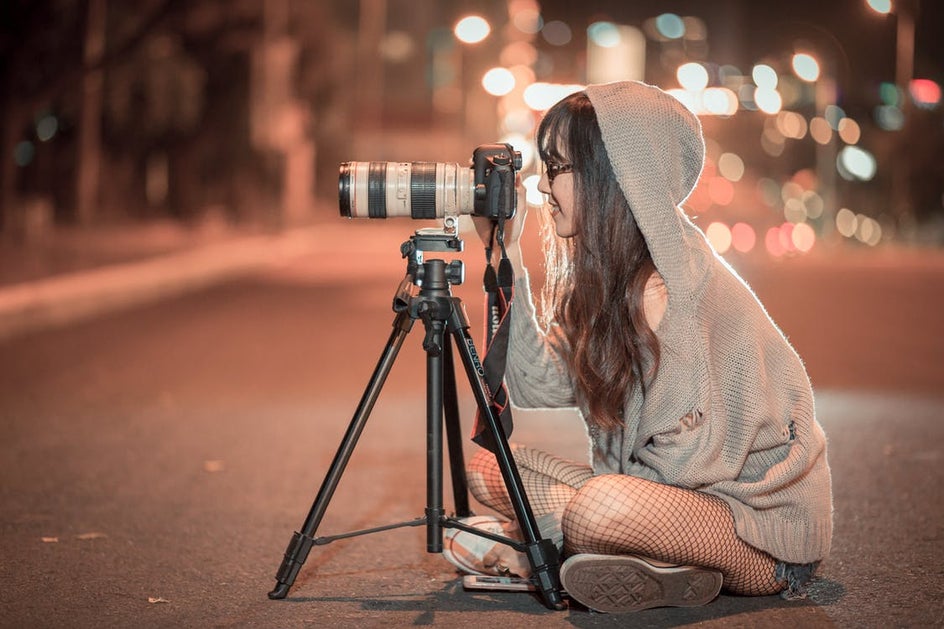
After your ISO and Aperture are set, all you have to do is change the shutter speed. The slower your shutter speed, the longer the exposure time and the less grainy your photo will become. The thing with using a slow shutter speed is that the camera’s ability to capture will be very sensitive to movement, so a tripod is essential. Try starting with your shutter speed between ⅛ of a second and ⅖ of a second and see what works best for your light scenario.
If you're on your mobile phone camera, you won't be able to adjust these settings individually. However, mobile cameras are perfectly capable of capturing Christmas lights at their finest. Whichever camera you fancy, we've got some additional tips for nailing the shot below.
Tips For Getting The Perfect Shot
As with any kind of photography, getting the perfect shot involves patience and timing. With these additional tips and tricks, plus a little intentionality, you'll be set up for success:
Photograph At Twilight Or Dusk
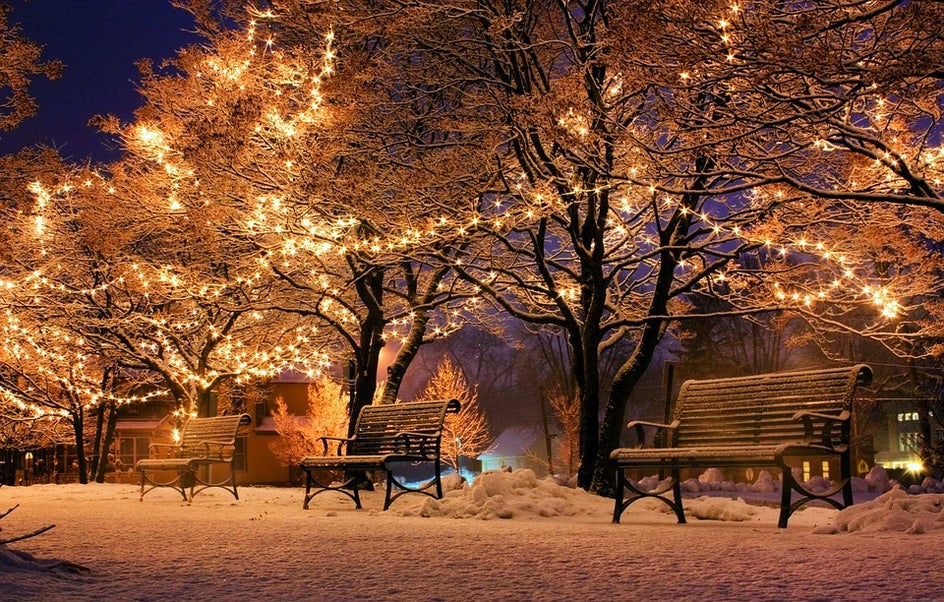
Christmas lights are vibrant at night, but if the sky is pitch black, they’ll end up looking like they’re floating in an abyss. Timing your shot just right is a key to success, and you’ll get a lot more photographic texture if you try capturing at twilight or dusk. That way, you’ll be able to see the shape of a house they’re on and more of the surrounding elements.
Ten minutes after the sun goes down is a magical time to capture Christmas lights as well. It's called Blue Hour, when the whole sky will turn a cool shade of blue on a clear day. During this time, you'll be able to capture the vibrance of holiday lights and their environment, but be quick - Blue Hour only lasts about ten minutes, after which the sky starts getting dark.
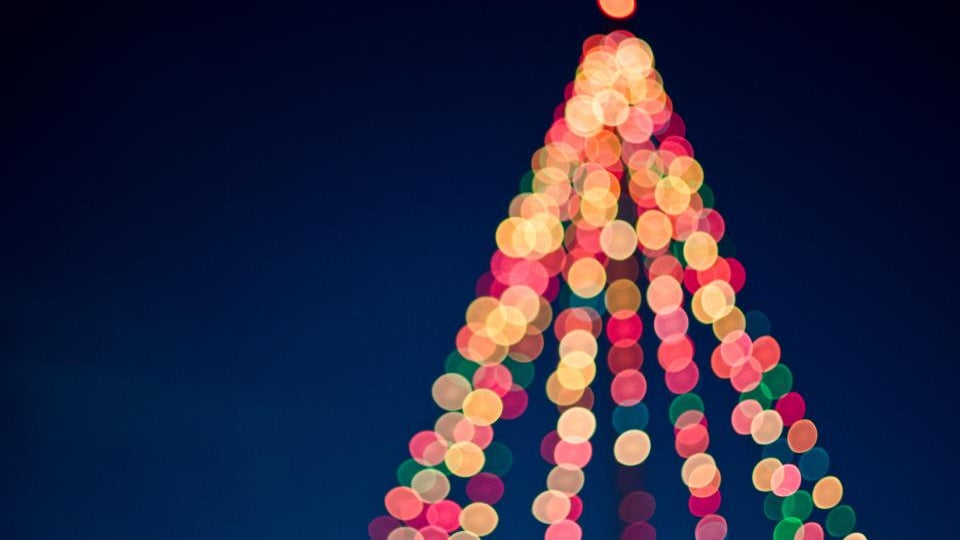
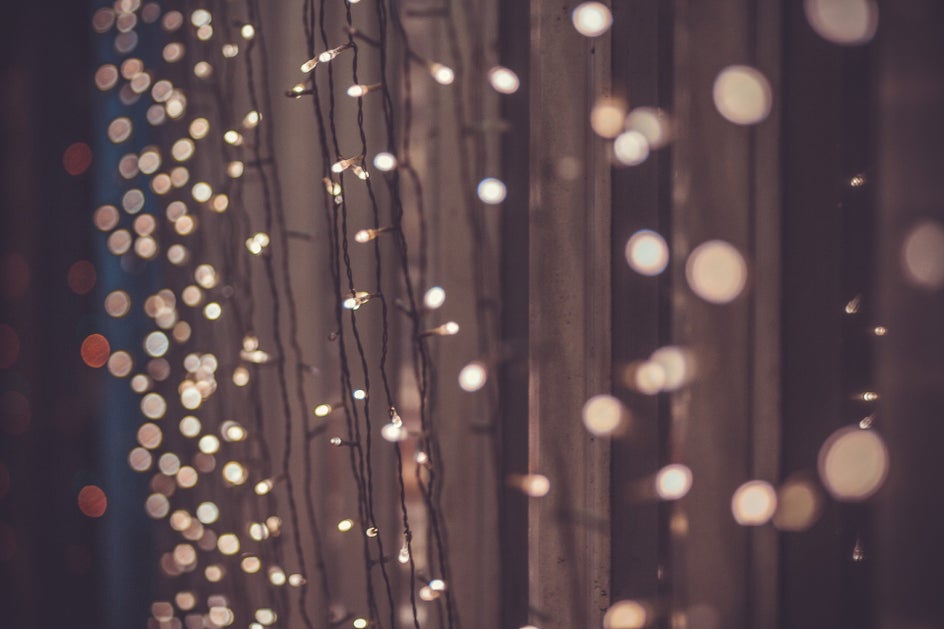
Embrace Bokeh
Sometimes getting blurred or out of focus lights produces a bokeh effect (those wonderful little balls of light), giving your photo an artistic flare. There are so many creative ways to use bokeh in your images. You can use a macro lens and zero in on a subject to keep it sharp while blurring the background into beautiful bokeh (like the photo on the left), or you can blur the entire image into a bokeh wonderland (like the photo on the right).
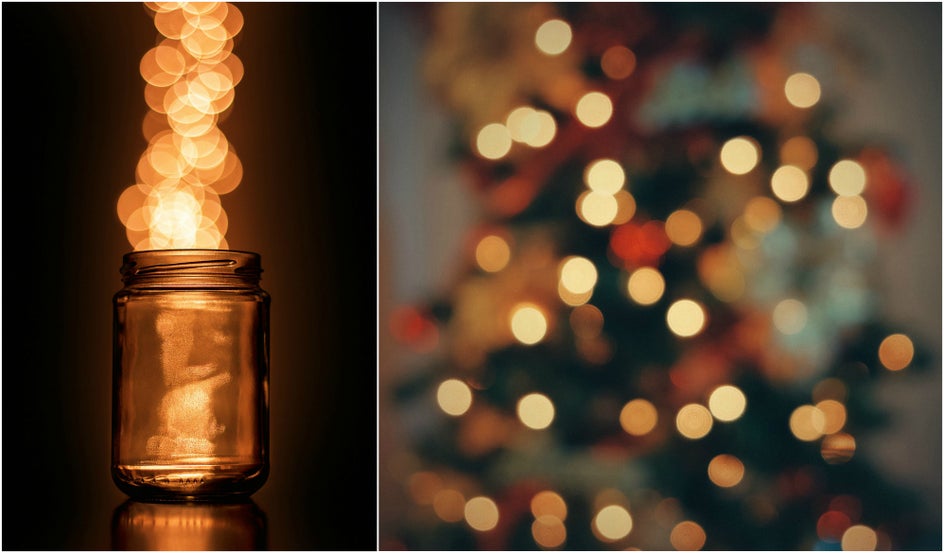
Either way, you’ll end up with a beautiful shot.
Use A Tripod
Shaky hands make for a blurry shot (most of the time in a bad, non-bokeh way). To ensure that your image stays crisp and clear with the ideal camera settings, bust out the tripod.
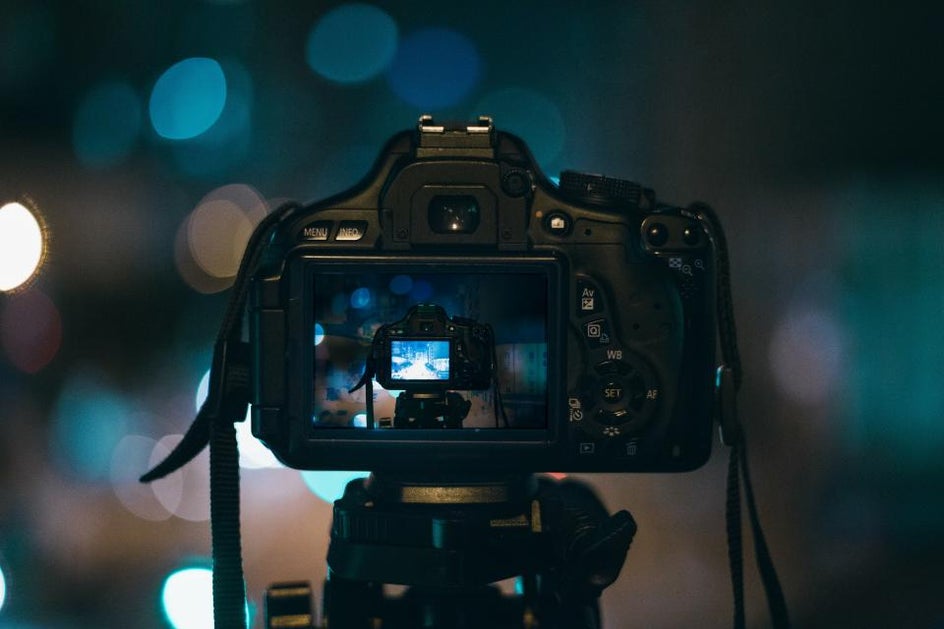
You can go the extra mile by using a remote or timer while the camera is on a tripod to make sure you won’t have an ounce of residual movement after you click the trigger.
Don’t Ever Use Flash
I know, it’s tempting. But using the flash will counteract the colors of the lights and create a lot of image noise. Keep the flash off. Don’t even think about it.
Editing Tips For Christmas Light Photography
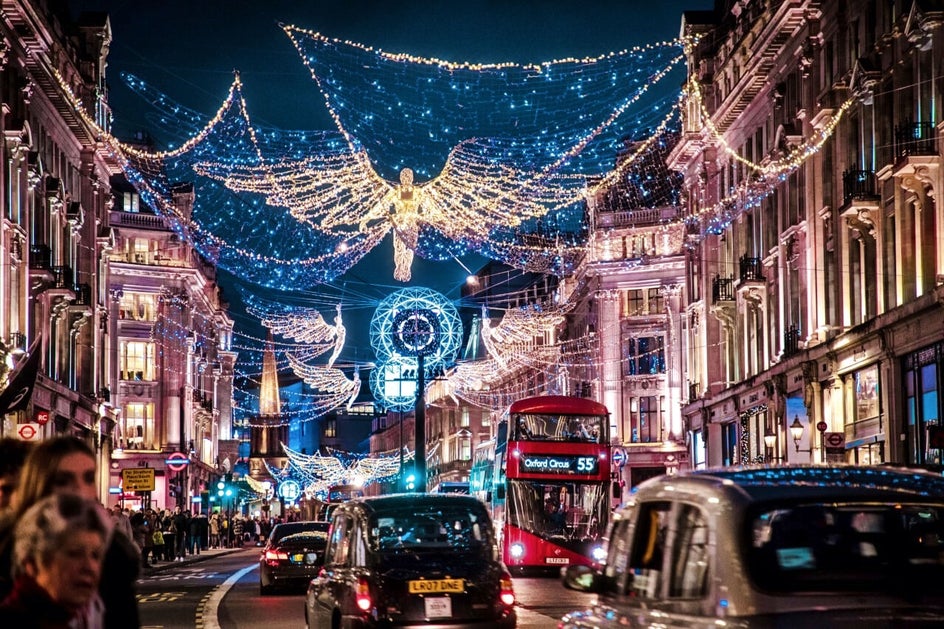
Now that you’ve mastered the art of capturing Christmas lights on camera, it’s time to edit them into something glorious. First, upload your favorite image into BeFunky’s Photo Editor. Depending on what mood you want to portray, there are many different tools in the Edit menu that you can use on your photo to make it perfectly festive. Let’s start with the Exposure tool!
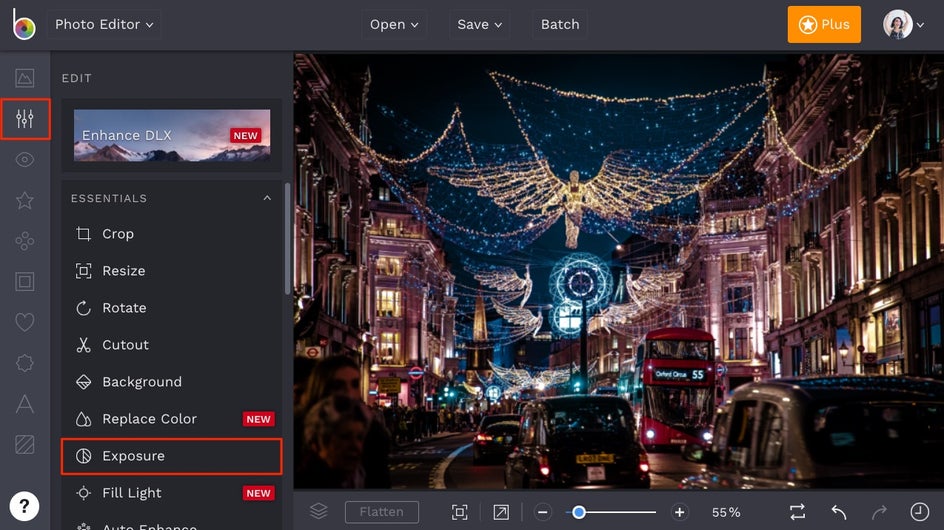
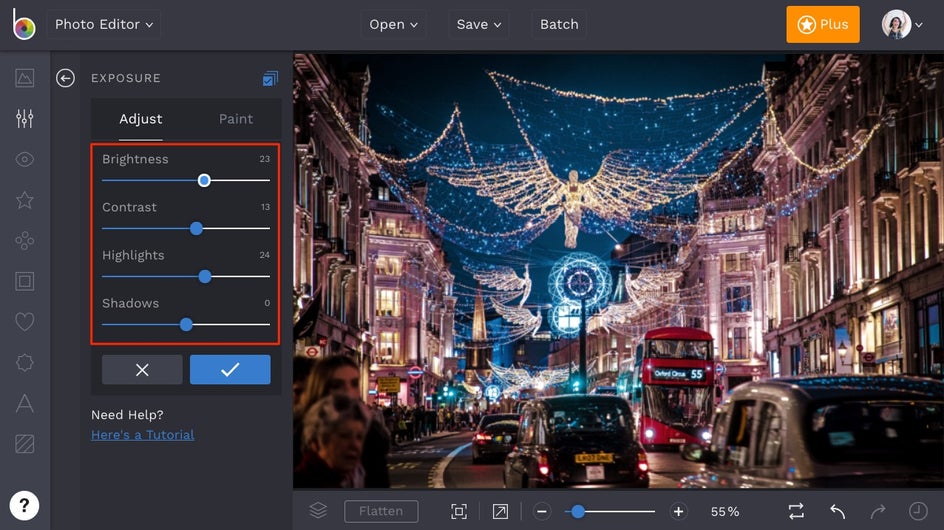
In the Edit menu on the left, click on the Exposure tool. This one’s perfect for quickly brightening an otherwise dark photo (like this one!). Use the sliders to adjust Brightness, Contrast, Highlights, and Shadows until your image looks more balanced exposure-wise. When you’re finished adjusting the sliders, click the blue checkmark to apply your edits.
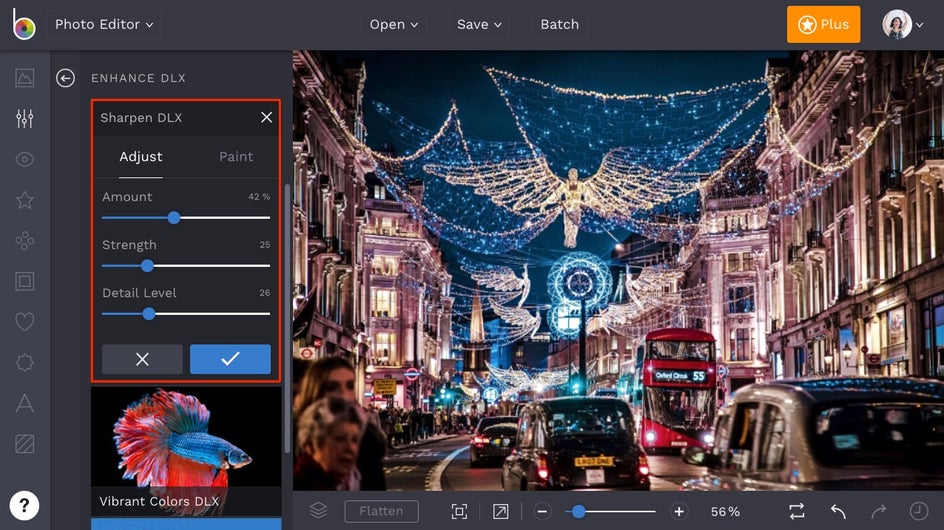
Next, the Enhance DLX effects are perfect for adding dimension, sharpening photos the perfect amount, and bringing out vibrant colors in your shot. They’re meant to fix problematic photos, and since Christmas light photography is commonly shot in dim lighting, these tools will help a ton. Click the big button labeled Enhance DLX at the top of the Edit menu.

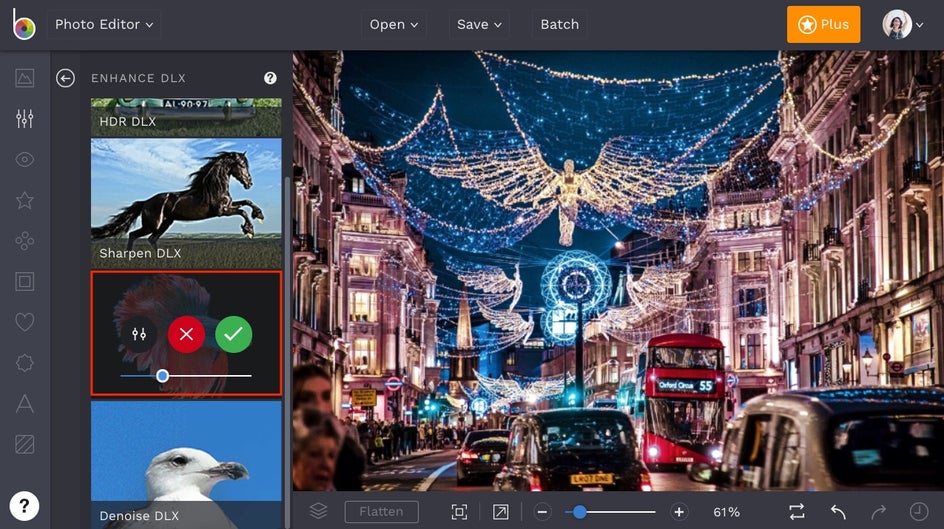
There are four amazing tools within the Enhance DLX category, and we’ll start with HDR DLX. It’s one of our smartest tools that’s able to sense the areas of your image that need added dimension and contrast. To use it, click on HDR DLX and use the slider to increase or decrease the amount. It’s that simple, but if you want to really tweak the effect to your liking, feel free to click the Settings menu (the mixing board icon) to really customize it.

Next, the Sharpen DLX tool will help sharpen your photo in only the areas that need it. It’s another smart tool that can analyze every pixel and only apply sharpness and contrast where it needs. Click on Sharpen DLX to add the effect in one click, then adjust the slider to your liking. For this photo, we’ve clicked on the Settings menu (the mixing board icon in the Sharpen DLX thumbnail) to fine-tune the detail level and really bring out the good stuff.
If you’re looking to bring out the colors in your image, the Vibrant Colors DLX tool is for you! It’ll adjust your colors to be vibrant, without being oversaturated. Like most night photography, the color tends to get lost in the shadows. Clicking on Vibrant Colors DLX will add just the right of saturation back in.
And lastly, the best thing about Christmas Lights is the fact that they glow! It’s a beautiful thing that sometimes can get lost in the photo taking process. Thankfully, BeFunky’s Glow tool can make those Christmas lights look as magical as they do in person. To use it, click on Glow in the Edit menu on the left.
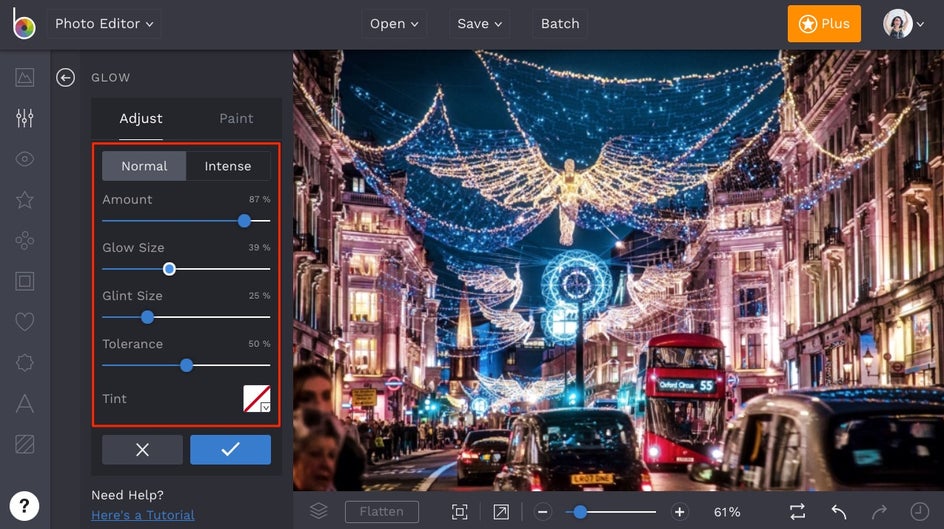
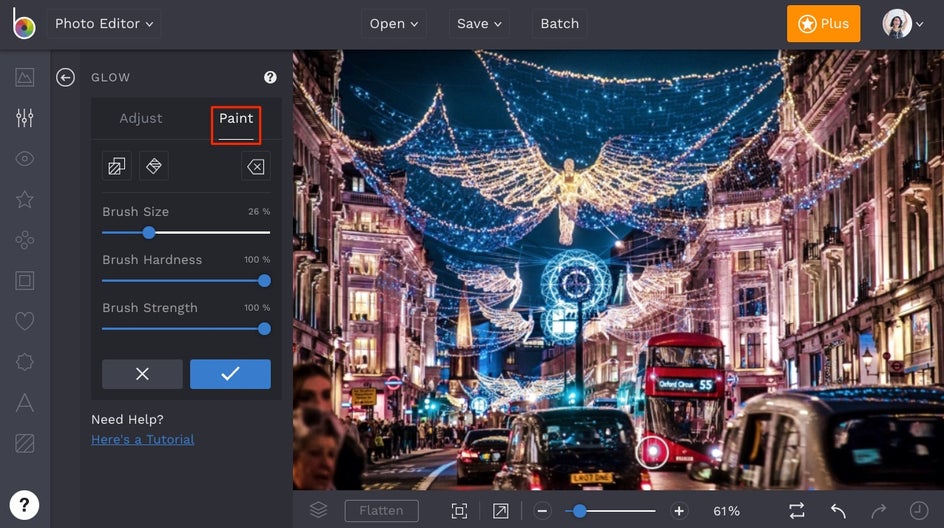
In the Glow tool menu, you can adjust the Amount, Glow Size and Glint Size to really make those Christmas lights pop. If you find that too much of your image is glowing, you can decrease the Tolerance slider to make less of the lights look shiny, or use the Glow tool in Paint mode to paint over the areas where you don’t want the effect to be. Just click on the Paint tab (next to adjust) and use your mouse to paint over those areas.
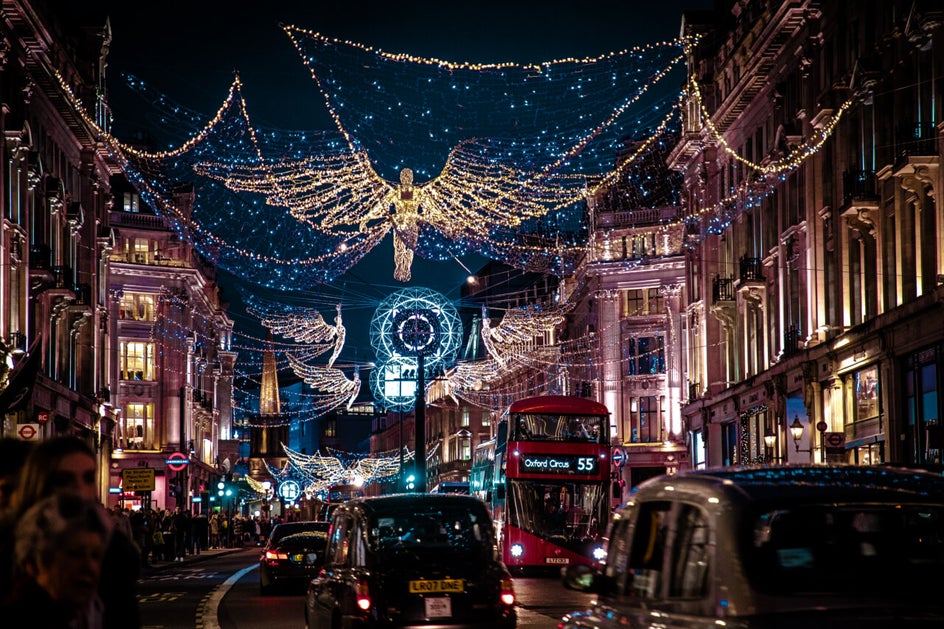
And just like that, you’ve got a bright, magical-looking photo that shines above the rest!
We hope you’re having the best Holiday season and capturing all that’s festive with your camera. Now that you know the best camera settings and photo editing tools to make that Christmas lights photography pop, you’re gonna be unstoppable. Happy holidays to you and yours!