How To Convey Emotion In Photos With The Color Tool

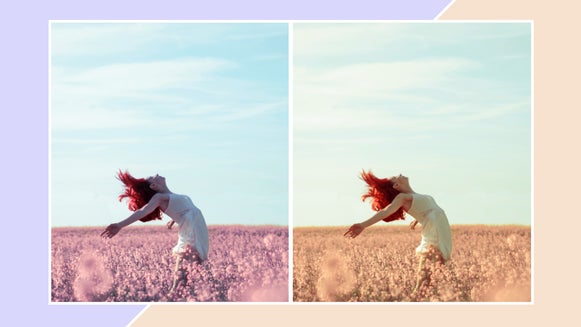
Color is pretty important. When used right, it can help create bold, beautiful photographs that make people stop and take notice. But they can do so much more than just make your images stand out. They also help to convey different emotions through your photos. Want to capture the good vibes and communicate happiness? Take photographs with more uplifting yellows. Trying to create a perfectly serene scene? Adding blues to your photos will help keep them calm and cool. Or, if you want to do the opposite and create energy, stir up excitement with intense red tones. But why limit yourself to the colors already in your image? To create any kind of feeling in your photos, try using BeFunky’s Color Tool. With it you’ll be able to adjust Hue, Saturation and Temperature to create any color and mood you can imagine!
Make Your Audience Feel Something
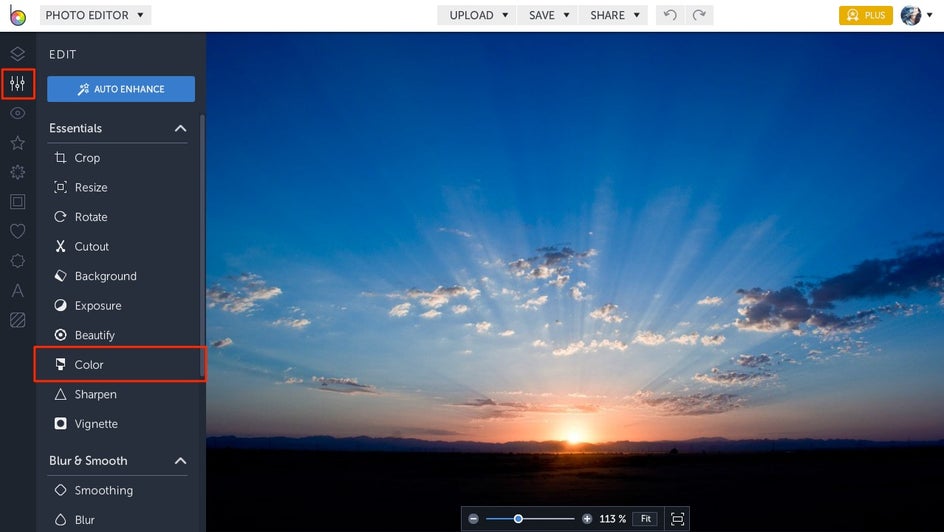
Composition, lighting and the other elements of a photograph are necessary. Each play their role in creating a well-balanced image, but none of them can capture emotion like color. It has the ability to instantly elicit a reaction from your audience and make them feel something. Whether you want them to feel joy, melancholy or any other emotion under the sun, you can easily make it happen with the Color tool! To get started, upload an image to the Photo Editor. Then, select Color from the Edit menu.
Pro Tip: Using too many colors in your photo can create a confusing and visually unappealing image, so be careful not to overdo it!
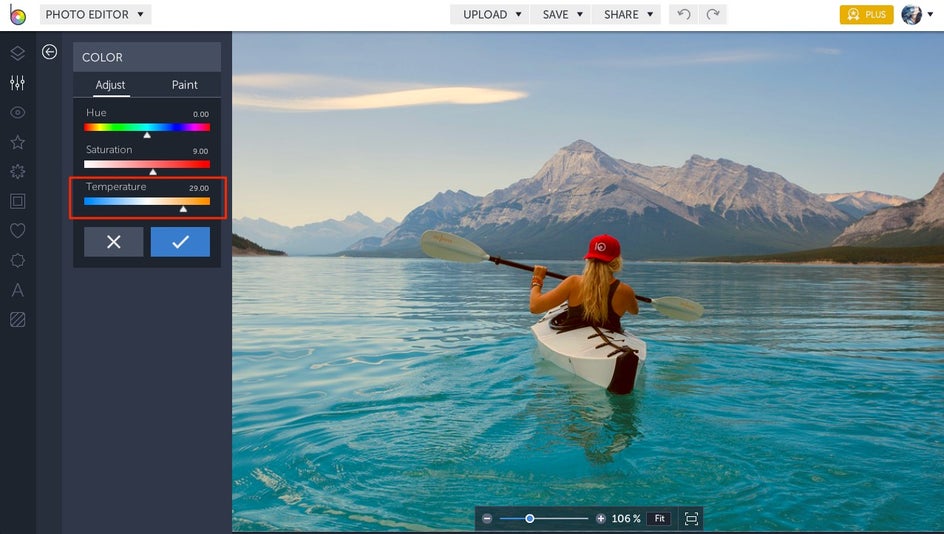
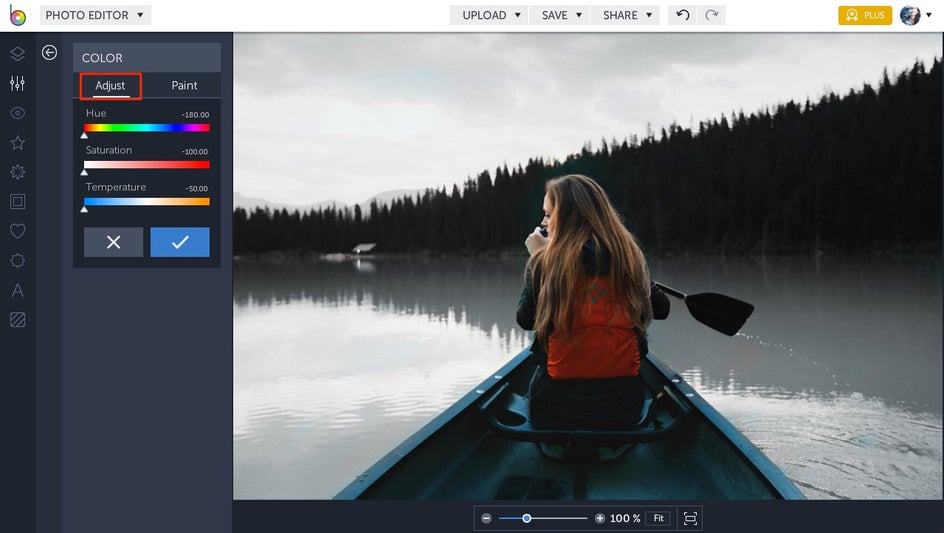
Instant Color Correction
Your first option when photo retouching will be to adjust Hue, which is really just another word for color. If you would just like to correct the color in your image, slide the scale very slightly to the left or right. If you would like to completely change the colors in your image, slide the scale farther and place it over the color you would like to add to your image. But keep in mind, the Hue you select will look different when added to the colors already in your photo. If you add blue to a red rose, it will transform into a verdant green. If you apply a red Hue over a blue sky, it’ll turn into a royal purple sunset. So slide the scale, experiment with the color in your image and watch as it changes the emotion of your photo.

Pro Tip: To undo any photo edits to you make with the Color tool, go into the Paint menu and select Erase.
Bring Color to Life
Wanna give your photos a quick color boost? Then you’ll want to use our Photo Editor to change Saturation, which controls the intensity of color in your photograph. To embolden color and create an eye-catching image, just slide the triangle under Saturation to the right. To dull the colors in your photo and create a muted look, slide the triangle under Saturation towards the left. But be careful while adjusting Saturation to retouch photos. If turned down too low, your image will turn black and white.
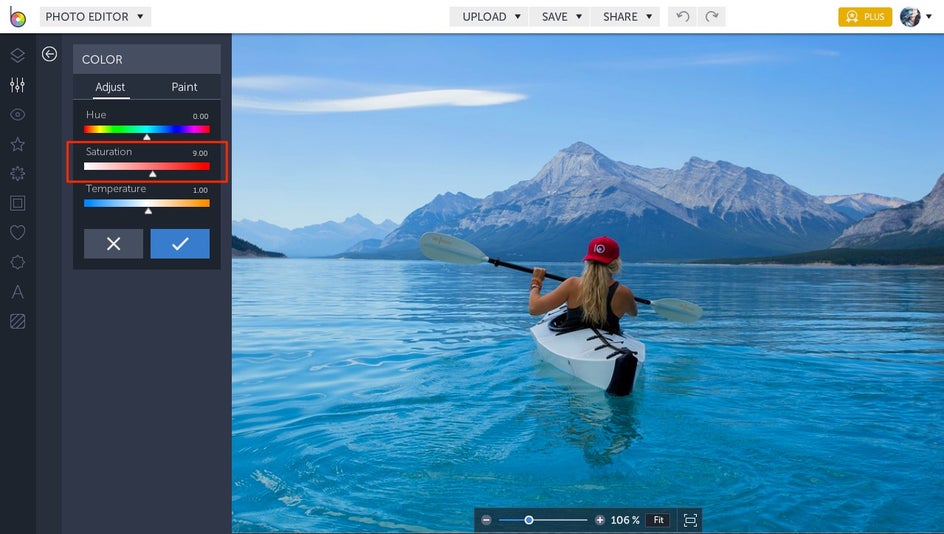
Pro Tip: Too much saturation can cause harsh color and create undesirable grainy photo effects in your image.
Set the Temperature Just Right
Your final option will be to adjust Temperature, or how warm or cool the colors in your photo are. This can be another great way to elicit emotion from your audience. By using warm colors, you can create sizzling images filled with anger, romance or excitement. To achieve this effect, just slide the triangle under Temperature to the left, and watch as the oranges, yellows and reds in your image become more pronounced.
Using cool colors help create feelings of calm and comfort. To chill your images out and bring out the blues, greens and purples, slide the triangle under Temperature towards the right.
Pro Tip: To instantly enhance color, saturation, temperature, sharpness, contrast and fill light, try our Photo Editor's Beautify tool.
Create A Compelling Story
In addition to creating emotion in your images, our Photo Editor can help you tell visual stories. By using our Color tool to place emphasis on certain aspects of your photo, you can guide your viewer’s gaze and create an engaging narrative. For example, a black and white image of a woman holding a vivid red rose tells a love story. Or, an image of a dark tunnel with a bright light at the end tells a story of hope. But really, there are endless stories you can tell!
To create your own visual stories, try using the Paint feature to only apply the Color tool to selected areas of your image. When you're ready to start, select Paint from the Color tool menu. Then, customize your tool to create a unique effect. You’ll be able to adjust Brush Size to change the amount of surface area that your tool covers at once time, Brush Hardness to determine the feathering of your tool and Brush Strength to change the intensity of the finished effect.

Once you're finished personalizing your tool, drag and click it over the parts of your image you would like to remain unaffected by the Color tool. Then, go back into the Adjust menu and change Hue, Saturation and Temperature. When you do, the area you painted over will remain in its original colors, while the rest of the image's colors change with the settings. When you’re finished, click the blue checkmark button to apply the photo effects.
Pro Tip: To reverse the effects of the Paint tool after you edit pictures, select the icon with the two overlapping squares labeled Invert.
Final Results
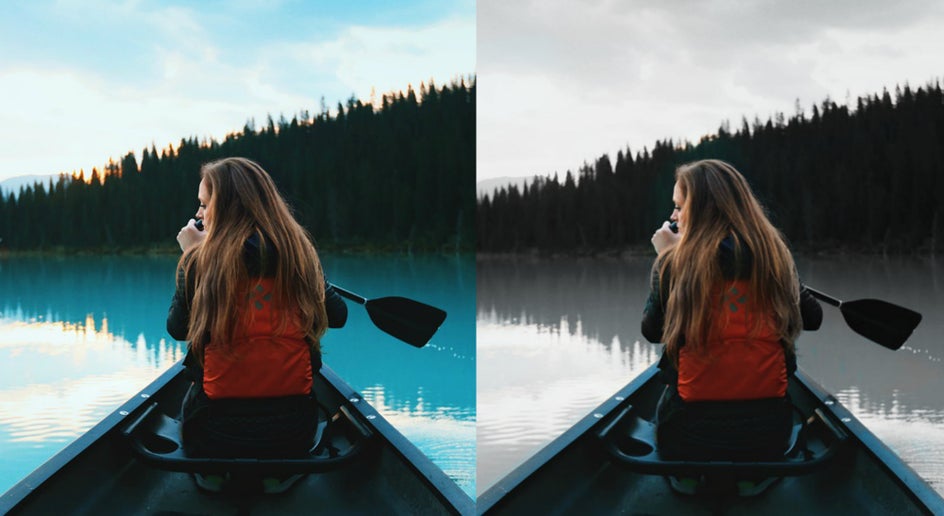
Want to connect with your audience on a deeper level? Try the Color tool to instantly correct color and create beautiful images that burst with emotion!