Beautify Your Photos in a Single Click
From makeup and lighting, to retouching and so much more – professional photographers have entire teams dedicated to getting the perfect shot. Chances are you don’t have these expensive and time-consuming resources at your disposal, but what if we told you you could correct coloring, improve saturation, add fill light, sharpen lines, and enhance contrast in just a single click? Thanks to BeFunky’s Beautify Tool, you can! It contains the photo perfecting power of not one, but five photo effects in one.
Now you can say goodbye to tedious photo editing software and start enjoying the simple beauty of BeFunky's Photo Editor. Keep reading because we’ll show you how!
Applying the Beautify Tool All-Over
Ready to beautify a photo online? Head to BeFunky’s Photo Editor and open a photo of your choice. Navigate to the Edit menu on the far left side of the screen, then select Beautify from the Essentials section.

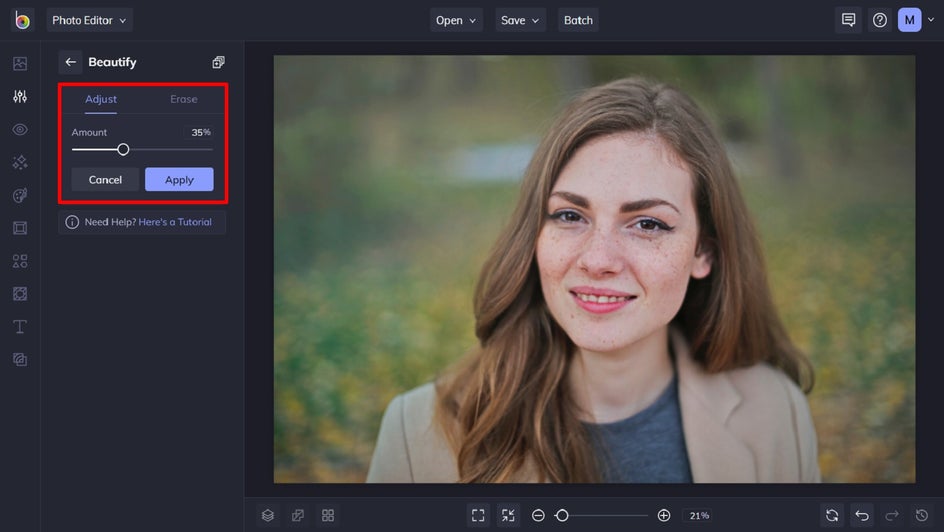
To use Beautify on your entire image, ensure you’re within the Adjust tab. You can then fine-tune your effect by adjusting the slider located underneath Amount. Dragging the slider to the left decreases the intensity of the effect, while dragging it to the right increases the intensity.
Once you’re happy with how the effect looks on your image, simply click Apply.
Applying the Beautify Tool to Selected Parts of Your Image
You also have the option to only apply the Beautify tool to parts of your image, rather than the image as a whole. To do this, click on the Erase tab within the Beautify menu, which is located next to the Adjust tab.
You can use the slider to make your Brush Size larger or smaller, or to determine the softness and feathering of your effect, simply adjust Brush Hardness. To increase or decrease the intensity of your beautification, adjust Brush Strength. You can even invert the effect by clicking on the icon labeled Reverse.
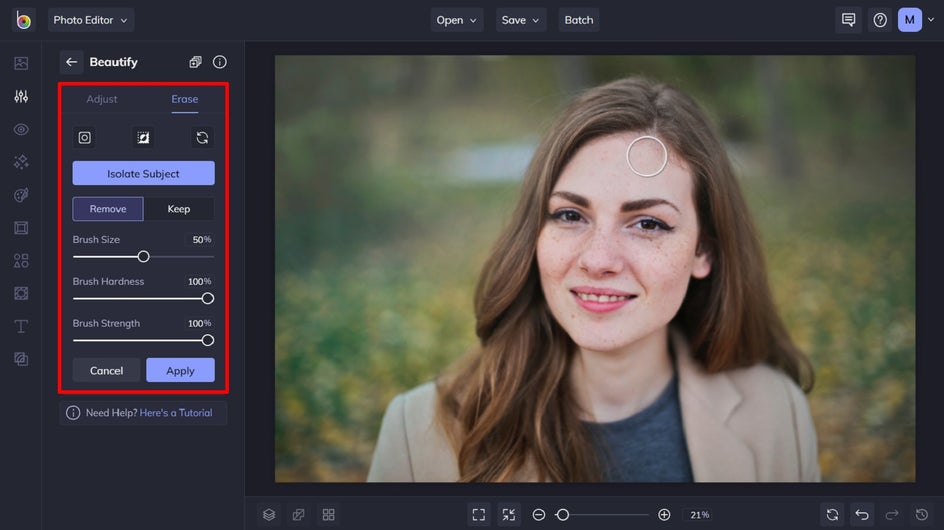
Once you’re satisfied with these customizations, simply click and drag your mouse over the areas of your image that you wish to use the Beautify tool. To apply your changes, just click the Apply button.
Pro Tip: If you make a mistake, don’t worry! The Erase tool lets you remove the Beautify effect in selected areas and the Reset tool will undo the effect completely.
Additional Tools to Beautify Your Photo Online
Want to fine-tune elements of your photo without an all-in-one solution? While the Beautify tool is both powerful and time-saving, there are also plenty of other photo editing options available to help you individually achieve the look of this tool.
If you want the colors in your photo to come to life, try using our Color tool to enhance saturation. Additionally, you can select our Exposure tool and adjust the Brightness, Contrast, Highlights, and Shadows to your liking. Or, if you’re looking to create crisp and clear images, apply our Sharpen tool.
Pro Tip: Each of these tools also offer a Paint option, allowing you to apply each effect selectively.
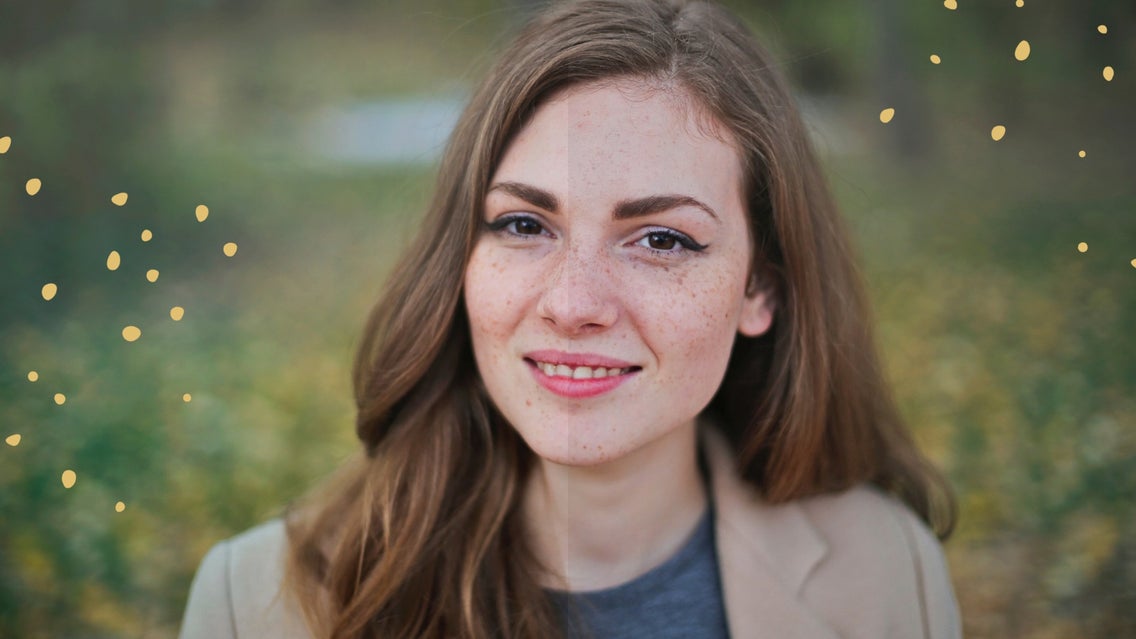
Final Results
How’s that for photo editing perfection? Our revolutionary Beautify tool lets you correct coloring, improve saturation, add fill light, sharpen lines, and enhance contrast in just seconds. Think of it as your one-click beauty photo editor!


One-Click Beauty For Photo Retouching Perfection
Forget spending hours retouching your photos. With BeFunky’s Beautify tool, available in the Photo Editor, achieving a balanced image is as simple as the click of your mouse. What incredible images will it help you to create?
Go on, try the Beautify tool for yourself to see just how easy it is!