How to Batch Edit Photos With BeFunky

Here at BeFunky, we’re all about making your photo editing experience as seamless as possible. Photography is hard work, and when it comes to the editing process, we want to do everything we can to make your life easier. So, after realizing that one of the biggest obstacles to efficiency was the need to edit photos individually, we came up with a way to batch process photos. This means you can edit hundreds of images all at once.
Whether you want to add the same photo filter to multiple photos from your family vacation or need to make twenty photos for your blog the same size and shape, we’ve got you covered. And the coolest thing is, you can make your own custom Batch Processing panel, storing all your favorite editing tools in one place for easy access. Here are some tips on how to use BeFunky’s Batch Processing and save serious time.
How to Get Started With Batch Processing
To edit photos as a batch, simply click the Batch button at the top of the Photo Editor. Or, head directly to the Batch Photo Editor by clicking on this link. Click the Add Images button or drag and drop all the images you’d like to add from your computer. You can upload as many images as you want!
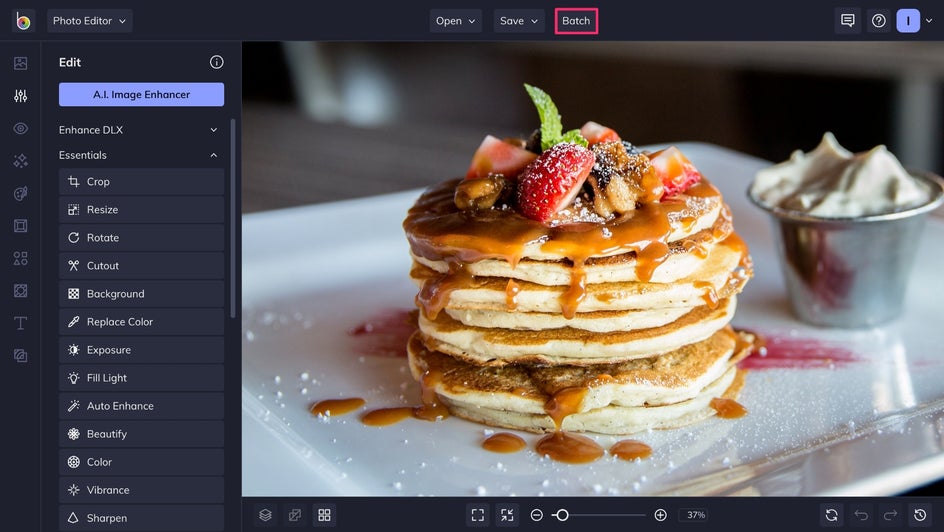
Batch Processing is particularly handy if you’ve got a large folder of photos from your latest vacation, photoshoot, or images you’re ready to edit for a blog post. You can crop them in the same orientation, resize them to a specific dimension, sharpen them at the same rate, or add the same photo filter in just one click. The sky’s the limit!
Crop & Resize Multiple Images in Just One Click
Any photographer knows that cropping and resizing photos individually is tedious, hand-cramping work. Luckily, that’s all a thing of the past with Batch Processing.
Cropping Multiple Images
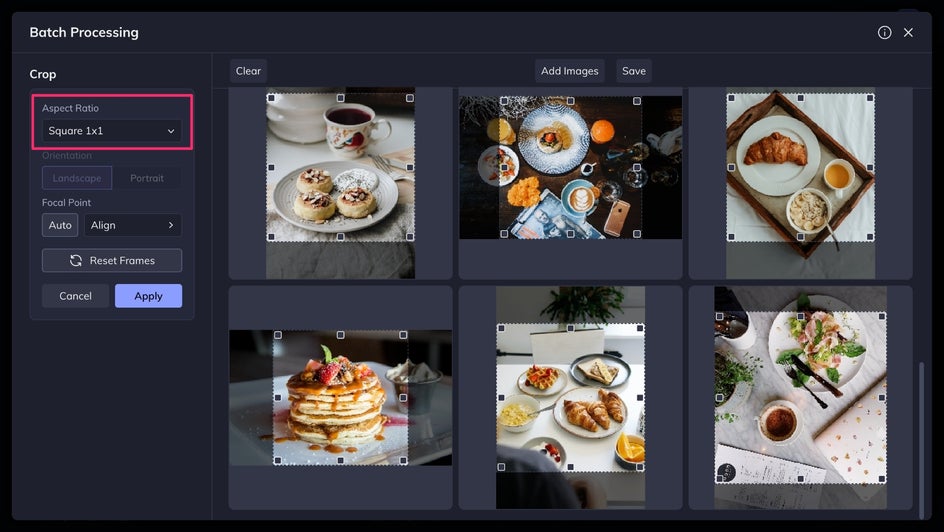
To crop your photos, click Crop and you’ll be able to use the dropdown menu to choose pre-measured crop options like 4 x 6 Photo, Square, Golden Ratio, and more.
If you’d rather crop photos in freeform mode, you can choose the Freeform option from the Crop dropdown menu. This way, you can crop each photo within the batch to your chosen dimensions.
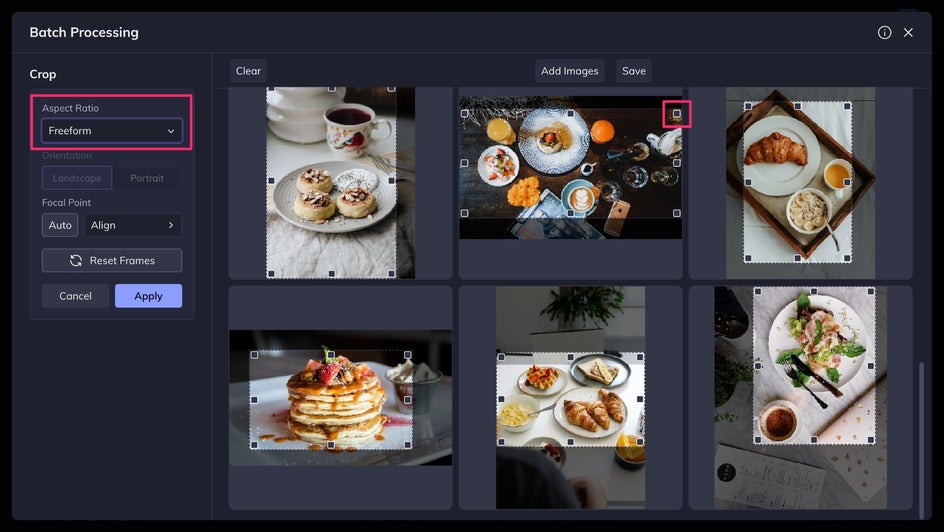
The Crop tool is so smart that when you click the Auto button beneath Focal Point, it will automatically detect the focal point of your photo and place the crop target accordingly! No need to worry about your photo’s subject getting cut off.
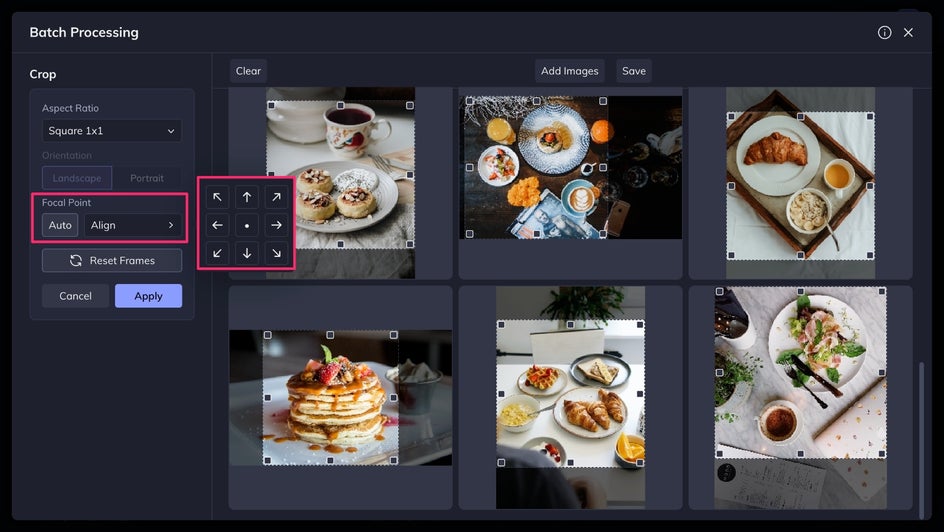
You can also move the crop targets individually for custom placement, or choose from a set focal point menu by clicking the Align options in the Crop menu. Once everything looks just the way you want it to, just click the blue checkmark. Too easy!
Resizing Multiple Images
Even if you have a mix of landscape and portrait orientation photos in your batch, clicking on Resize in the Batch Processing menu will let you resize images by Scale, Longest Size, Width, Height, and Exact Size. For example, if you need each of your images to be 1280 pixels wide, you’d click the Width option and type 1280 into the pixels box.
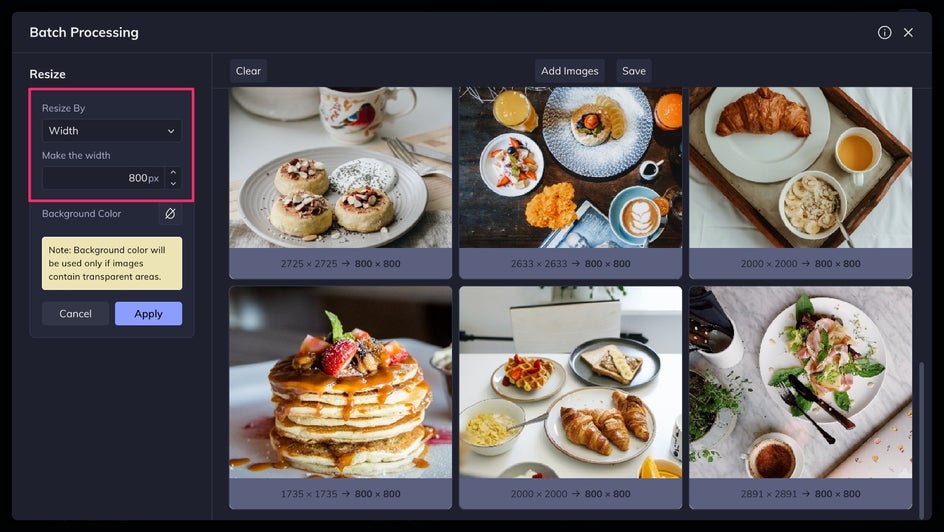
The original photo size and new photo size will be displayed on the bottom of your batch images. Click the blue checkmark to confirm your selection and watch them all resize in seconds!
Edit and Add Filters to Hundreds of Images at Once
With Batch Processing, not only can you resize and crop an entire folder of images, but you can now also edit them to maintain a consistent aesthetic across all of your photos! There’s no need to edit each photo individually. You can save plenty of time by applying your favorite BeFunky tools and effects to an entire batch.
Editing Essentials at Your Fingertips
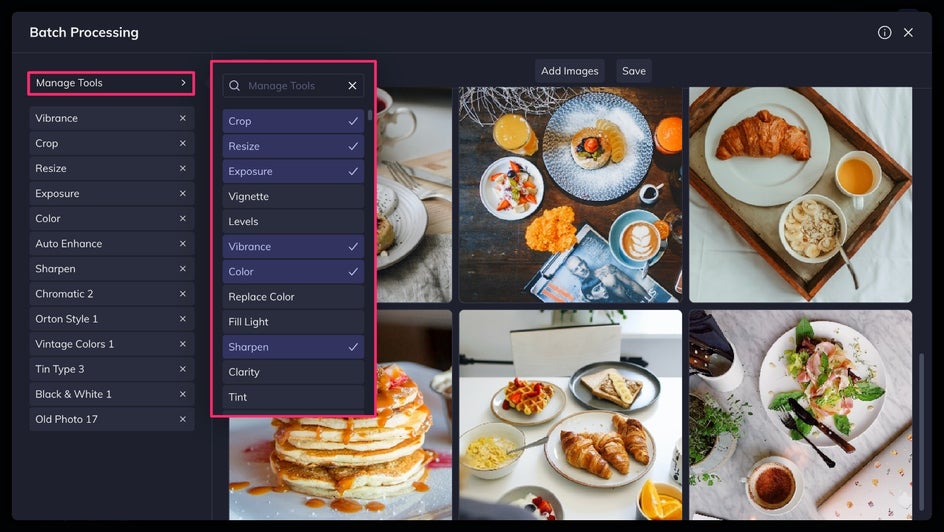
Immediately after you upload your photos as a batch, you’ll notice specific tools from our Photo Editor listed on the left. These are your quick access options. You can click on them one by one to edit your photos using each tool, or click the ‘x’ next to any tool to delete it from your quick menu.
Customized Toolbar for All of Your Editing Needs
If you don't see your favorite tool or effect on the quick access list, fear not! By clicking the Manage Tools button at the top of the list, you can search BeFunky’s Photo Editor for tools and add them right to your quick menu. This way, you’ll always have your favorite photo editing tools at hand when batch processing your images.
Using Batch Processing to Achieve a Cohesive Look
Applying tools and effects with Batch Processing allows you to achieve the same look across multiple images without needing to open each file individually. There are hundreds of ways to edit your photos, but here are some of our favorite tools to use when we’re editing large batches:
Adjust Exposure
This one is particularly handy if you’ve got a batch of photos from the same photoshoot or time of day. If they all need some adjusting in the exposure department, you can click Exposure and use the sliders to enhance Brightness, Contrast, Highlights, and Shadows.
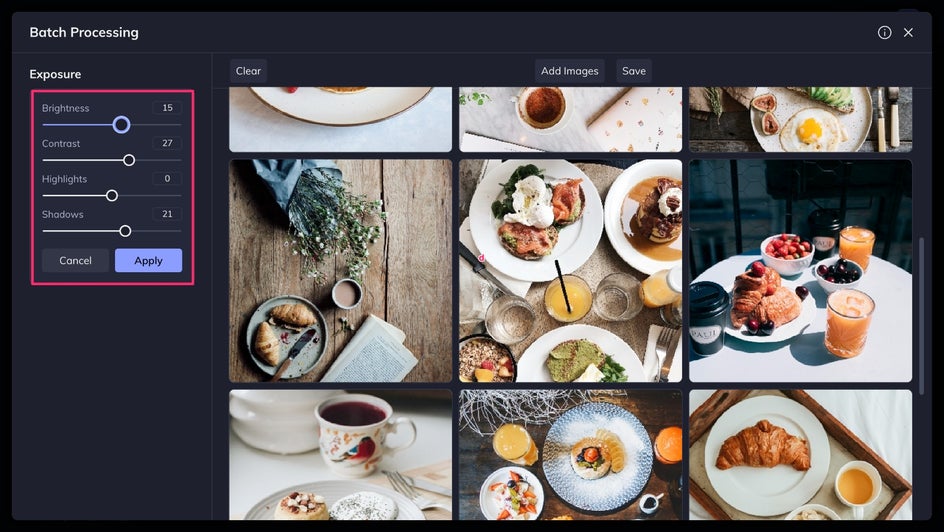
You'll be able to watch and see how subtle changes in the Exposure panel improve all of your images at once!
Improve Color
The Color tool in the batch processing menu lets you adjust the color of your photos. It comes in handy when you want to increase or decrease saturation, change the temperature of the images, or make uniform adjustments to hue.
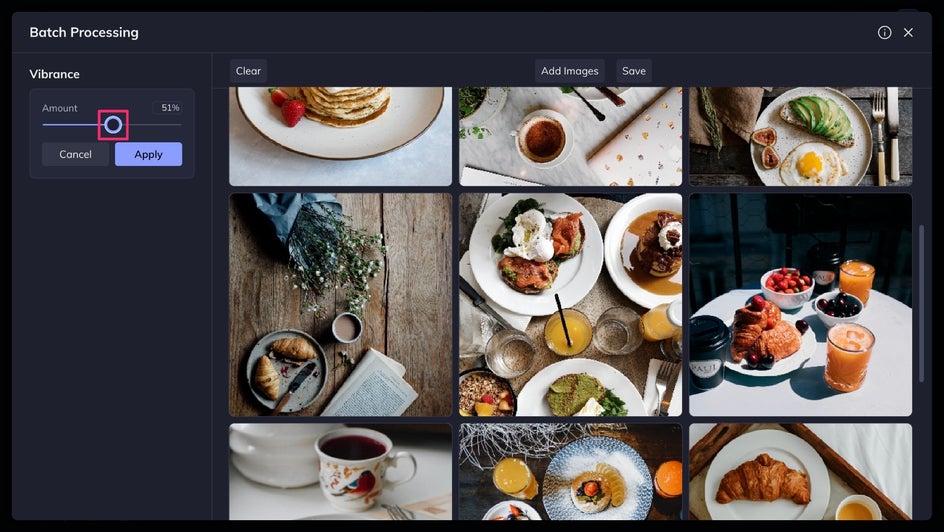
You can also use the Vibrance tool to bring out the perfect amount of color in each of your photos without oversaturating a single pixel. Our Vibrance tool is so smart, it’ll scan each photo individually and seek out the areas of the image that need a color boost, all while leaving the well-saturated areas alone.
Sharpen Photos
Use the Sharpen tool to quickly sharpen images. After clicking on Sharpen, simply use the slider to increase or decrease the amount of sharpness and get crystal clear images in seconds.
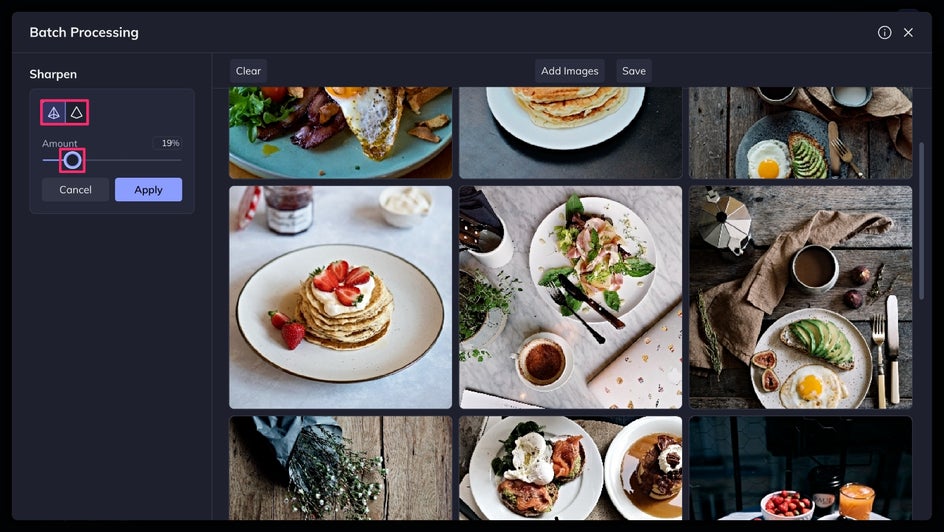
Another great tool for sharpening images is the Clarity tool. It enhances your images by adding contrast to the mid-tones of each individual image, creating a super clear photo without oversharpening!
Make Smart Enhancements
The Auto Enhance tool is ideal when it comes to figuring out the right exposure and color balance for your images. It’s so smart, it’ll sense each photo’s individual needs—boosting color, balancing exposure, and giving your images that expert touch in just one click.
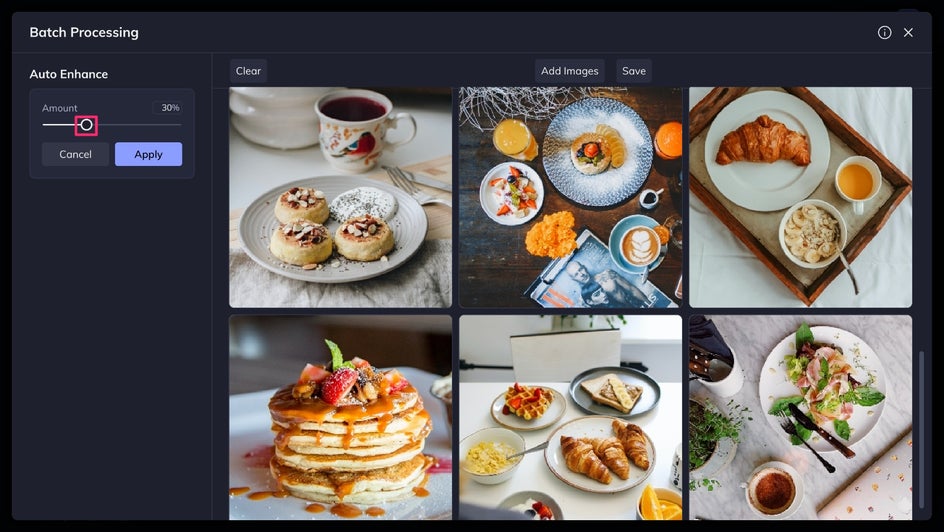
Once you click the Auto Enhance button, you can use the slider to adjust the amount if you’d like to make the enhancements more subtle or dramatic.
Add Your Favorite Photo Filters
You also have access to a huge library of photo filters from our Effects tab to use in your batch processing sessions! Choose your favorites and add them to your quick menu to create an entire batch of Black & White photos, add a Chromatic effect, or layer a few of your favorite looks to create a totally custom filter for every single image. We all love how fast a filter can improve the look of an image, and with batch editing, the process is even faster.
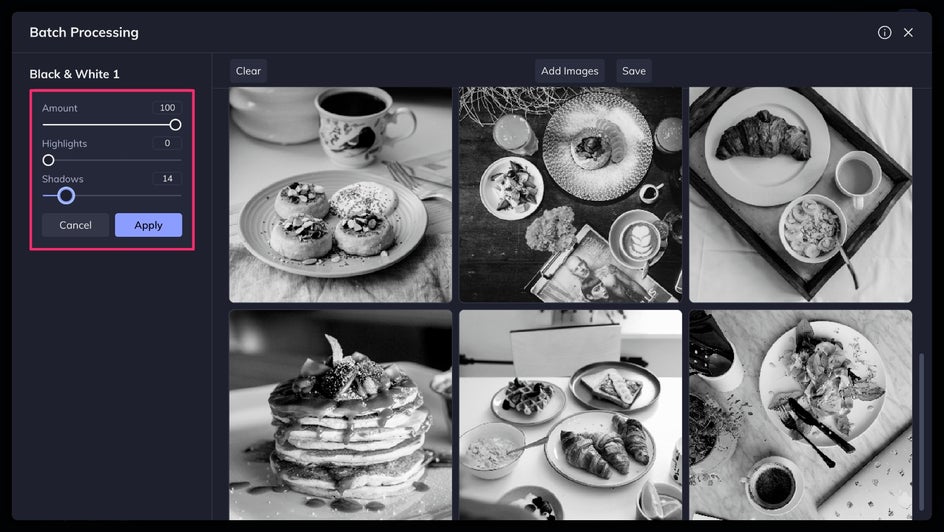
There are so many photo editing tools you can use in your Batch Processing session, so feel free to make adjustments to your quick menu by clicking the Manage Tools button at the top of the Batch Processing screen. You’ll love the quick access to your favorites and how easy it is to edit all those photos at once!
Save Your Batch Images as a Compact ZIP File
When you’ve made all your batch enhancements and you’re ready to save, click the Save button at the top of the Batch Processing menu. You’ll have options to save as JPEG or PNG files, as well as naming options for organizing each image file within the batch. Type a descriptor into the Update Filename box, then choose whether you'd like what you've typed before the filename or after the filename using the dropdown. You can see an example of the filename you've customized in the yellow box below the Update Filename section, and when you're finished making your selections, click the Save Images button to choose a destination on your Computer for your batch.
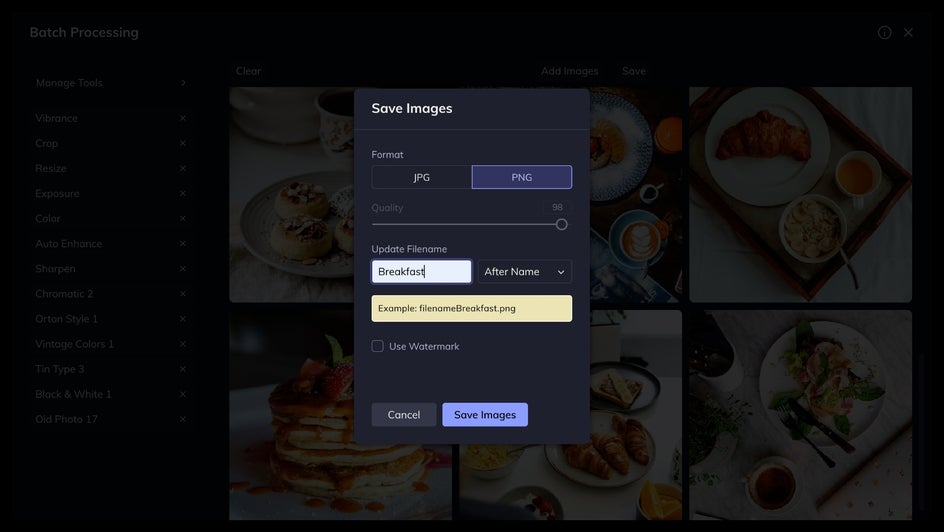
Once you’ve clicked the Save Images button, all of the images within your batch will be enclosed in a ZIP file. Double click it to unzip it, and marvel at all of your beautiful photos with all the enhancements in tow!
Save Valuable Time and Energy With Batch Processing
By editing your photos with Batch Processing, you can avoid the tedium of manually applying the same effects to a hundred different photos. This gives you more time and freedom to do the creative work you love—plus, your wrists will thank you.
Already have a batch of photos in mind? Head on over to the Photo Editor and see for yourself how fast Batch Processing can be.
