How to Create Black & White Photos with Pops of Color
Before color film was introduced to the masses in 1960, black and white film photography was the only option and all that people knew. When the ability to take colored photographs was introduced, people flocked to it like the newest release of the latest iPhone. Now that we have access to every type of film and digital tool imaginable, black and white photography has become more of an aesthetic.
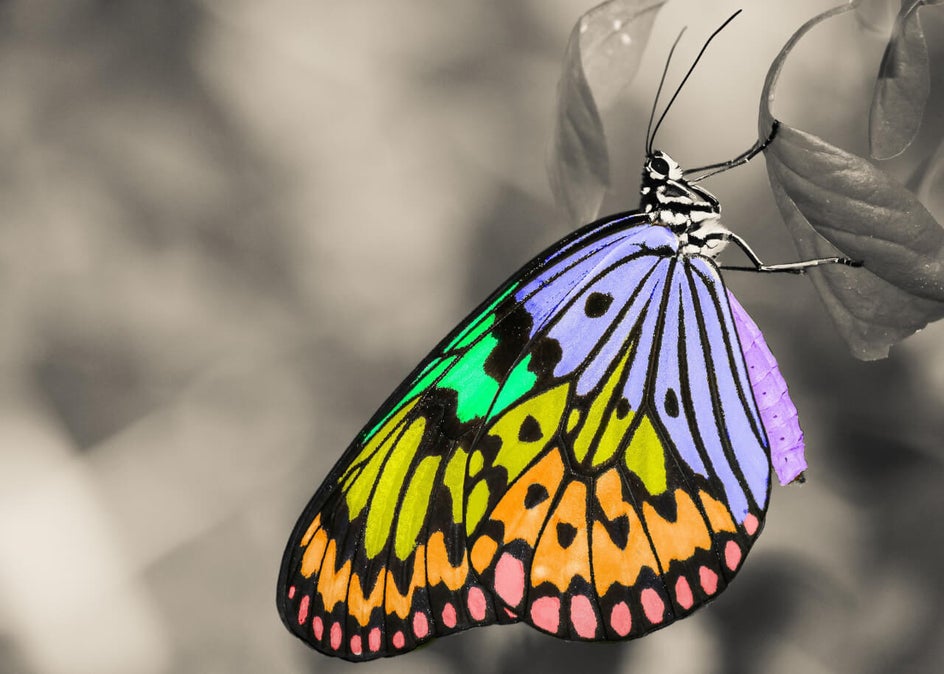
While black and white photography communicates its message by using highlights and shadows, color photography gives you an array of colors to use in order to catch someone’s eye and tell a story. With the introduction of post-processing, different styles and effects have been introduced to the market, one of which is black and white photography with an isolated saturated color still being represented.
When you really want to draw your audience’s attention to a specific detail, using a mix of black and white and color better allows you to guide your audience’s eye to the place you want it to go. With BeFunky’s Photo Effects and Erase Mode magic, it’s easy to create pops of color in your black and white photos.
When to Use Color Pops in Black & White Photos
When you add a pop of color to black and white photography, you’re telling a powerful story with your image. Whether you’re a business looking to get creative with your advertisements or simply want to have a little fun in your next photo editing session, this color pop technique is so simple but packs a powerful message. Here are a few of our favorite scenarios where it really comes in handy:
Tell a Story With Your Subject
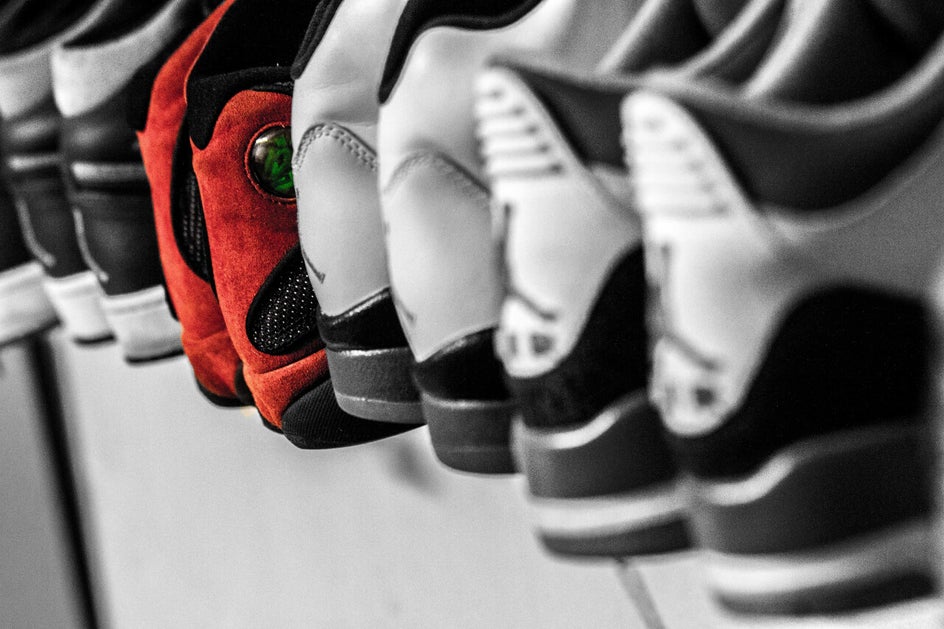
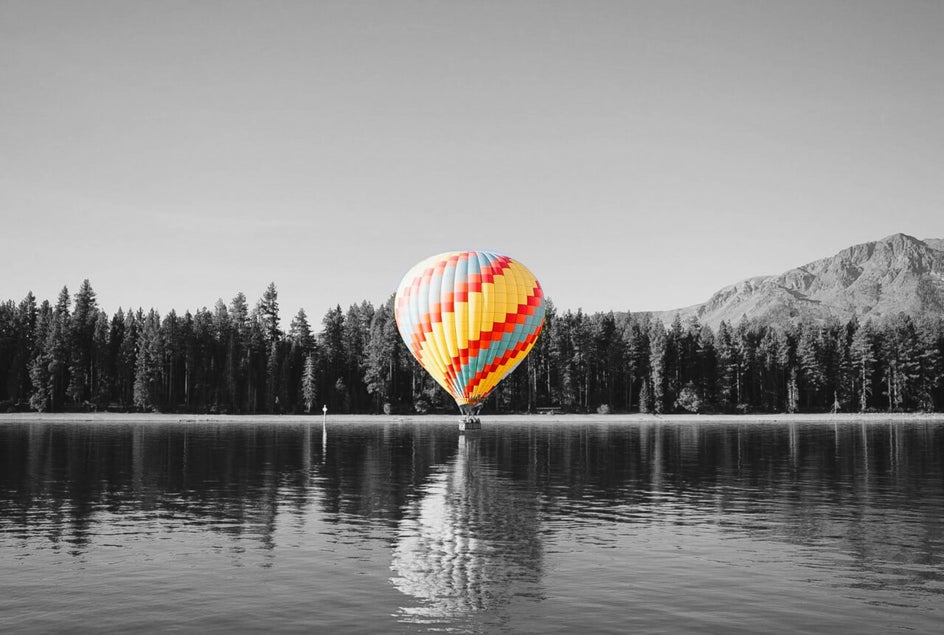
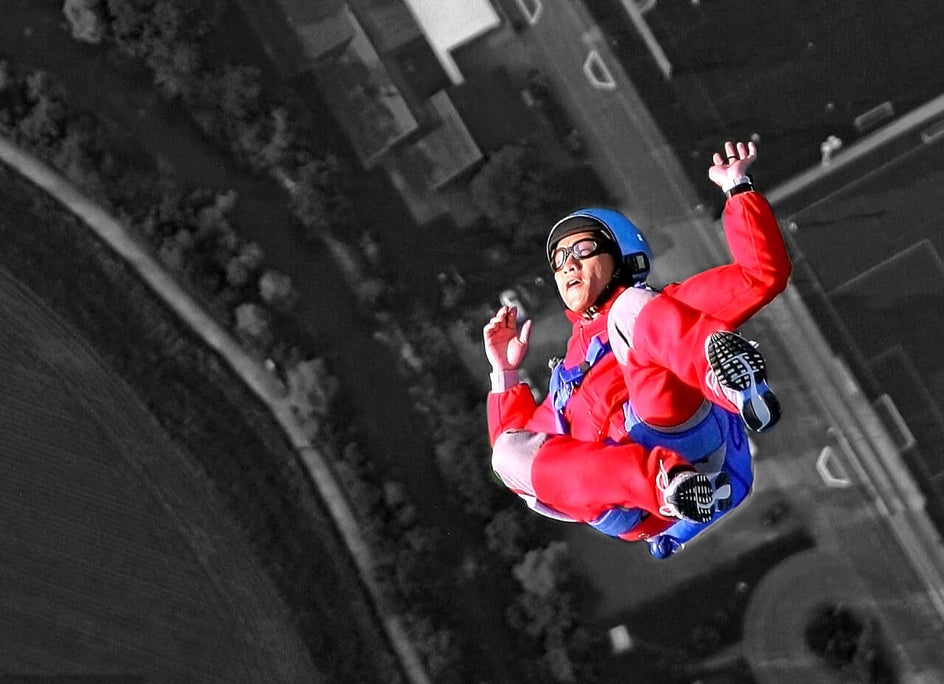
Adding a pop of color to your black and white photography helps to quickly draw the eye to a specific subject you are trying to focus on. If you are wanting your audience to notice one particular item within your image, this can be a great tool to use.
If you are wanting your audience to notice one particular item within your image, this can be a great tool to use.
Create Stillness on Busy Backgrounds
This is also a great technique to use when you want to separate your subject from a busy background. Black and white photography has a way of creating stillness and silence and when you mix that energy with a pop of color, it provides a great contrast that brings intrigue.
Play With Depth of Field
This technique is also good for dialing in on depth of field. Depth of field always creates interest in a photograph. If you are looking to enhance your depth of field, this can be a great and easy tool to use in order to accomplish that.
How to Create Black & White Photos with Pops of Color
To begin, start with BeFunky’s Photo Editor by clicking here.
Step 1: Select an Image
Select a photo that has a colorful subject that you want to use. Head into the Image Manager by selecting the tab in the left-hand menu. From here you can either upload a photo from your computer or select Search Stock Images to access thousands of free stock images.
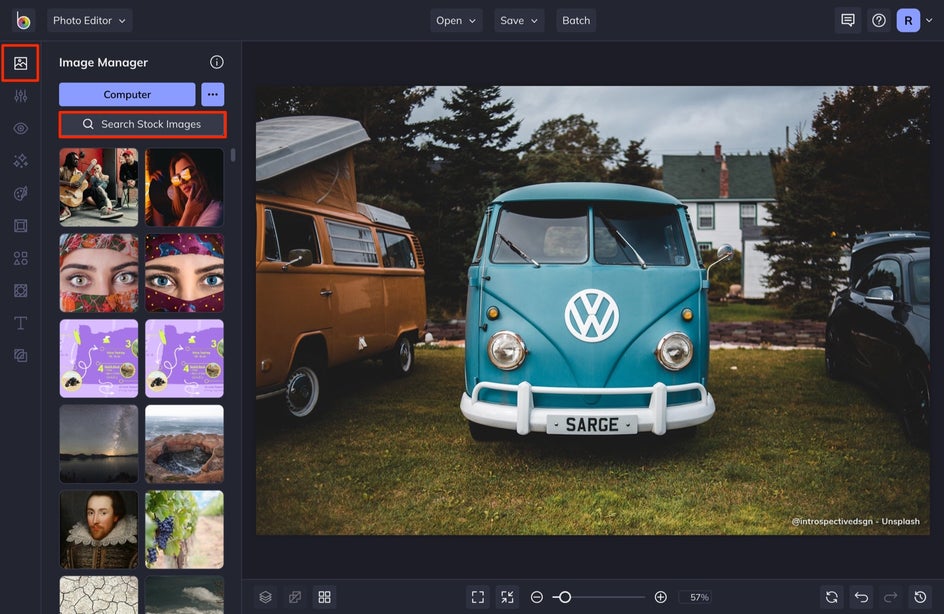
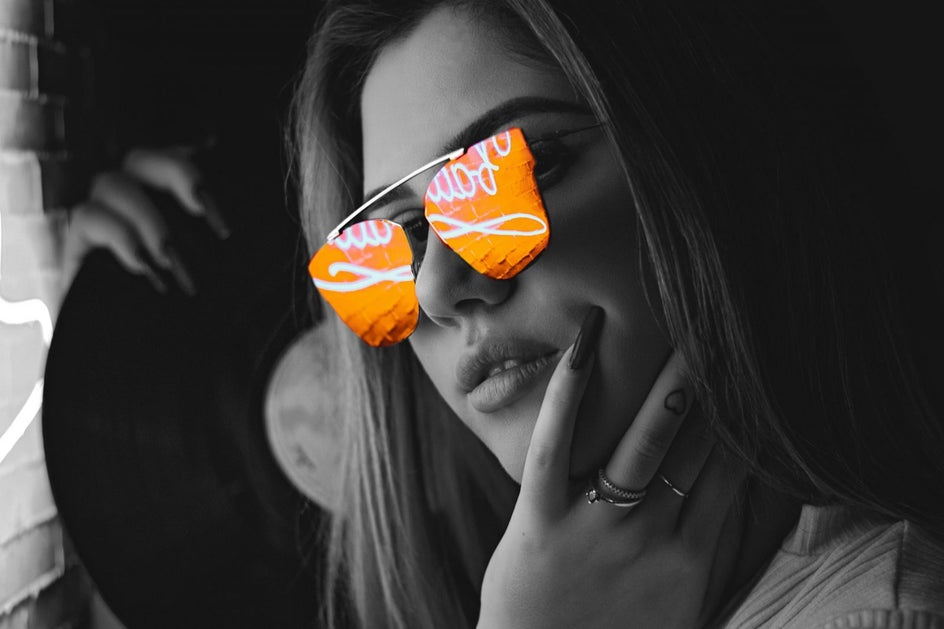
Once you select Search Stock Images, a menu will appear where you can search for any type of photo you’d like. Simply select the images you want and they will be automatically added to your Image Manager. We’re going to focus on the colorful sunglasses in our photo.

Next, add your photo to the canvas by either clicking on the image and selecting Set as Background or dragging and dropping your image directly onto the canvas.
Step 2: Apply the Effect
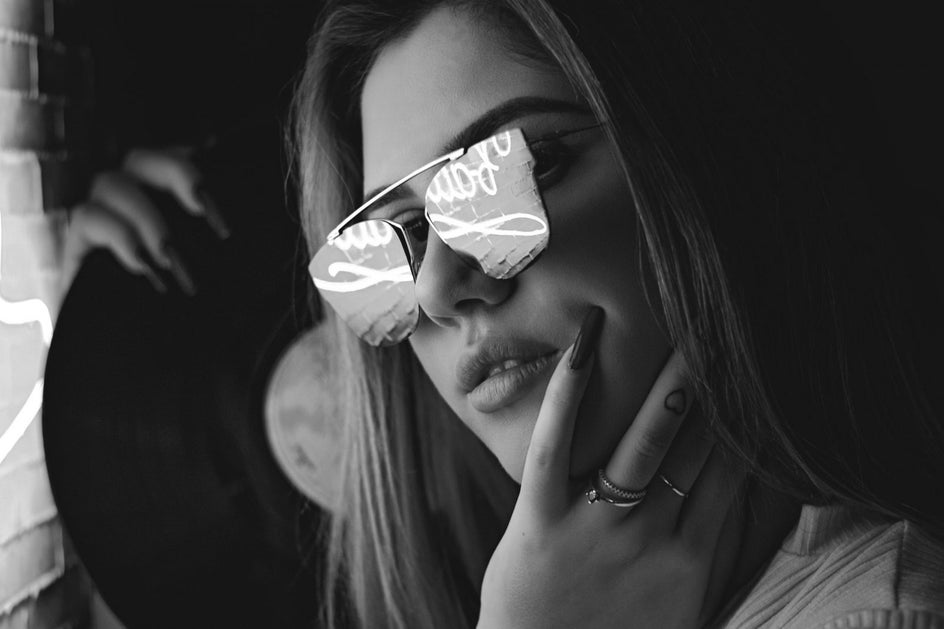
Once your photo is loaded onto the canvas, click on the Effects tab in the left-hand side menu, then select the Black & White category.
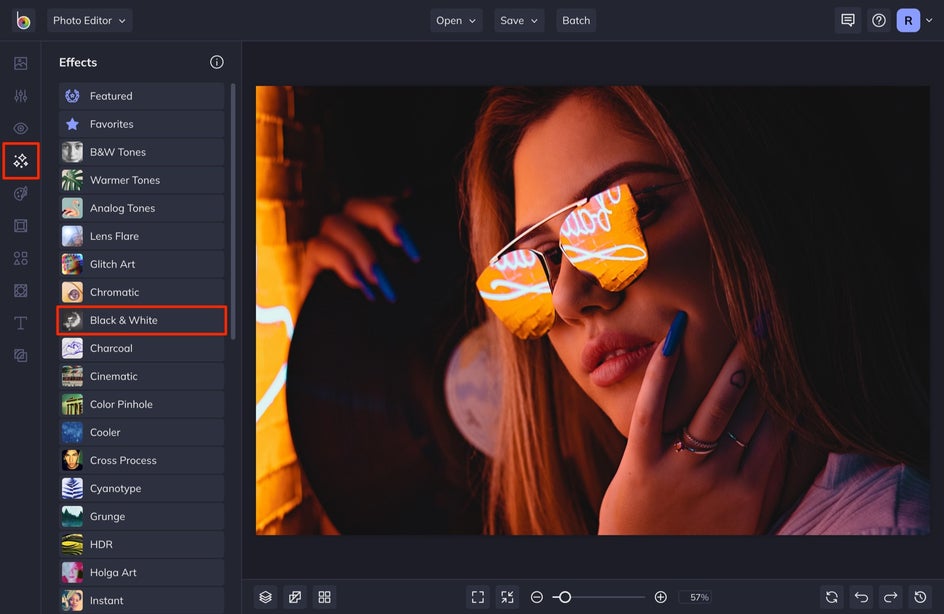
Clicking through any Black & White effect will show you a preview of how it will look on your image. Try out as many as you want! When you find one you love, click on the Settings menu on the effect thumbnail.
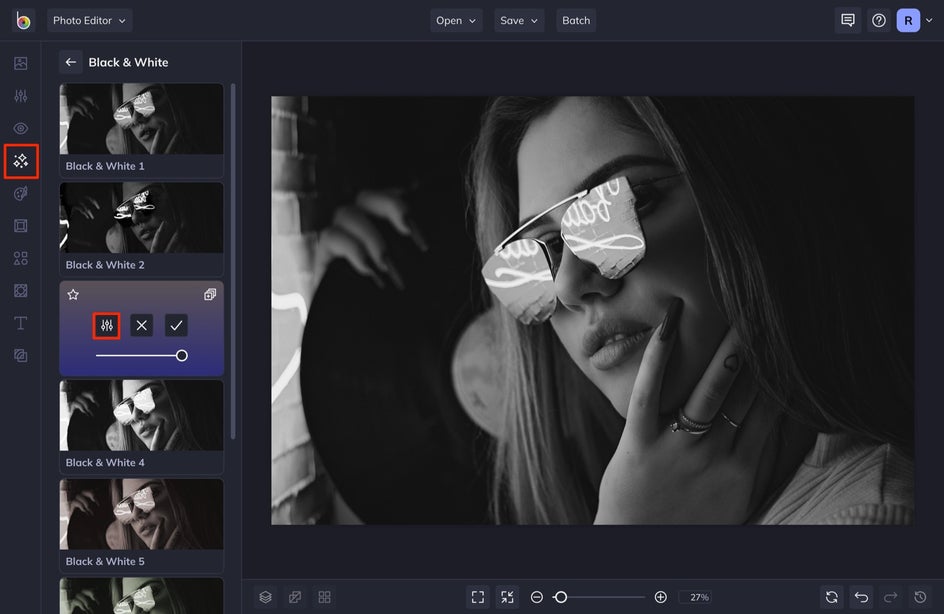
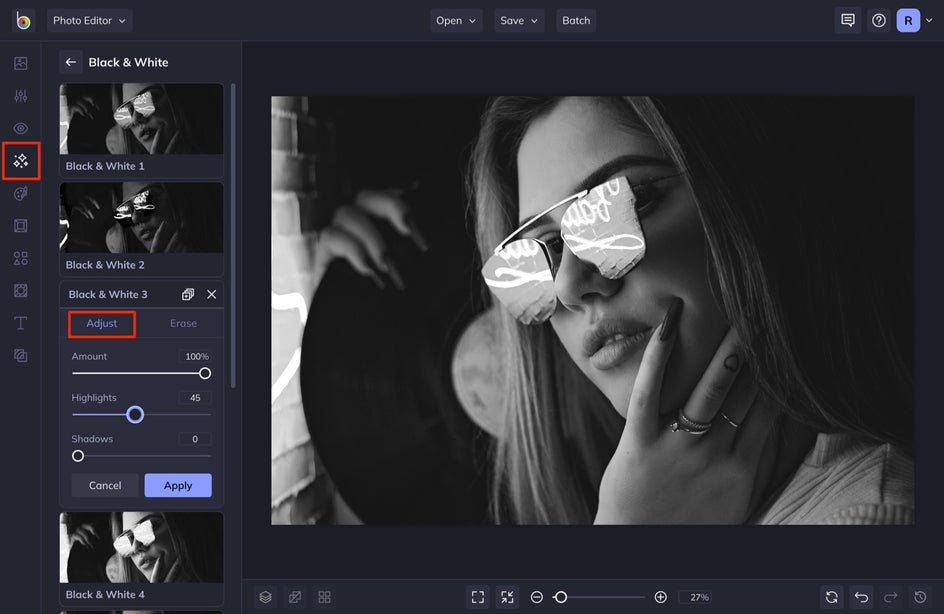
In the Settings menu, you’re able to adjust additional elements of the effect like Highlights, Shadows, and Amount. Feel free to play around with these settings until your Black & White effect looks perfect. Then, click on the Erase tab.
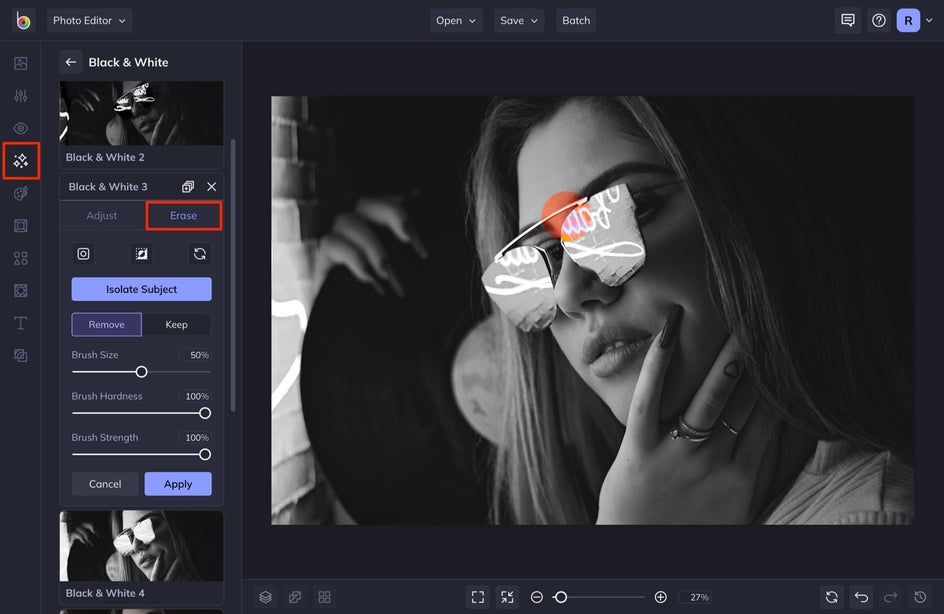
Step 3: Using Erase Mode
In Erase Mode, you can erase over a section of your black and white photo that you want to remain in color. You will notice that the black and white dissolves away as you move your selected cursor over your image. To get the look just right, be sure to adjust the brush settings like Brush Size, Brush Hardness, and Brush Strength. We’ll cover these options next.
If you have a busier image that you’re having a hard time manually editing, try selecting Isolate Subject. This is a smart button that does all of the work for you by locating the main subject and masking it out. You can also select Invert. After you do this, if it needs a little cleaning up, use the brushes above. For more information, check out this post!
Brush Hardness refers to the straightness of the edge of the brush. You will see that the higher your percentage of hardness the sharper the outside edge is, as shown in the above image. The lower your percentage, the softer or more diffused the outer edge is, as shown in the image below. Finding the right balance of Brush Hardness will make it easier to erase and make everything look natural.
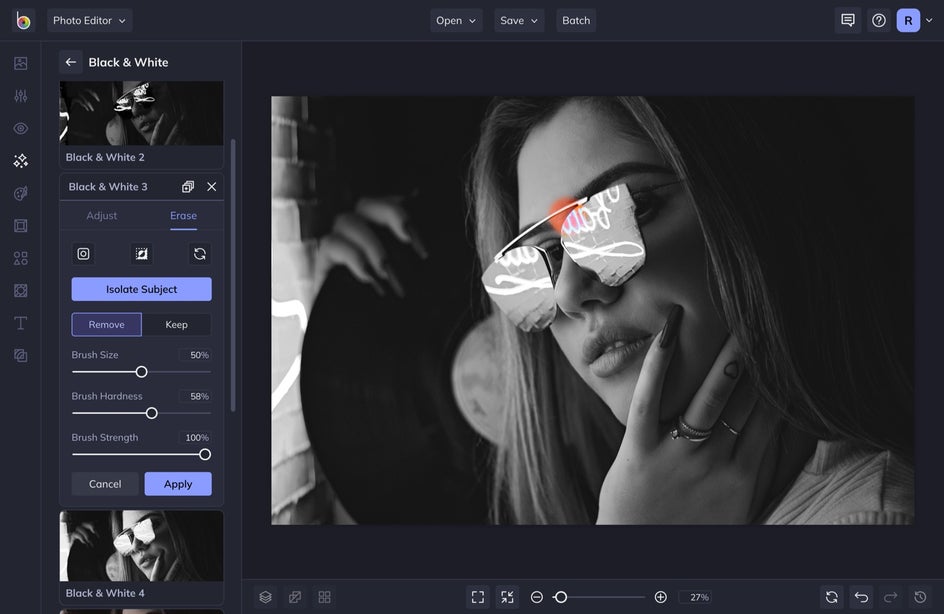
Brush Strength refers to the strength of the brush, or in this case, how powerful and vibrant the color will appear over the erased selections. The lower your percentage of Brush Strength, the more desaturated the erased portions will look. Keeping the percentage at full strength will make the color pops as vibrant as possible.
When you’ve got the perfect brush settings, erase the subject in your image. Zoom in on your photo in order to get very detailed - the more detailed you are, the more realistic the photo looks!
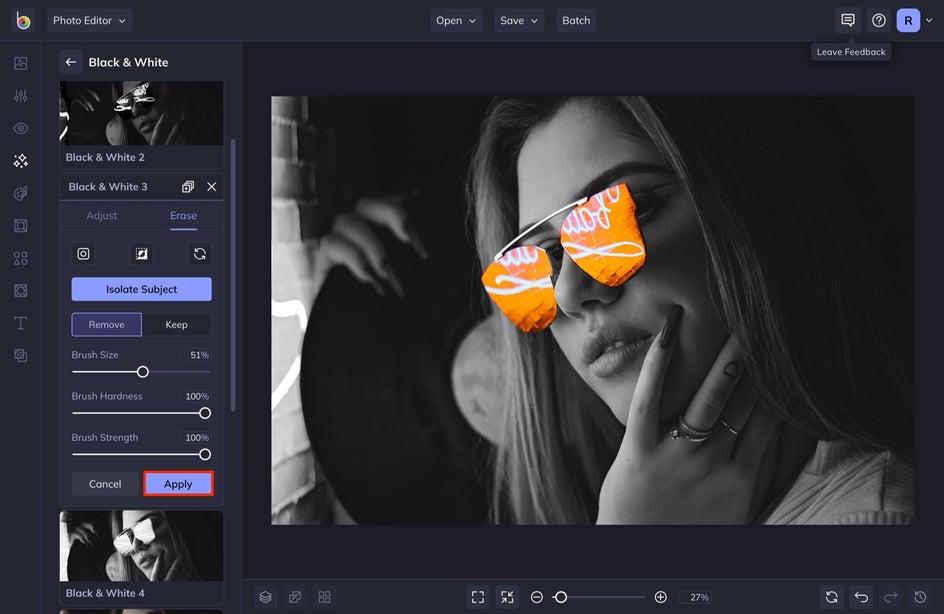
Don’t be afraid of messing up! You can always click the Undo/Redo buttons (the arrows in the bottom menu) or simply use the Erase button in the Erase Mode menu and re-paint over the part you colored. Once you feel you have worked your magic, click the blue checkmark to apply everything!
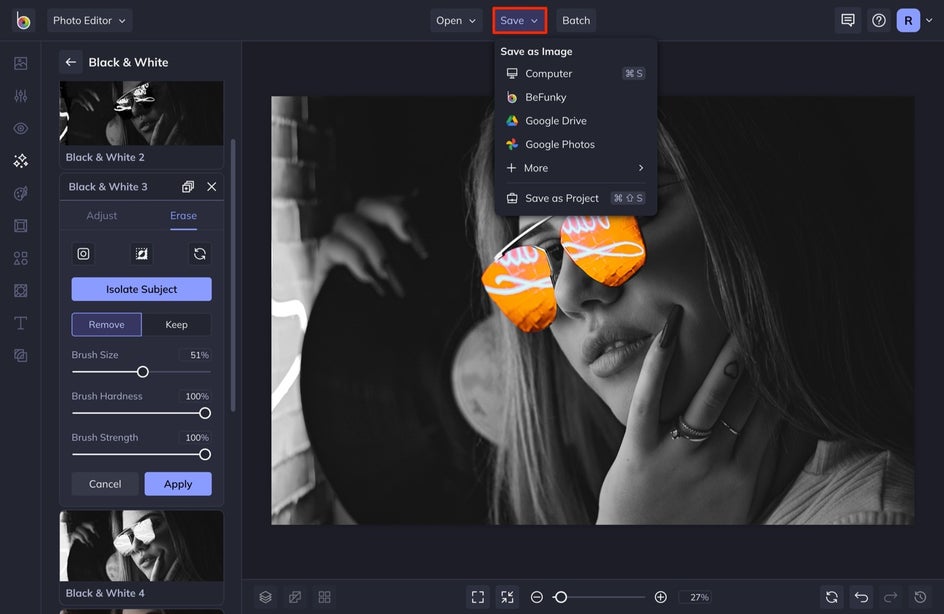
Step 4: Save the Photo
Now all that’s left to do is save your work. Click the Save button at the top of the page and select your chosen destination and file format. If you’re not quite finished and want to save your work in an editable format, be sure to choose the Save as Project option.
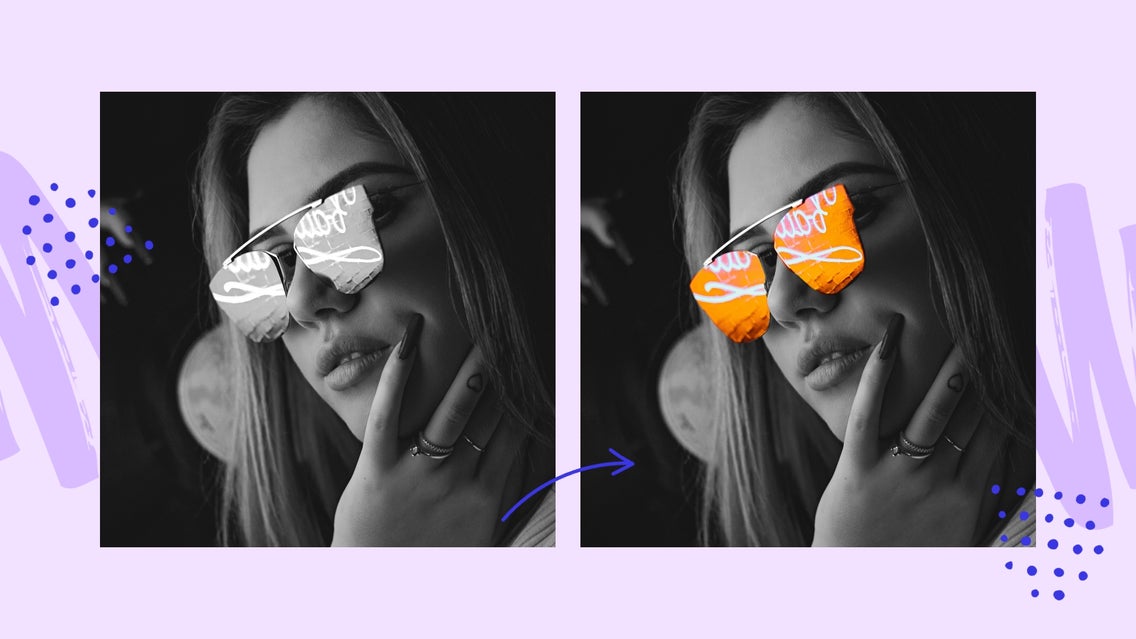
Before and After
Try experimenting with adding color pops to your black and white photos using BeFunky’s Photo Effects. This is a great technique to use when you are wanting to add a little whimsy to your photos, draw attention to a specific subject, or single out one particular thing from a group or pattern.