Add a Lens Flare Effect To Your Photos
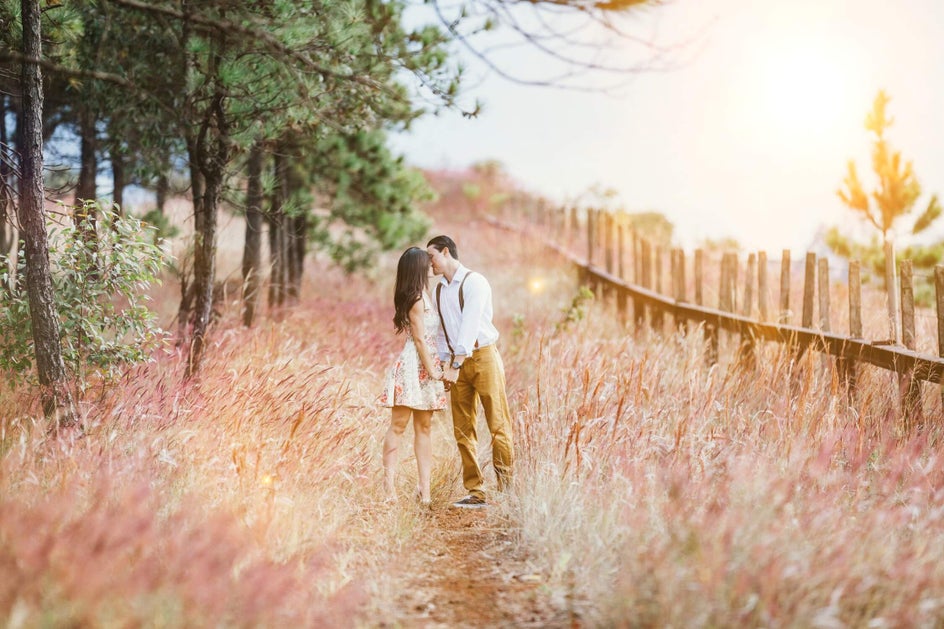
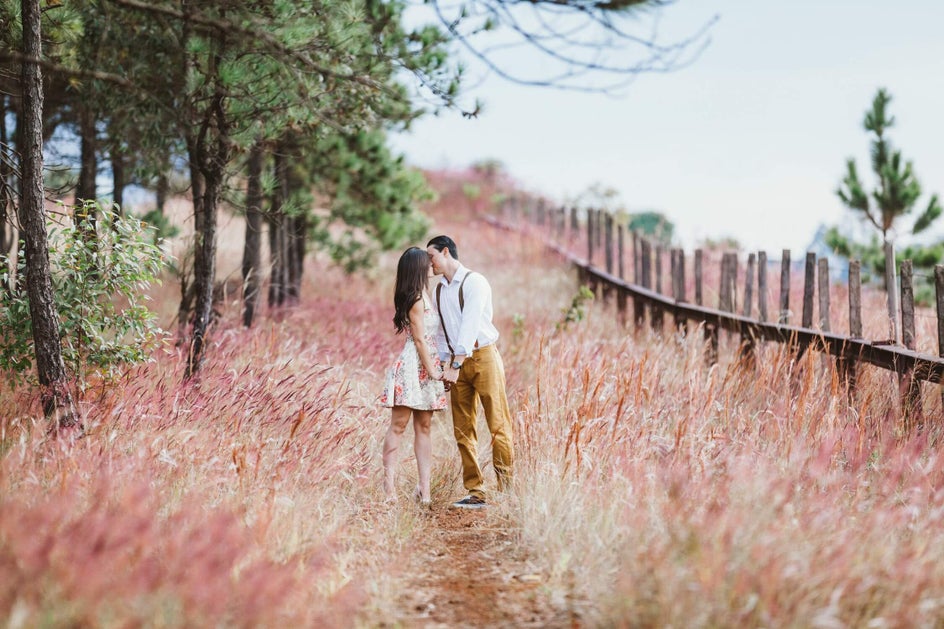
The golden hour is a beloved and somewhat sacred time of the day for some people. It’s that time of day just before the sun sets, and the sky begins to take on a mesmerizing pinkish-orange ombre. It’s a stunning sight to see, and quite obvious why so many people rush out to photograph the sky around this time. Unfortunately, sometimes our photos fail to truly capture the sun’s photogenic flare as we see it through our eyes. But no worries, BeFunky's Lens Flare effect gives you the power to make the sunshine just how you like it. In photos containing sunrises or sunsets, the Lens Flare effect helps to enhance the beauty in the light you’ve already captured. It can also add drama to sunlight by making it appear as though it's reflected perfectly off your lens, capturing those fragments of light we all love.
When to Use Lens Flares
While the Lens Flare effect is optimal for enhancing photos with sunlight, there are a few other use cases where it also shines. These include:
Landscape Photography
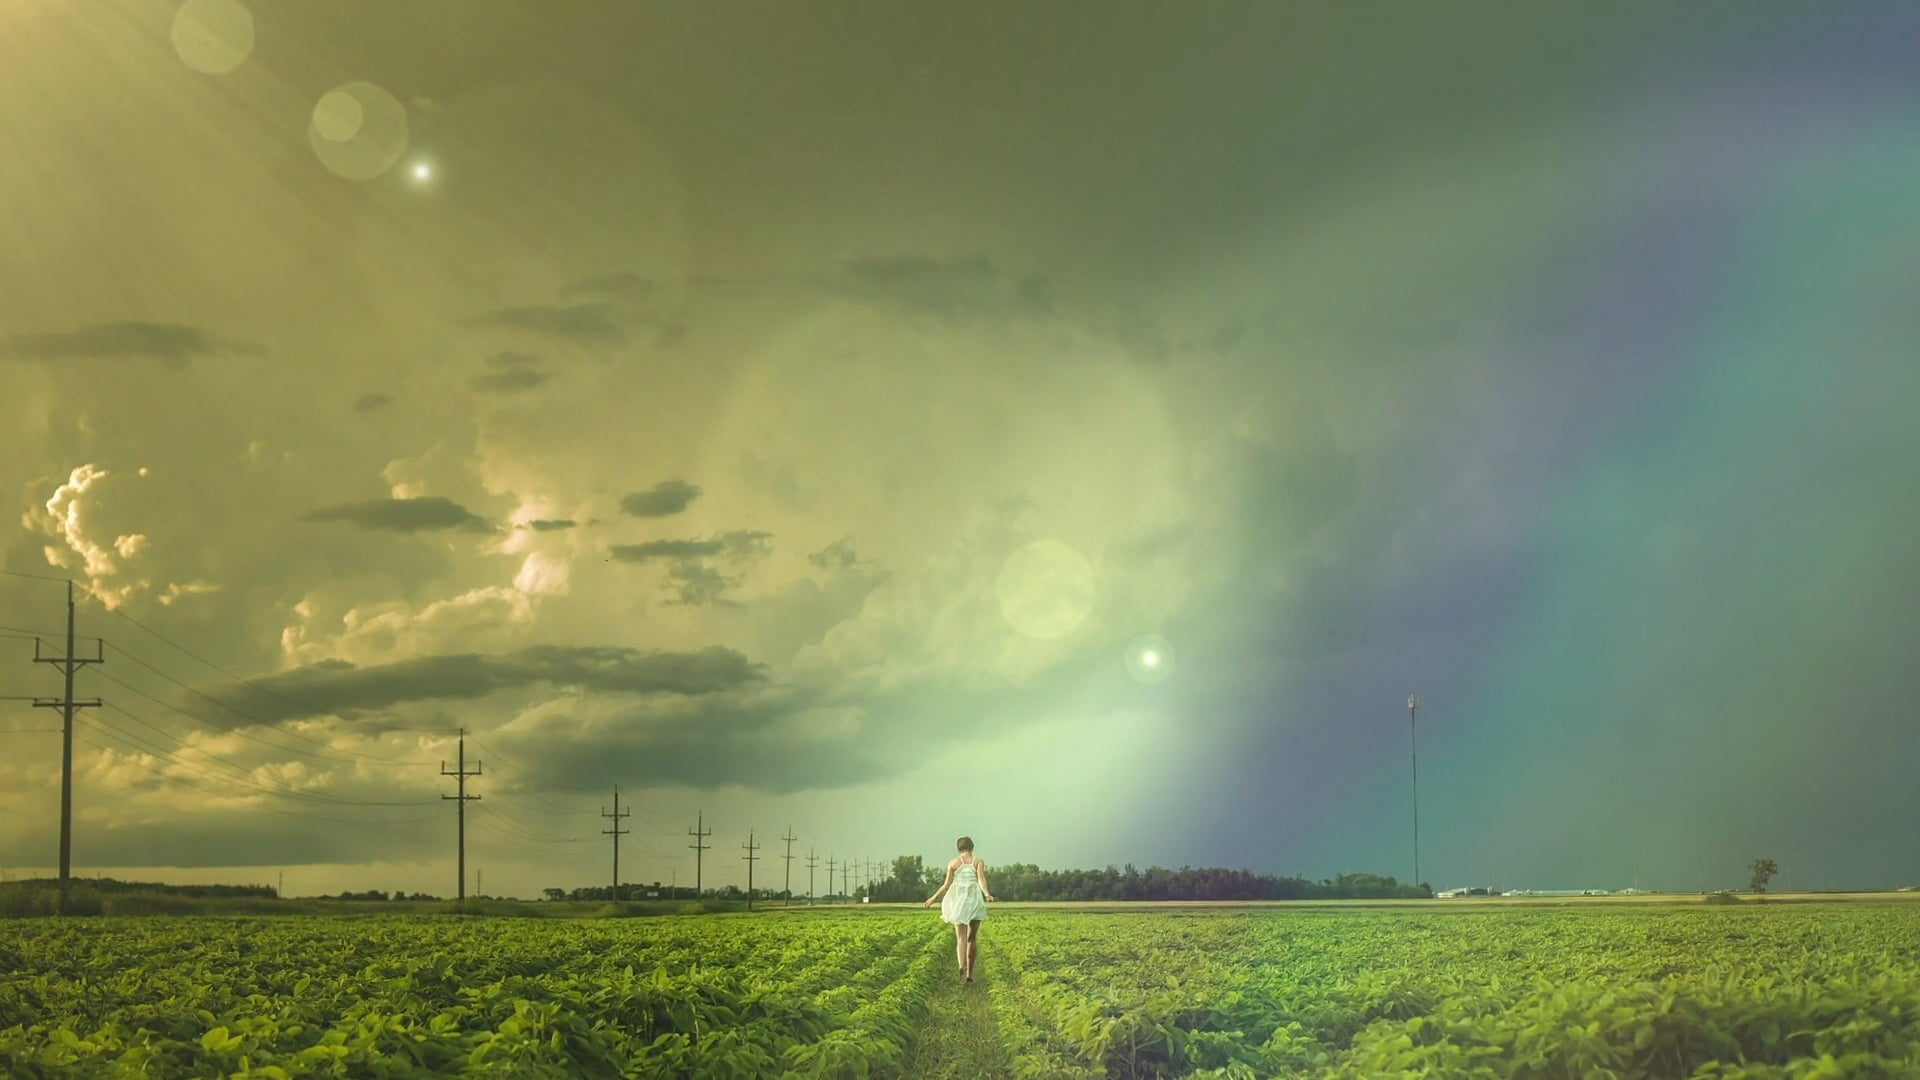
Have you ever captured a stunning landscape, only to notice it lacks a certain pizzazz in-camera? Even in images taken on the most overcast of days, a lens flare can quickly add another much-needed dimension to your photo. It can mimic that stunning moment the clouds part to let the sunshine through, or even replicate how light particles bounce off the water’s surface and onto your lens.
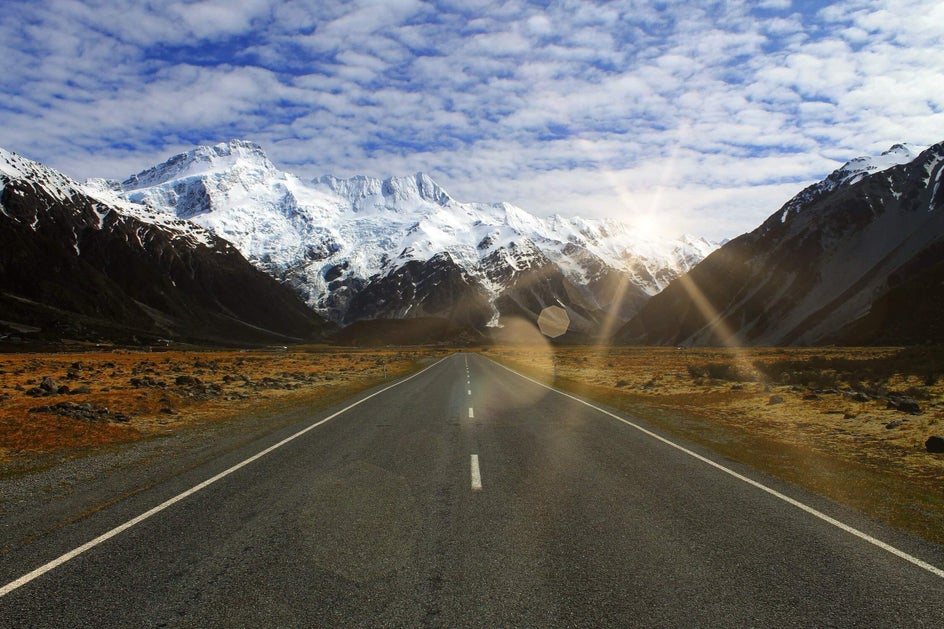
You can also use our lens flare effects to draw attention to certain elements within your frame, such as the rolling green hills over to one side, or a person as they walk off into the horizon.
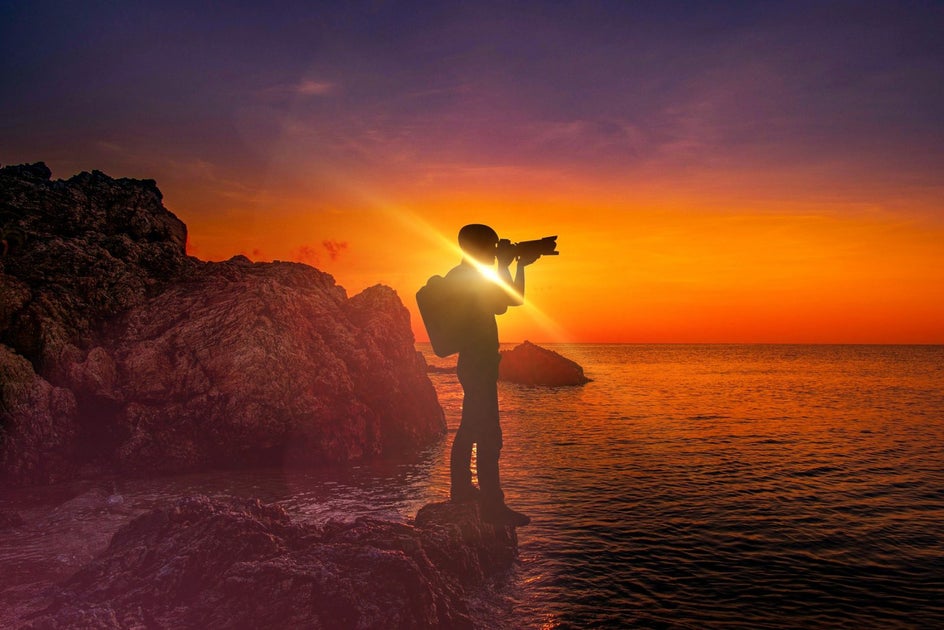
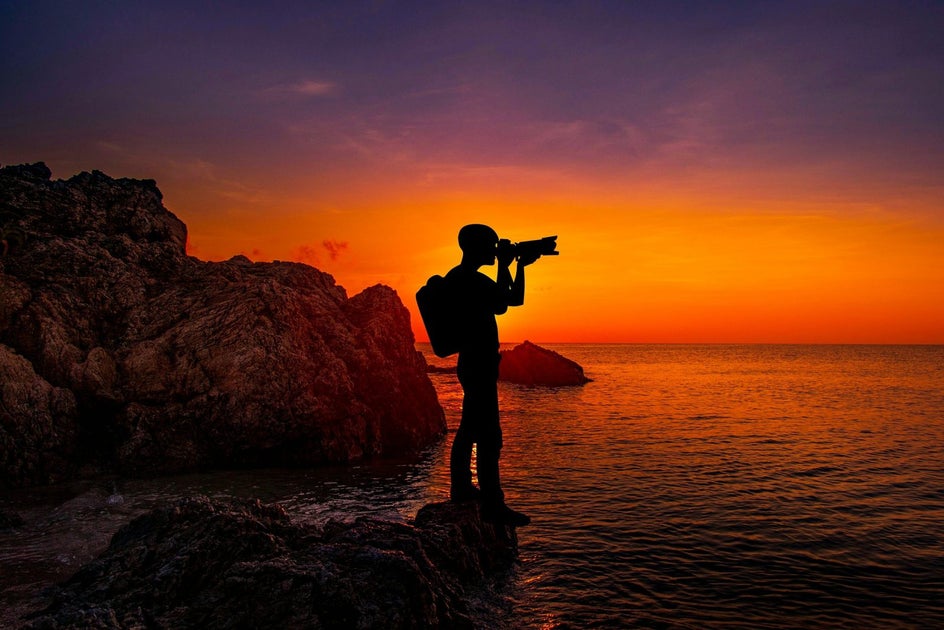
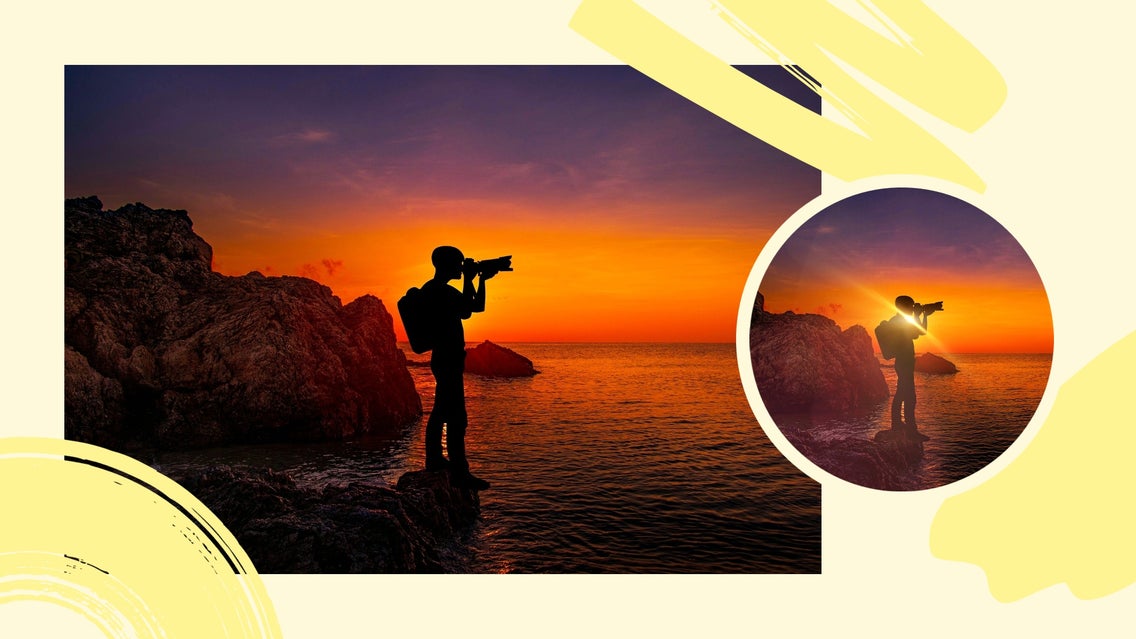
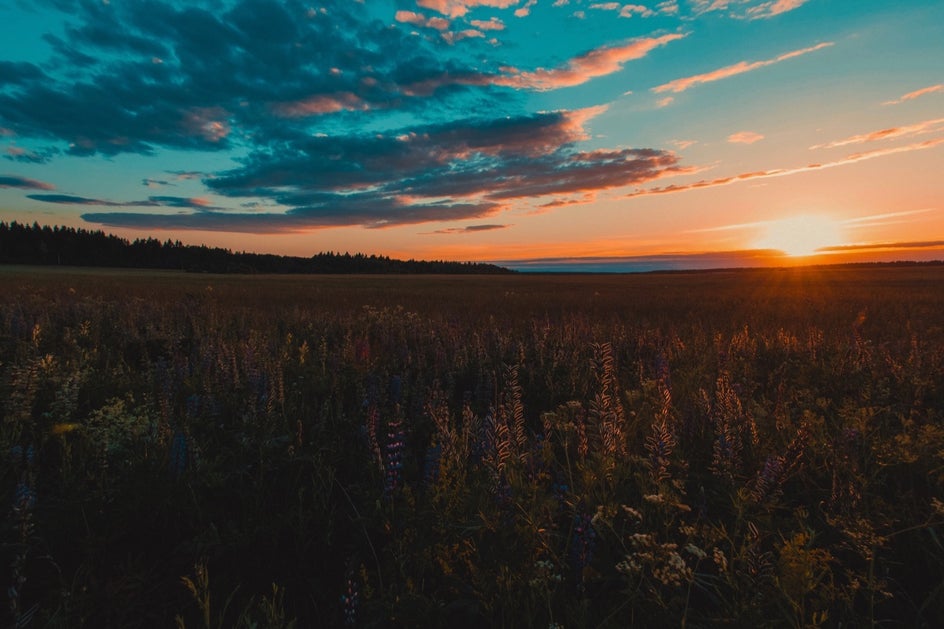
Sunrises and Sunsets
Our lens flare effects are particularly powerful in photos containing sunrises or sunsets, as they work to enhance the beautiful light that you’ve already captured. Lens flares also have the ability to increase the drama of the sun, making it appear as though it's reflected perfectly off your lens to capture those fragments of light we all love.

Portrait Photography
When it comes to portrait photography, you’ve probably heard a million times that golden hour is the best time to shoot. But what if the sun doesn’t turn up? One of the easiest ways to achieve that sun-drenched, backlit effect is with our lens flares, meaning that there’s no need to re-capture your portraits due to a lack of sunlight.
To Add Bling
If you’re looking to enhance things like jewelry, headlights, or anything that reflects light, then we have a Lens Flare effect for that too! Our Glint Lens Flare effect is perfect for adding bling to specific elements to really make them pop! It’s great for product photography or amplifying that engagement ring shot.


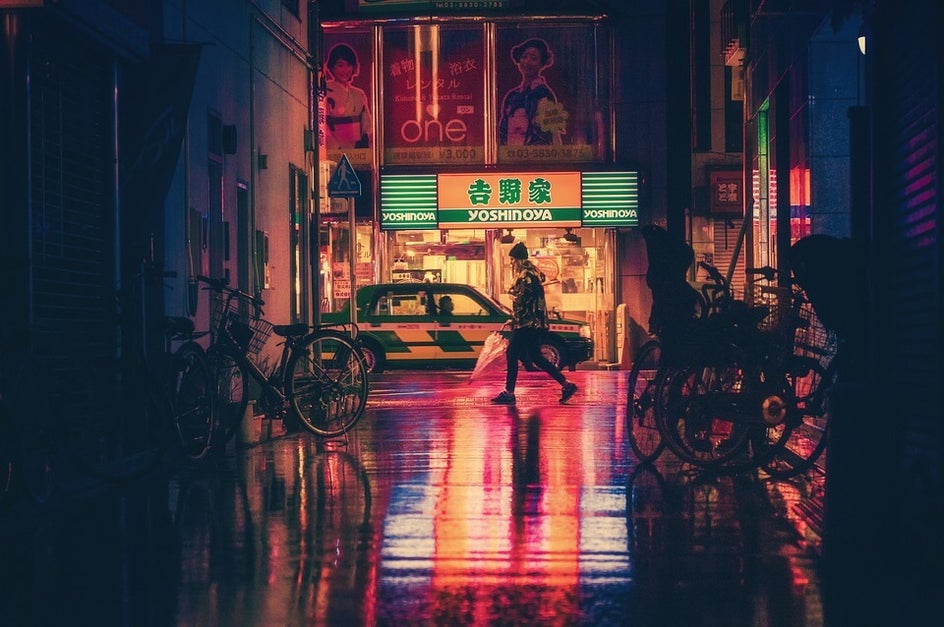
Night Photography
This might sound counterintuitive, but our Lens Flare effects are perfect for photos captured at night! All you need is a pre-existing light source to make it look realistic, and the effects will do the rest. Our Nova, Performance, Iris, and Elysium effects are an excellent complement to street lights and moving lights in a busy cityscape during those darker hours.

How to Add a Lens Flare to Your Photos
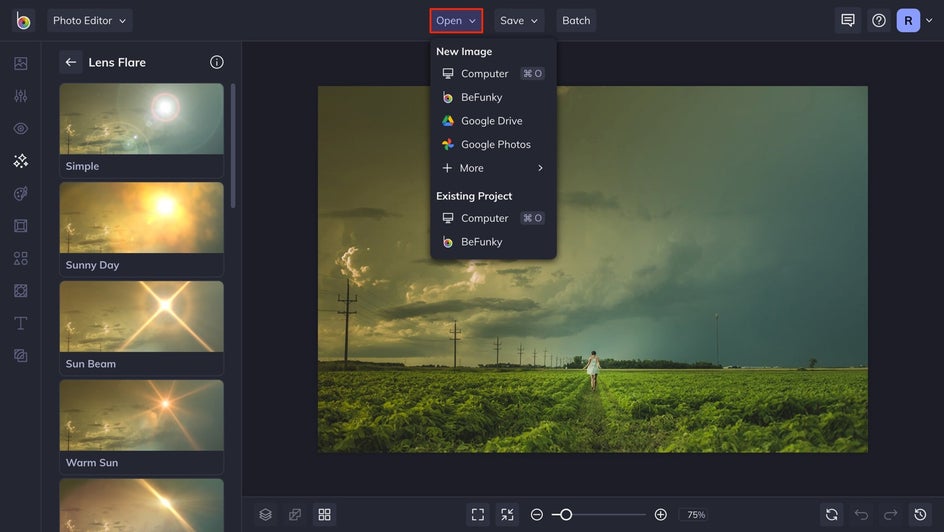
BeFunky's Lens Flare effect allows you to create realistic starbursts and sun flares. If you’re ready to add some serious flair to your photo (pun intended), click here to open the Lens Flare tab in the Photo Editor and keep reading to follow the rest of the tutorial.
Step 1: Upload Your Photo
First, start by uploading your photo. Click Open at the top of your canvas and select your desired photo. Or simply drag and drop your image directly from your computer.
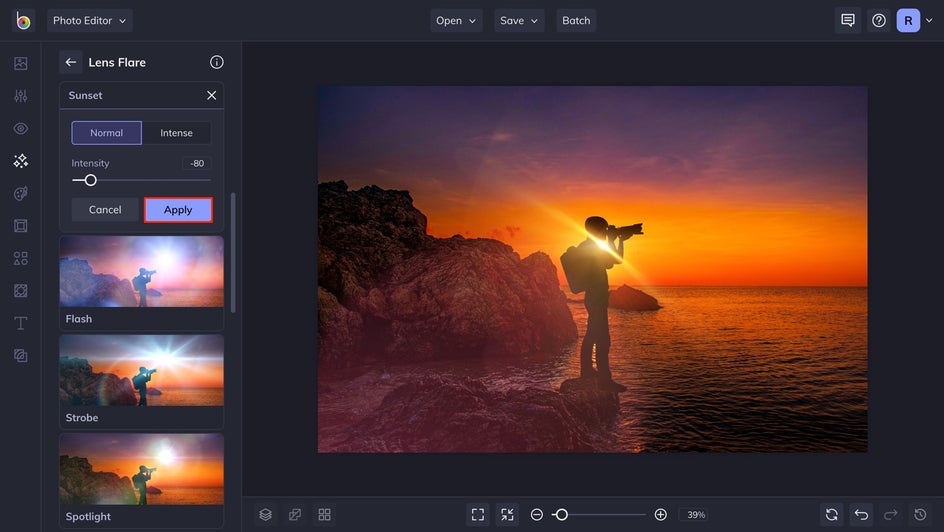
Step 2: Choose a Lens Flare Effect
Once your photo is uploaded, choose your favorite Lens Flare effect. After making your selection, targets will appear on your photo, allowing you to click and drag to adjust the position of the lens flare.

Once your flare is in place, use the settings options to edit the intensity of the effect. When you’re happy with the look, click the Apply button to save your selections.
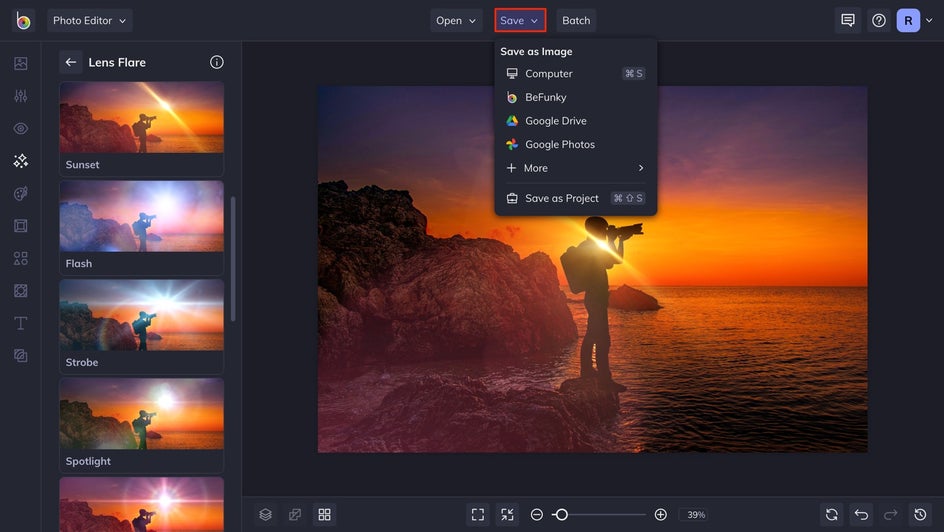
Step 3: Save Your Photo
With everything finalized, the last step is to save your photo. Start by clicking the Save button at the top of your canvas and saving your photo to your desired destination.
Add Some Flair to Your Photos
If you need help bringing out the drama in your sun-drenched photos, then our Lens Flare effect is just the tool you need to give your photos an artistic sense of realism. By replicating the natural effect of light refracting off a lens, your photos will allow your viewers to truly experience the beauty of light just as you do behind the camera. With just a few clicks, you can wield the sun’s shine to showcase your photos in an all-new light with BeFunky!