The 3 Best Tools To Remove Backgrounds In Photos
Whether you need to create a transparent background for uploading images to the web, or erase the background of an image layer to replace the background entirely, BeFunky’s Photo Editor is home to three powerful tools to help you make it happen. Between our automatic Background Remover and the ability to cut out objects from photos manually, no background is too complicated to remove! Simply choose the areas of the photo you’d like to make transparent and our photo editing tools will take care of the rest.
3 Best Tools For Creating Transparent Backgrounds
Here are the best tools for the job, plus instructions on how to remove photo backgrounds with them:
The Cutout Tool
The Cutout tool is perfect for cutting objects out of your photos and removing the background entirely. It’s the most ideal option for erasing busy photo backgrounds and isolating subjects. This tool comes with an automatic Background Remover and plenty of incredible brush options, and depending on the type of image you’re working with, here’s an overview:
Images With a Defined Subject
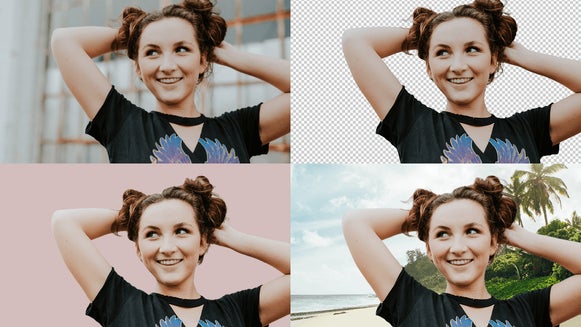
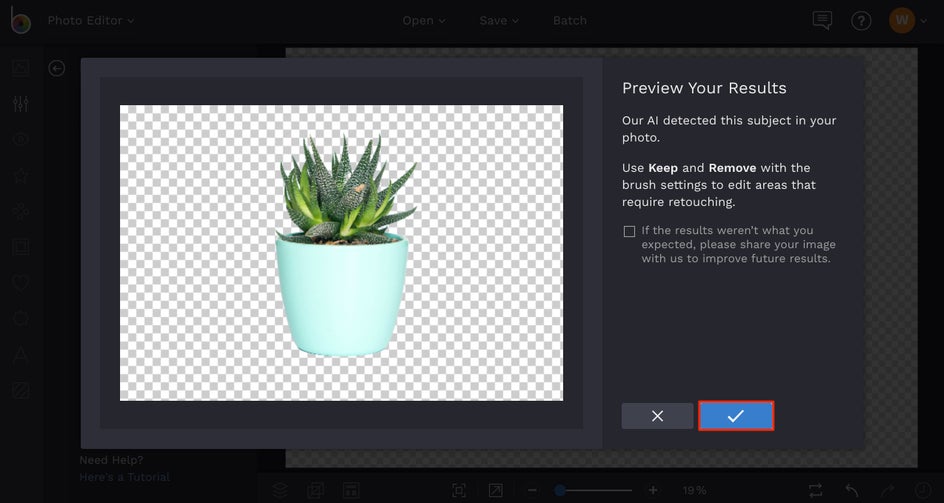
If your image has a main subject, such as a portrait, product photography, or any image with an object as the focal point, the Background Remover is the way to go. After selecting the Cutout tool from the Edit menu, simply click the Remove Background button.
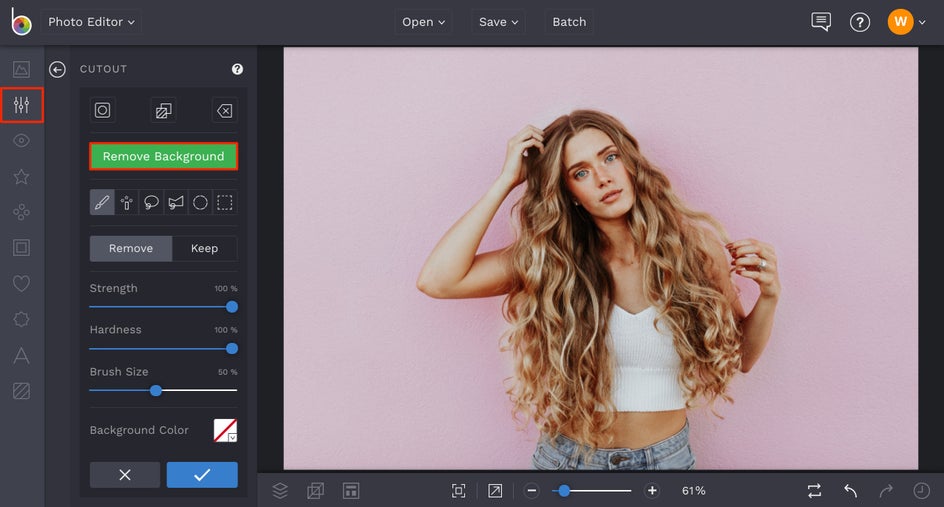
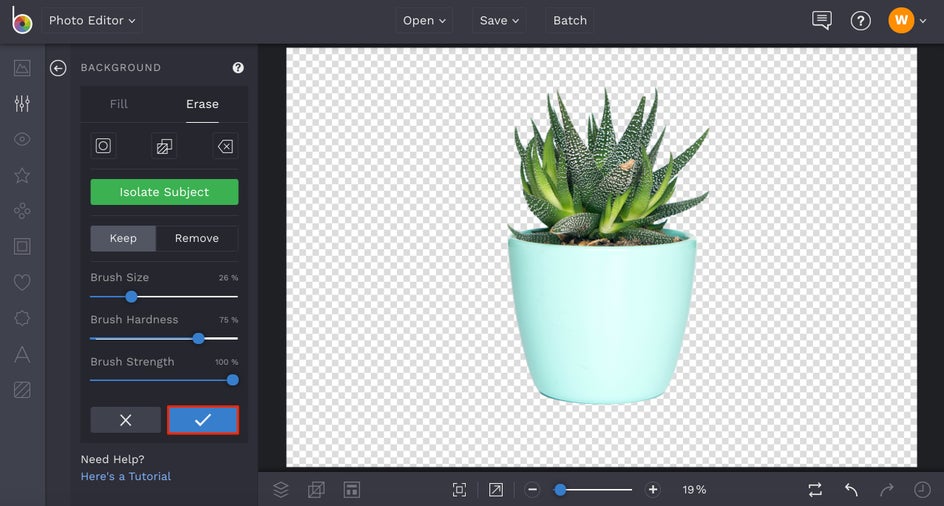
A preview of your image will appear, showing the subject that our AI-powered Background Remover detected with a transparent background. If there are some areas that need to be touched up, fear not. You can always use the Cutout tool brushes to clean up those areas after selecting the blue checkmark.
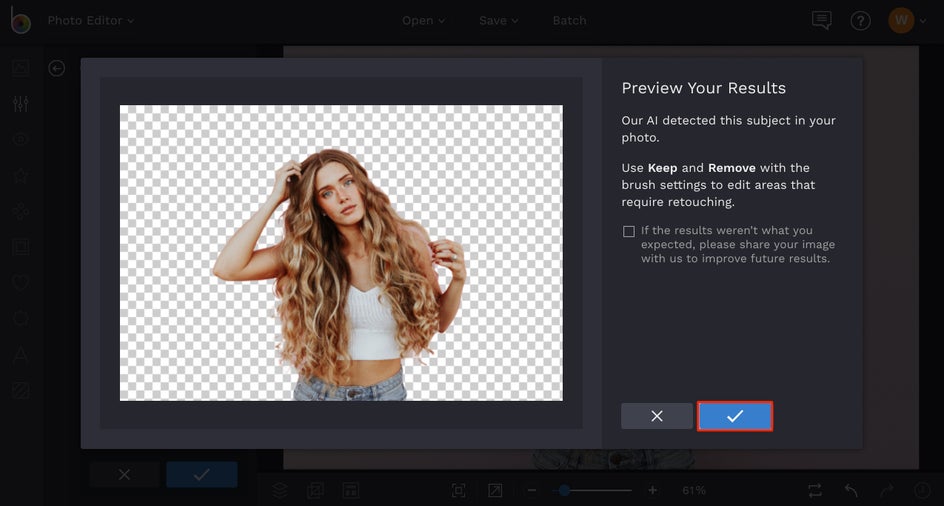
In most photos with a defined subject, our automatic Background Remover works on even the busiest of backgrounds.
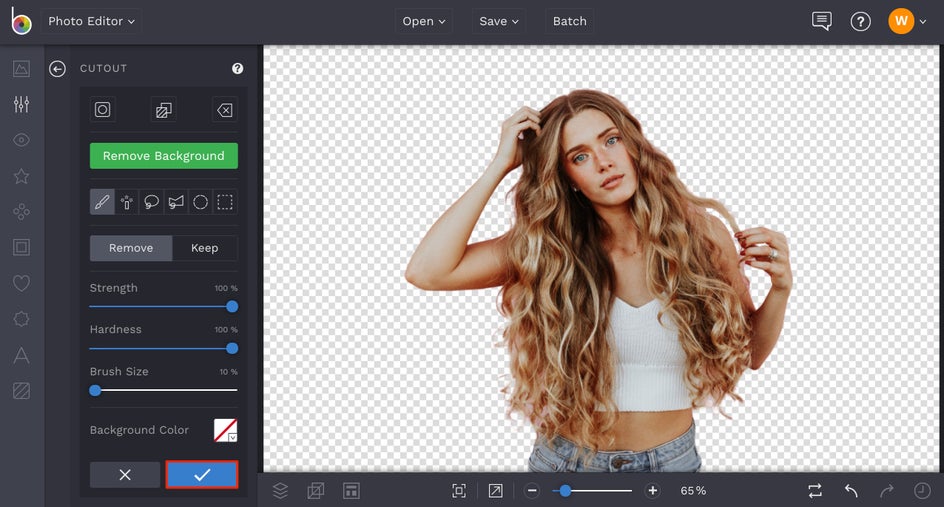
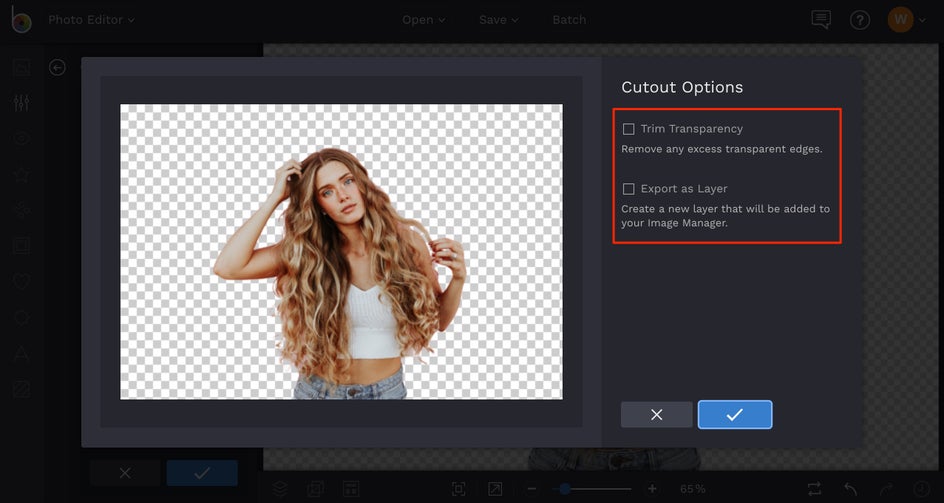
From here, you can continue using the Cutout tool brushes to detail any necessary areas. When you’re finished, click the blue checkmark to confirm. A Cutout Options menu will appear, asking if you want to Trim Transparency and/or Export As Layer. Choose Trim Transparency if you want to trim excess transparent areas from around your subject. Choose Export As Layer if you want to create an image layer from this cutout and add it to the Image Manager.
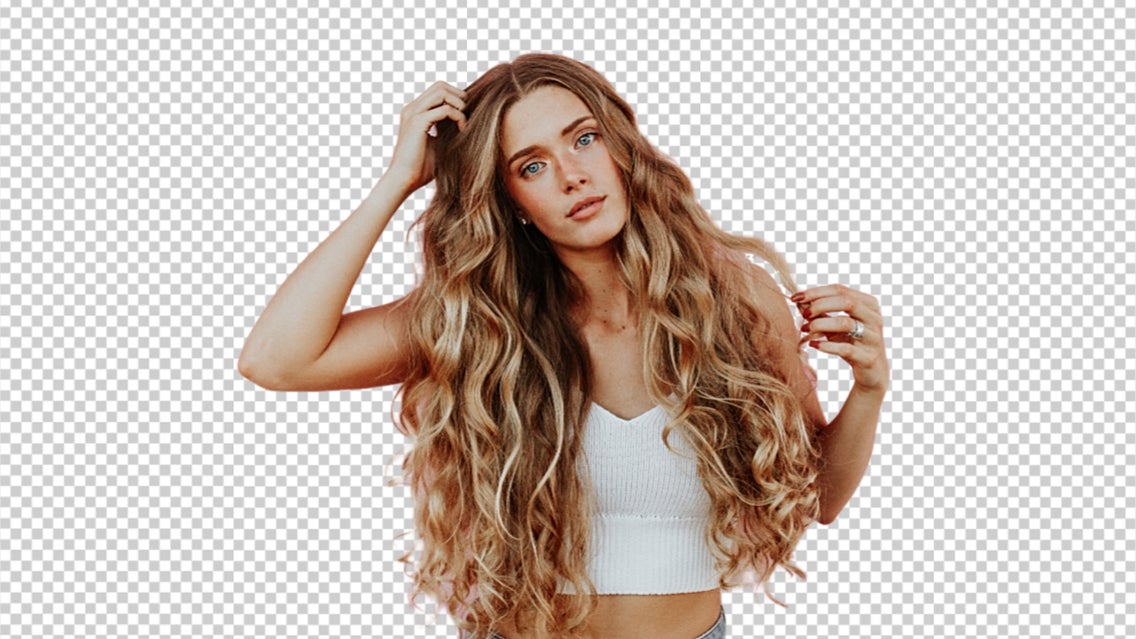
After you’ve applied the Cutout tool and you’re ready to save the image, be sure to choose the .PNG option in the Save to Computer menu. This will keep the background transparent after saving, while other options will keep the background checkered.
Images Without a Defined Subject
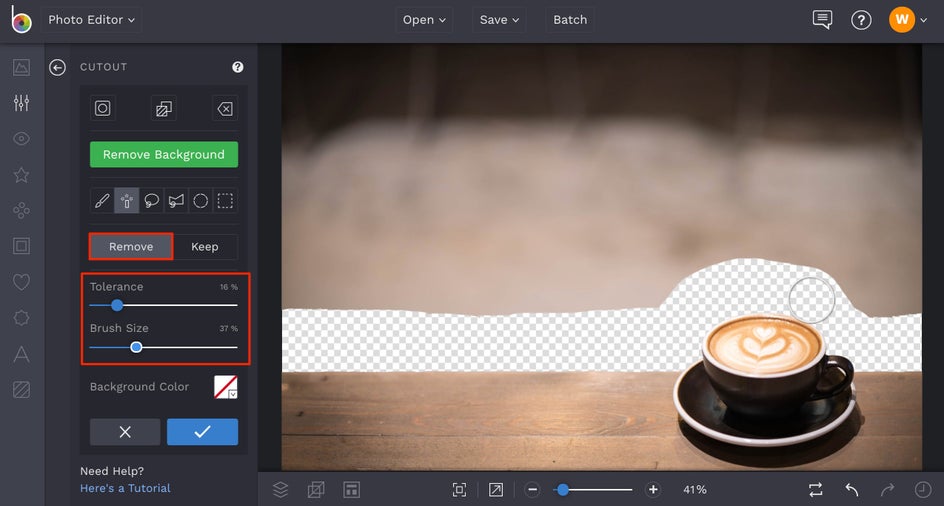
For images that don’t have a defined subject, have multiple subjects, or ones where you simply want to cut out a random object, the brushes in our Cutout tool are your best bet. After selecting the Cutout tool from the Edit menu, you’ll need to first determine which brush to use for easily cutting out your object. If your object is irregularly shaped, choose the Magic Brush, Lasso, or Paint options. If your object is geometrically shaped, choose either the Polygonal Lasso, Circular, or Rectangular options. For this tutorial, we’re going with Magic Brush since it’s ideal for removing most backgrounds, even if they’re complicated.
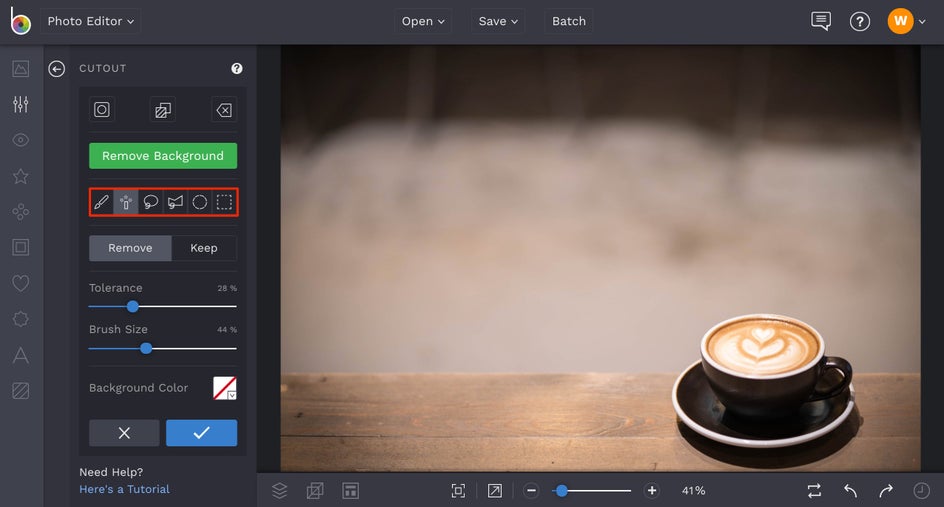
After clicking the best Cutout tool brush option, make sure the Remove button is selected and carefully use your mouse to cut out the object. Be sure to play with the different slider options like Brush Size and Tolerance to ensure precise cutting. For example, with Magic Brush, more Tolerance will include more of the colors you paint over in the removal process, so if your object is similar in color to the background, be sure to keep the Tolerance lower.
Once you’re finished outlining the object with transparency, either paint over the rest of the background with Magic Brush or use another brush (Paint works really well for this part) to paint the transparency over the rest of the background.
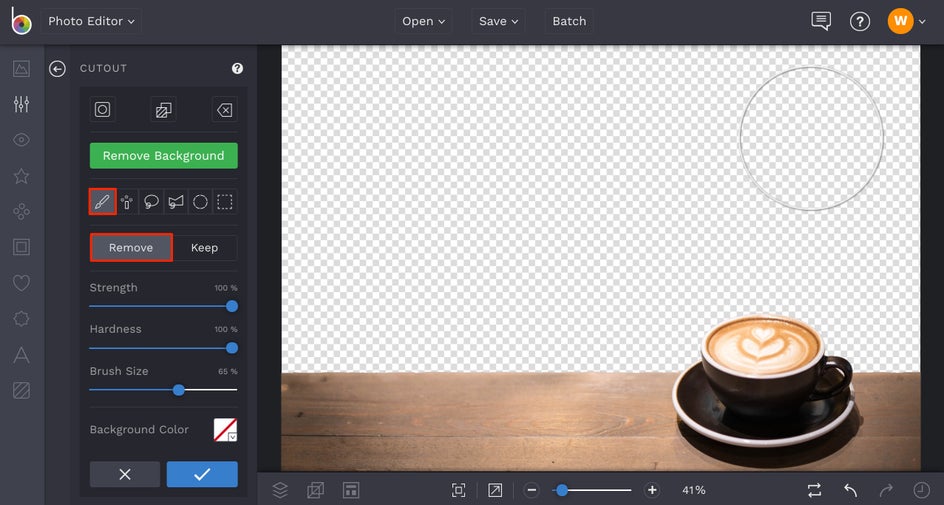
When you’re finished creating your transparent background, click the blue checkmark to apply the edit and choose your Cutout Options. Again, when you go to save your image, you’ll want to choose the .PNG option to keep all the checkered areas of your photo transparent.
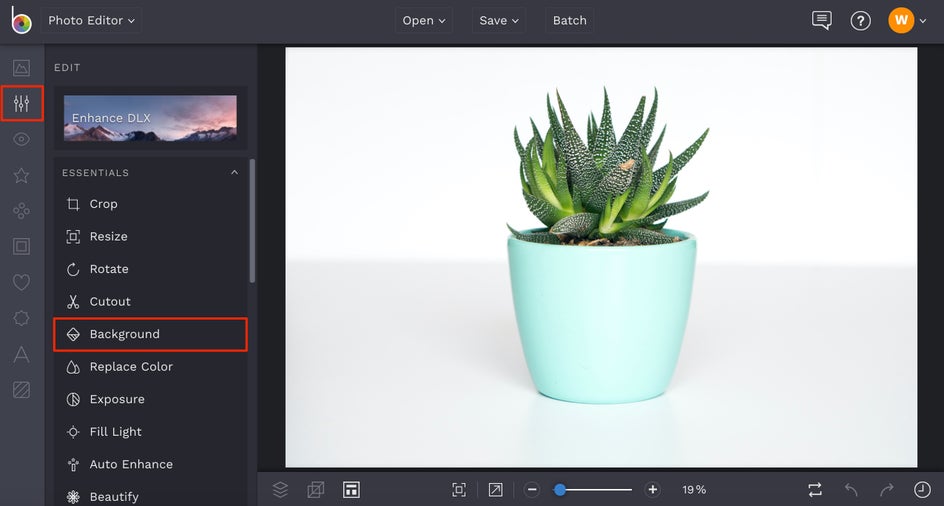
The Background Tool
Just like the name implies, the Background tool is perfect for editing the background of your photo. After clicking on the Background tool in the Edit menu, you’ll see that your entire photo is transformed into a transparent (checkered) background. Don’t be alarmed, we’ll show you how to use it in Erase Mode to isolate your subject and erase only the areas of the image you want.
With the Transparent box still checked, click the Erase tab (next to Adjust), followed by the Isolate Subject button.
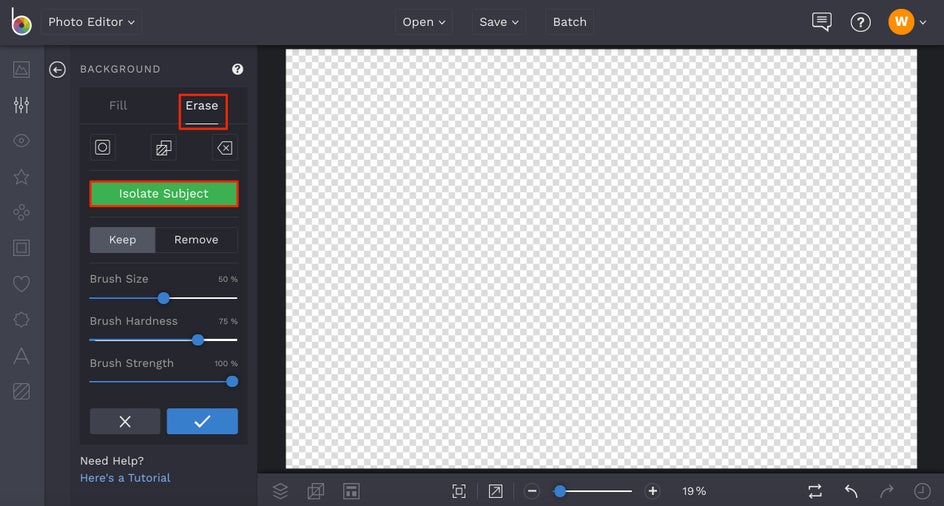
Using our AI-powered Background Remover technology, the Isolate Subject button detects the main subject in your image and erases the background around it. You’ll see a preview of your image with the background removed after clicking it.
Note that if there are areas that need to be touched up, you can always use the Keep and Remove buttons with the brush settings to clean up portions of the subject or background. When all looks perfect, click the blue checkmark to apply the Background tool.
As always, be sure to save the image as a .PNG in the Save to Computer menu to keep the background transparent.
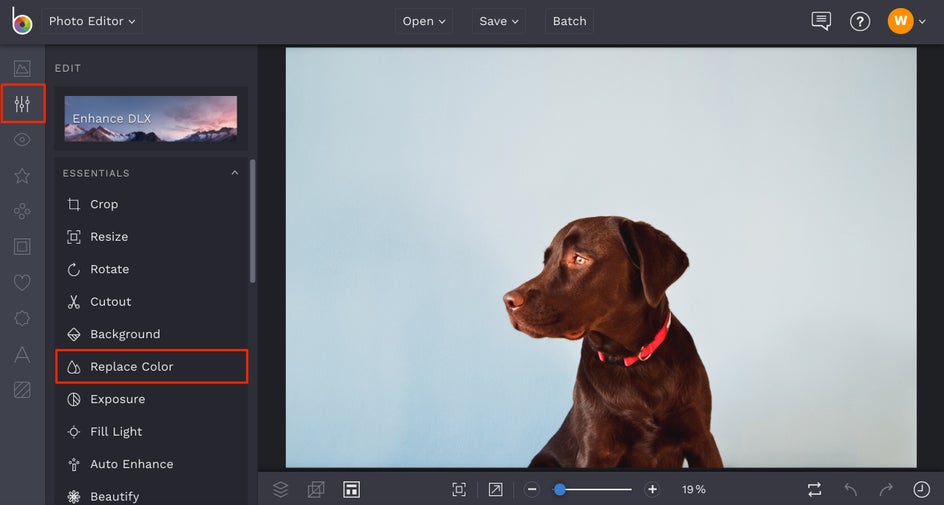
The Replace Color Tool
Perfect for solid colored backgrounds, the Replace Color tool will replace the background color in your image with a transparent background, all in a few clicks!
After selecting the Replace Color tool from the Edit menu, click the tile next to Source Color. In the Source Color menu that appears, click the Eyedropper tool and use it to select the background color on your photo.
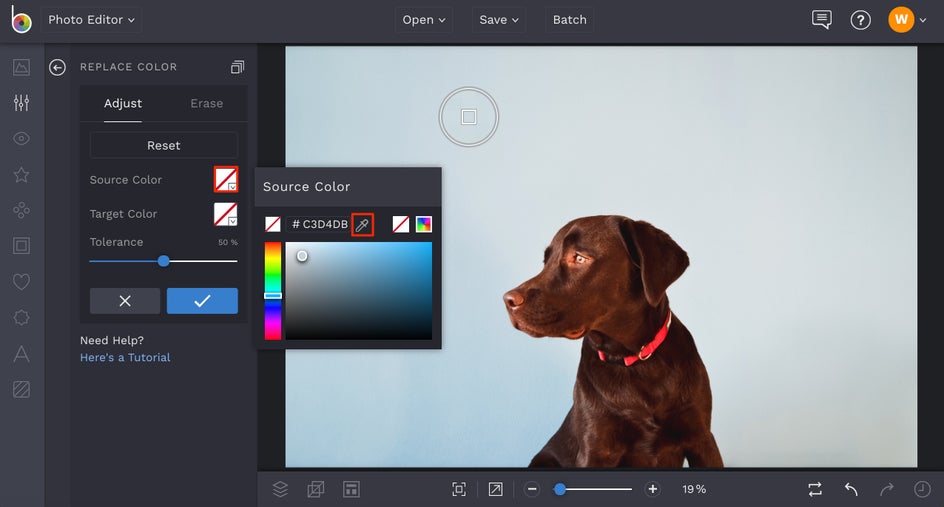
Once you select the background color, you’ll see that everything in that color range turns transparent. If too much of the image has become transparent, fear not! Try turning down the Tolerance slider until only the background is transparent.
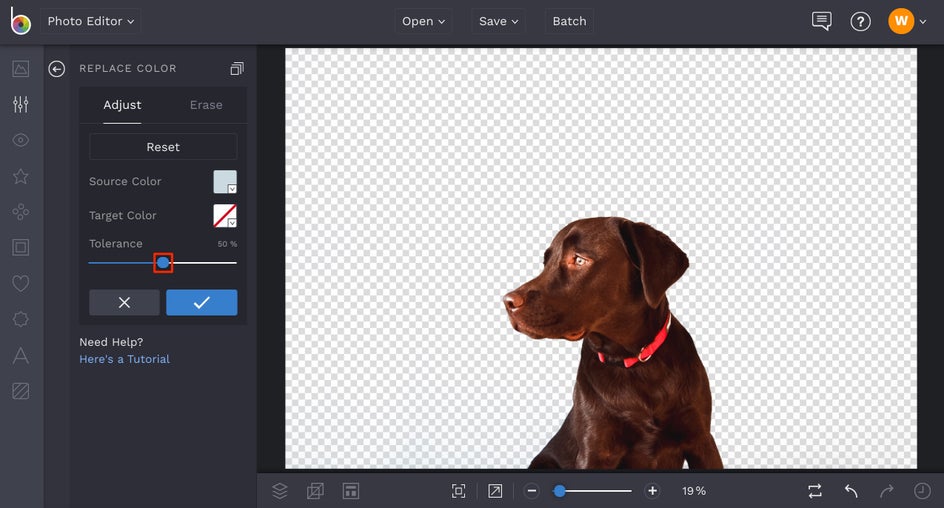
If that still leaves areas that are too transparent or not transparent enough, adjust the Tolerance slider so that the entire background is transparent. Then, click the Erase tab (next to Adjust) in the Replace Color menu. After adjusting the Brush Size and Brush Hardness, use your mouse to erase over the areas where you want to remove transparency.

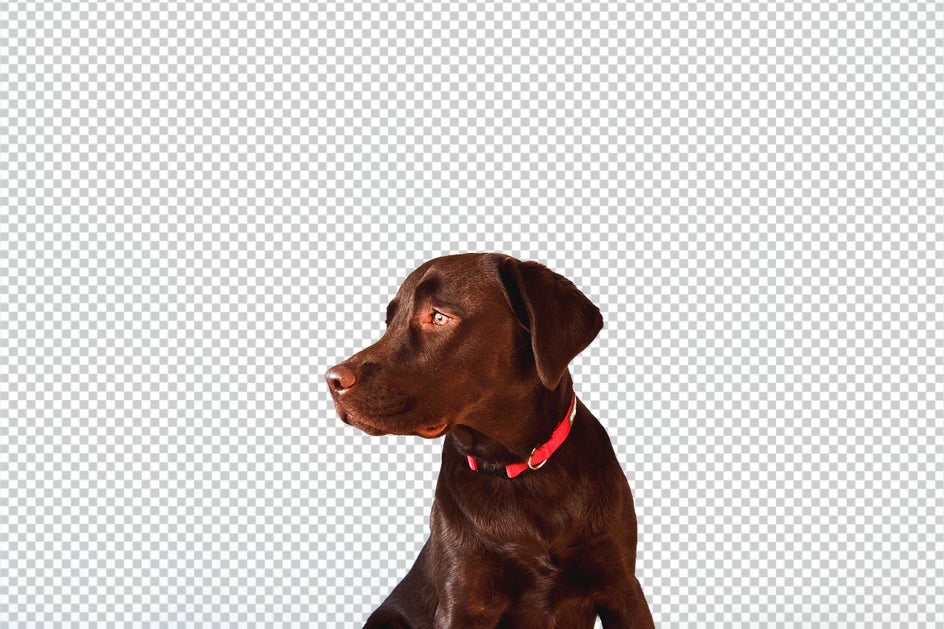
When your photo background is looking perfectly transparent, click the blue checkmark to apply the edits. Then, when you’re ready to save your image, click the Save button at the top of the Photo Editor, choose a destination, and be sure to select the .PNG option to keep that background transparent.

And there you have it: three easy-to-use photo editing tools with plenty of options for erasing backgrounds in your images! Whatever your photo background looks like, BeFunky’s Photo Editor makes it easy to transform it into a perfectly transparent background.
Ready to try these background remover tools? We bet you are! Click the link below to get started.