How to Resize Social Media Templates for Cohesive Posts

If there’s one major tip for social media success, it’s this: cohesivity is key. You want your brand to look the same across multiple social media channels. This brand consistency will help it stick in the minds of potential and current clients, growing your brand awareness through social media marketing.
We’ve already covered this in terms of social media headers, but having a consistent look when posting on multiple channels is one of the most effective ways of increasing brand awareness, boosting your following, and converting leads. This is where BeFunky’s Graphic Designer comes in handy, as it not only has all the social media templates you need to get your message out, but also gives you the ability to resize your design to fit any social media post size requirement!
Resizing Your Social Media Posts
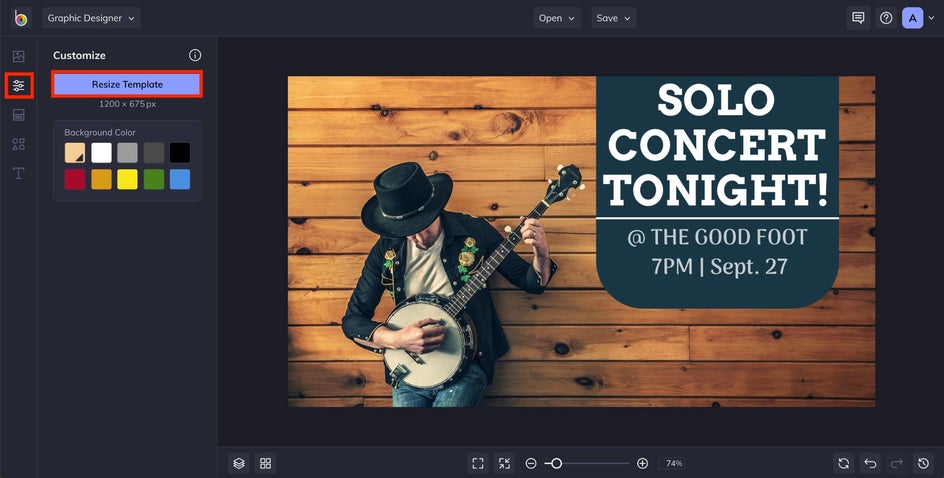
Here, we have a Twitter post that we created by using one of our templates. By swapping out the image and customizing the text and graphics, we've turned it into something unique. Now, let's learn how to resize it to fit other accounts.


Resize to an Instagram Post
Let’s turn our Twitter post into something suitable for Instagram by using the simple Resize Template feature.
Step 1: Resize Your Template
Navigate to Customize in the main icon menu on the left, then click Resize Template.
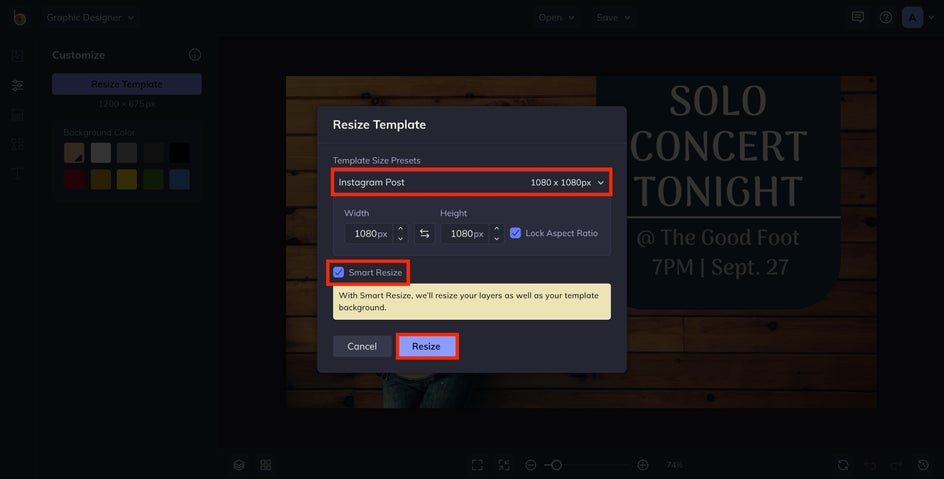
Click the dropdown menu underneath Template Size Presets. You’ll find a huge list of different styles of social media posts. Select Instagram Post from the list.

We recommend keeping Smart Resize checked, as this allows your entire image to be perfectly resized, including the layers, background, and all! Click Resize once you’re ready.
Step 2: Make Any Necessary Adjustments
Once you’ve resized your template, if there's anything you want to change, you can do so within the template by selecting any elements. We’ll go into more detail on this in the next example.
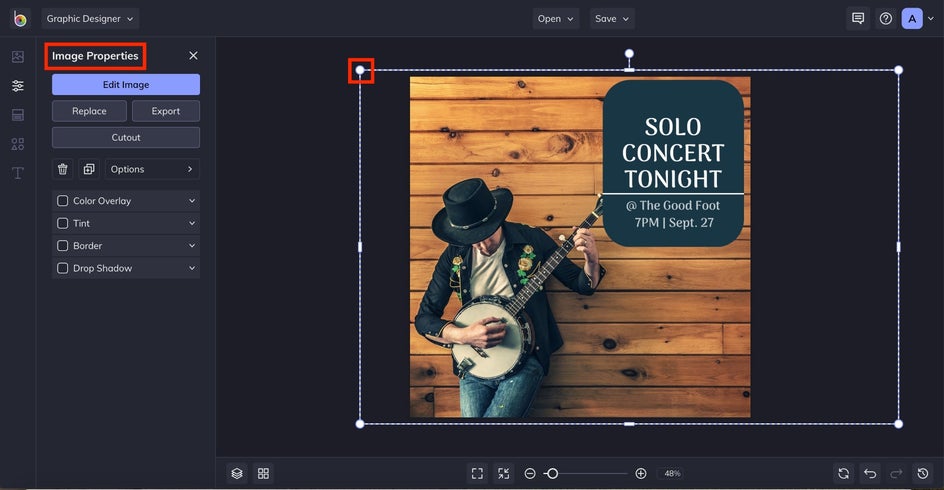
Ta-da! Wasn’t that easy? Now let’s try another one.
Resize to a Social Media Story
Now, let's go a step further and turn our Instagram post into a social media story.
Step 1: Resize Your Template
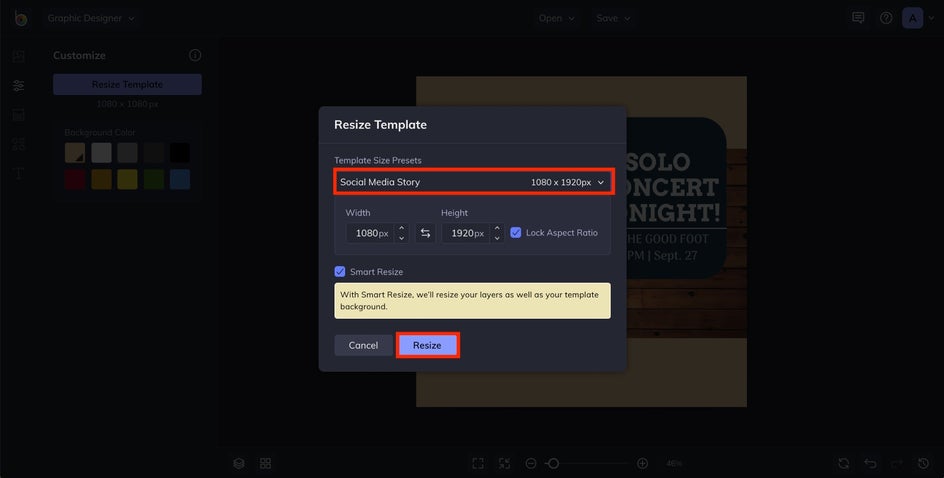
Navigate back to the Customize tab, followed by Resize Template. This time from the dropdown menu, we’re going to select Social Media Story. Then, click Resize.
Step 2: Add Text and/or Graphics
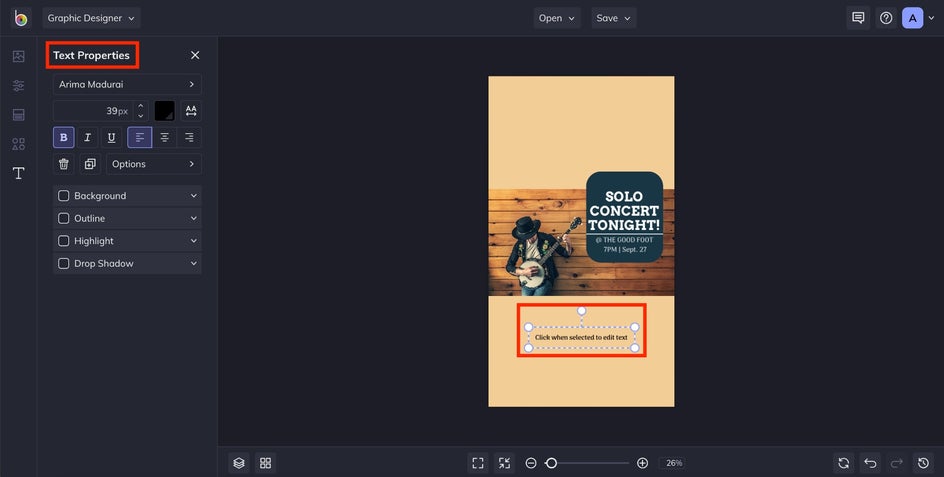
If you want to, you can add some text and graphics to your story for added wow-factor. To do this, click on Text in the main menu on the left, followed by Add Text. Then, just double-click your new Text Box and type in what you want it to say. From the Text Properties toolbar that appears, you can also edit things such as the font, size, color, alignment, spacing, and more.
Step 3: Encourage Engangement
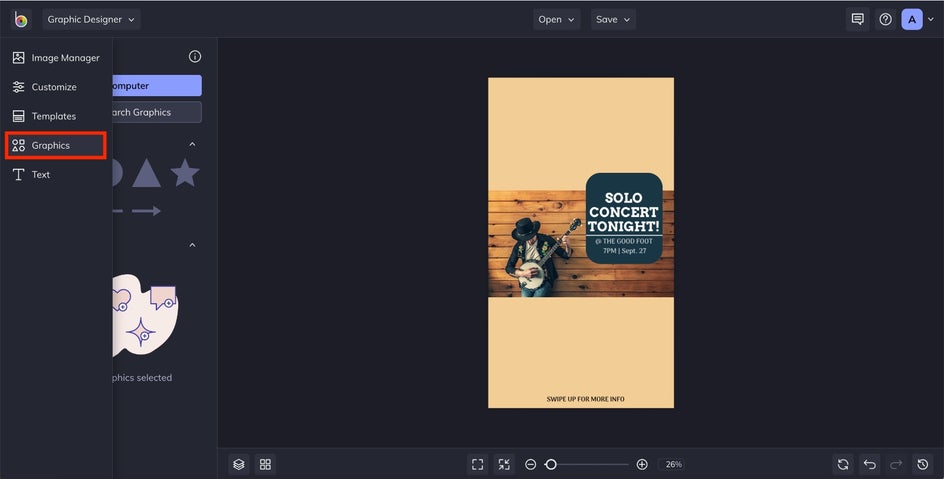
Next, we’re going to add an arrow graphic that will encourage viewers to swipe up to view what the Social Media Story is all about. Navigate to Graphics in the main menu (second from the bottom), then click Search Graphics.
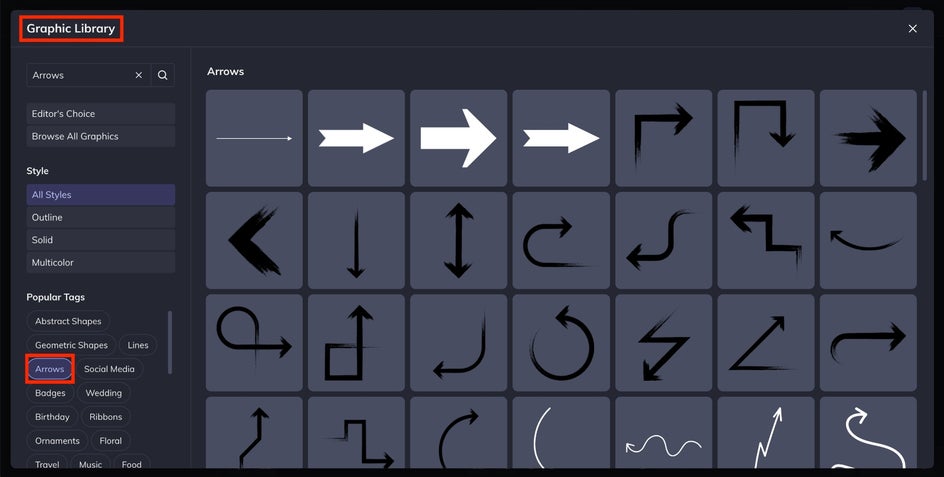
This will give you access to BeFunky’s huge library of graphic elements, including lines, symbols, shapes, clip art, and so much more. Browse the Editor’s Choice graphics, choose from Popular Tags on the left side, or type what you’re after in the Search Bar.
Once your selection has been added to Your Graphics, use your mouse to drag and drop it onto your template. You can also click on your graphic to open a Graphic Properties toolbar, from which you can add a Color Overlay, Tint, and more.For this example, we tried the Drop Shadow feature. Use the sliding bars to adjust the density, size, angle, and more of the graphic until it’s to your liking.
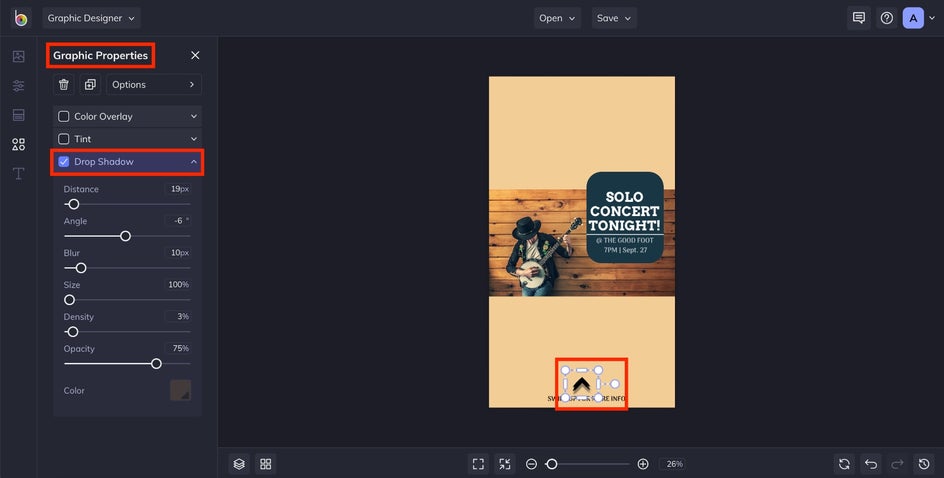
Step 4: Customize Your Template
Resizing a social media template sometimes leaves you with a lot of blank space. You can play around with adding graphics, rearranging items on the template, or changing the background color. Check it out.
First, let’s change the background color. Make sure you’re in Customize. Look at the color pallet in the left menu. The first square is the current color of the template’s background. Click the small black triangle in the corner of this square.
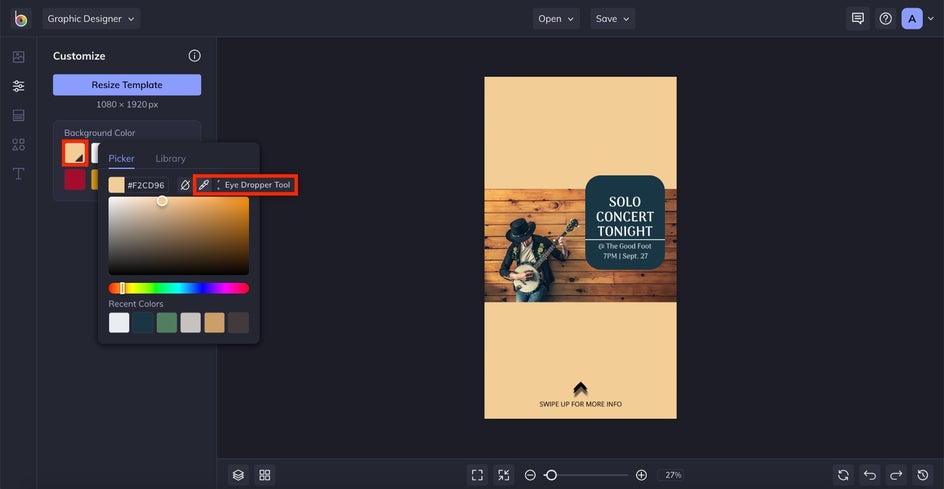
Clicking this triangle will open a small menu that allows you to change the color with greater freedom. Use the Eye Dropper Tool to make the background color a shade that already exists in the template.
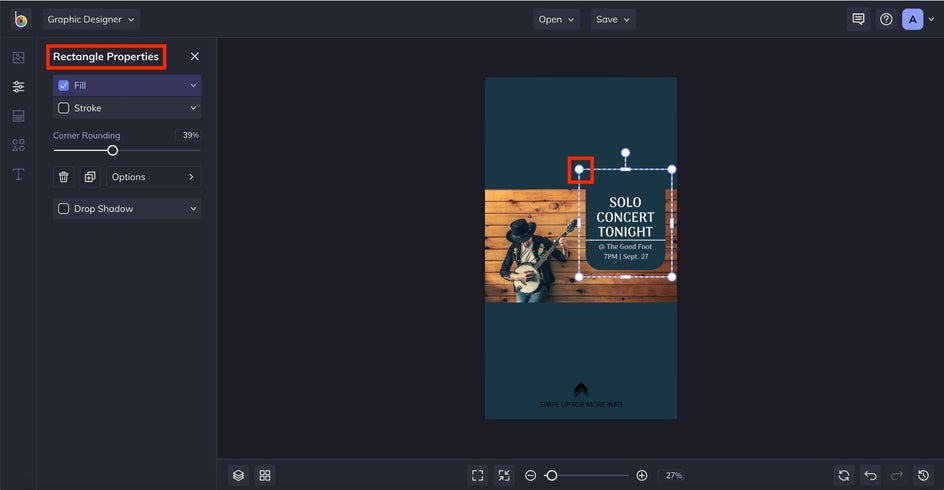
Rearrange the contents of the template in a way that makes them appealing to look at. You can do this simply by clicking each item on the template and dragging them. Use the white circles that appear at the corner of a selected item to resize it.
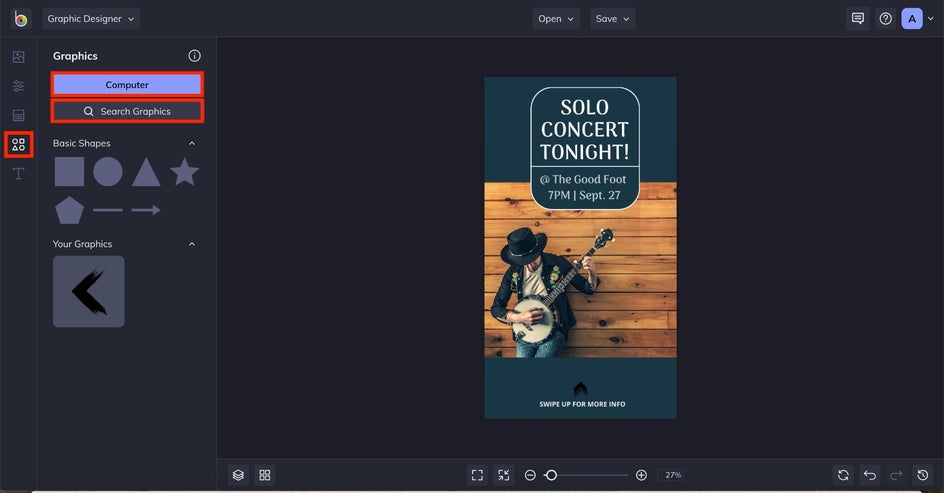
Once you’re happy with the layout, you can explore adding graphics. Navigate to Graphics, the second to last icon on the vertical icon menu. You can upload graphics by clicking Computer or Search Graphics. Select which graphics you would like to use just as you did in a previous step. You can move graphic layers forward or backward by going to the Options menu.
For this example, we’ve chosen to add two abstract shapes to place behind the text box at the top of the template. Double click or click and drag each graphic to have them appear in the template. When each graphic is selected the Graphic Properties menu will appear on the left. Use this menu to change the color of the graphic.
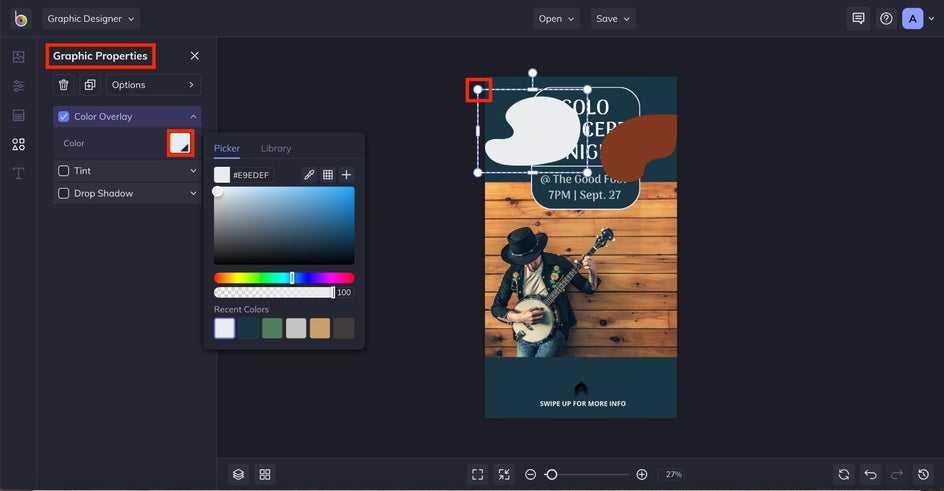
Once you’re happy with how your template looks, you can continue resizing it for different platforms, save it as a project for further edits, and more.
The Final Results: Sized to Perfection
With the Resize Template feature, it's super easy to translate your social media post to work on any platform. These posts are both cohesive and properly formatted for their respective platform.

Resizable Templates for Your Social Media Posts
Forget creating multiple images for each social media platform. With BeFunky’s Resize Template feature, creating a cohesive look for every profile – regardless of post size requirements – is just a few clicks away!

