How to Change Your Lip Color With the Lipstick Tool
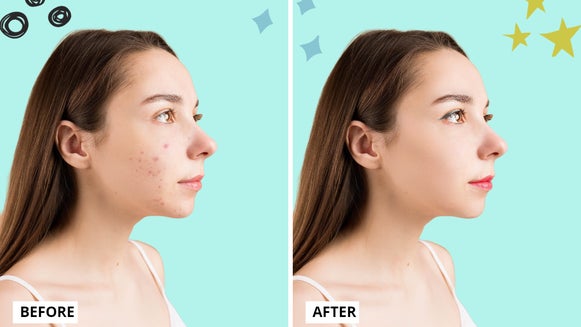
Have you ever thought that your selfie would have looked better, if only you had worn a different lip color? Thanks to BeFunky's Lipstick tool, you can apply digital lipstick of any shade to your photos. Whether you prefer a natural-looking lip or something a bit bold, you can achieve that pout in seconds with the Lipstick tool!
How to Change Your Lip Color in a Photo
The Lipstick tool is great for experimenting with your look while creating a very natural aesthetic. When applied, it remains partially transparent to ensure your lips maintain their natural texture. (Though this can be adjusted using the sliders.) In this tutorial, we'll show you how to get the lip look you’re going for. To follow along, click here to open the Photo Editor and upload your photo. Let’s get started!
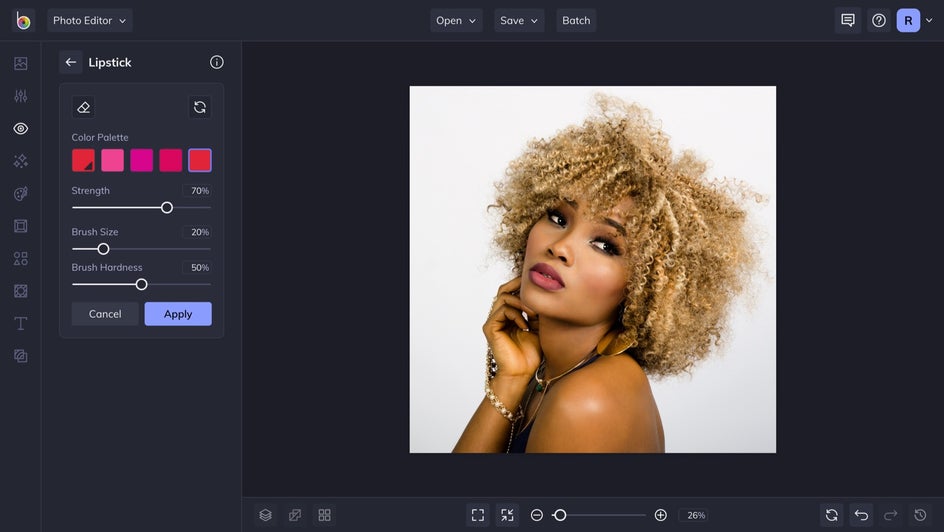
Step 1: Find the Perfect Shade
Once you’re in Photo Editor, click the Touch Up tab, followed by Lipstick under the Mouth section.
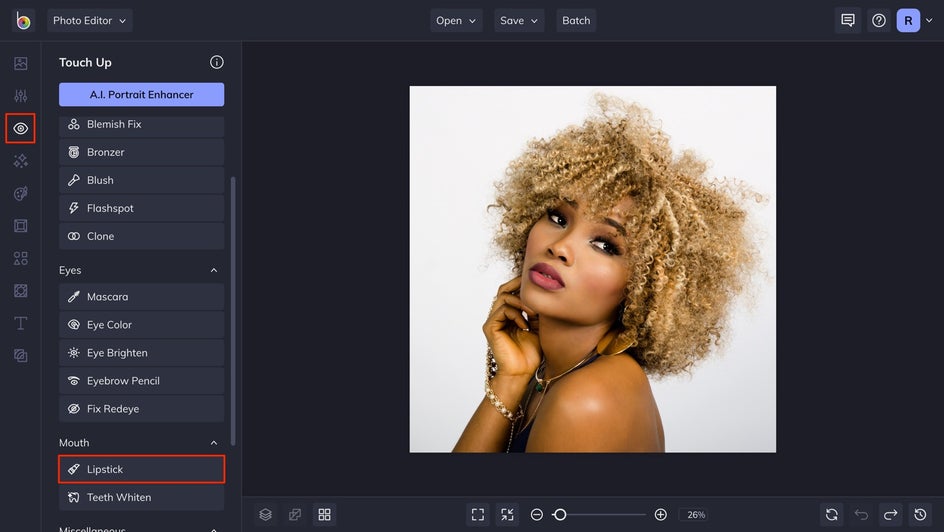
From here, you can choose from a wide variety of colors to complement the look you want to achieve. For this example, we chose a classic, bold red.
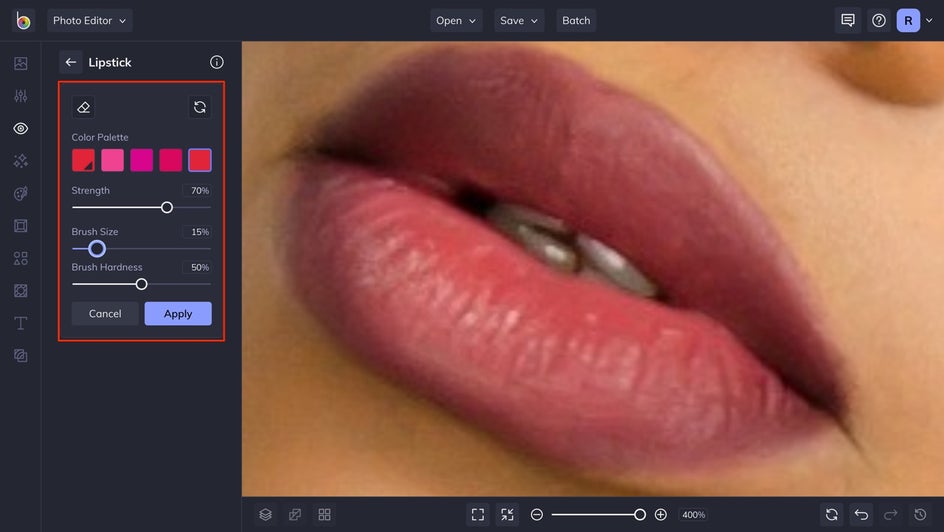
Step 2: Adjust the Lipstick Tool
After you select the right hue, it’s time to adjust the strength, size, and hardness of the Lipstick tool. Start by using the Zoom tool at the bottom of the screen to zoom in on the lips to edit in better detail.

Next, you’ll want to customize the Lipstick tool to you’re liking. There are three options you can adjust to help optimize the application process. Strength to determine the intensity of the Lipstick tool’s effect, Brush Size to fit the size of your mouth, and Brush Hardness to determine how sharp the Lipstick tool effect will be. Decreasing Brush Hardness will create a feathered appearance, which is ideal for blending as you retouch photos.
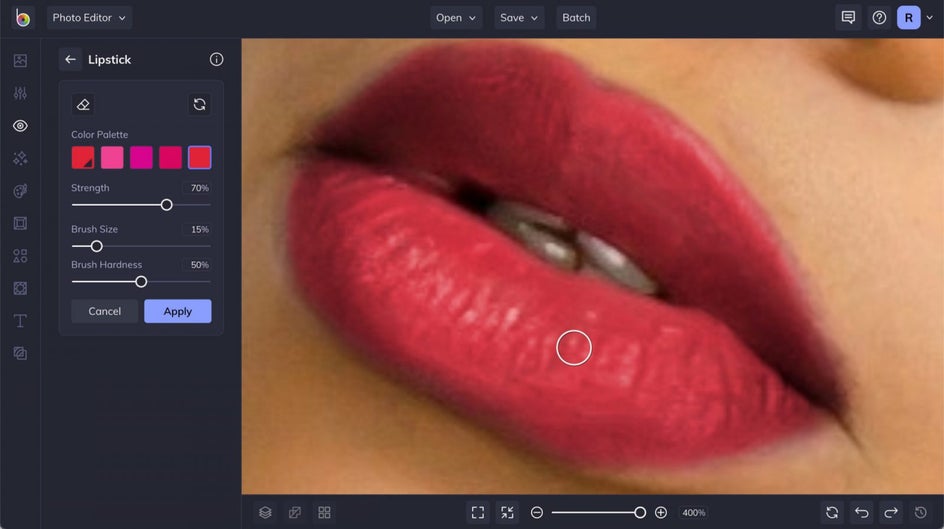
Step 3: Apply Color
Finally the fun part! This is where you get to paint your lips and start seeing transformation in real-time. To do this, carefully click and drag the Lipstick tool over your lips to apply color to your photo.
Step 4: Add Some Extra Volume (Optional)
This is totally optional, so feel free to skip this step if it isn't for you. Start by decreasing your Brush Size, and carefully applying the tool to the area just above your top lip. But be careful, overdoing it here can create a clown-like appearance that’s guaranteed to cause unwanted laughter! Alternatively, you can use the Reshape tool to increase the size of your lips in photos.

Step 5: Save Your Look
Once you’re satisfied with your look, save it by clicking the Save button just above your canvas followed by your desired destination. If you choose to save it as a project, you can come back to touch up that lipstick any time.
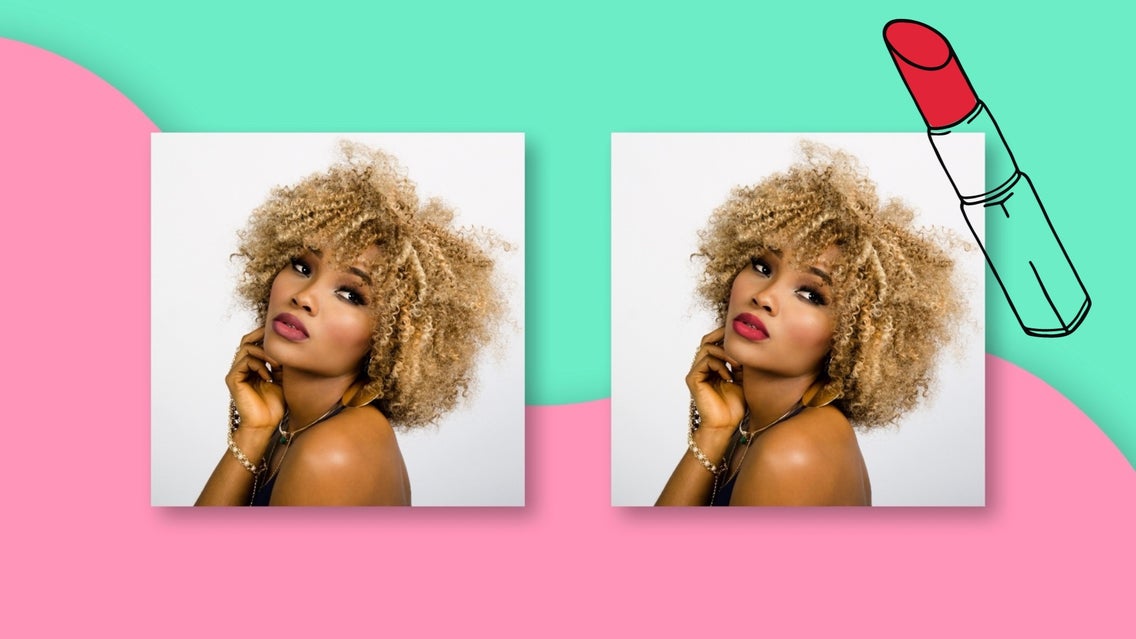
Final Results
Tou can see how much the color pops after just a few swipes. It still looks natural while demanding attention. All in just five steps!

Apply a Bold Lip in Seconds
With Befunky's Lipstick tool, the perfect lush lip look is just a few clicks away. Whether it's lipstick today or something else tomorrow, BeFunky's Touch Up tools have everything you’ll need to get picture-perfect photos. And don't forget to check out the A.I. Portrait Enhancer to add another layer of refinement to your portraits.