Guides for the Most Precise Layer Placement Ever

There are few things more frustrating than spending a ton of time on a design and sending it to the printer, only to find out that you made a hundred copies of a brochure that doesn’t fold properly. Or guessing where the “safe area” of a social media cover photo is and having to upload, re-design, and re-upload until you’ve got it just right. You won’t have to worry about any of that anymore though, because we just added some handy Guides to help you measure your designs to perfection! They’ll help you easily set your own parameters, margins, and safe areas no matter what kind of design you’re working on.
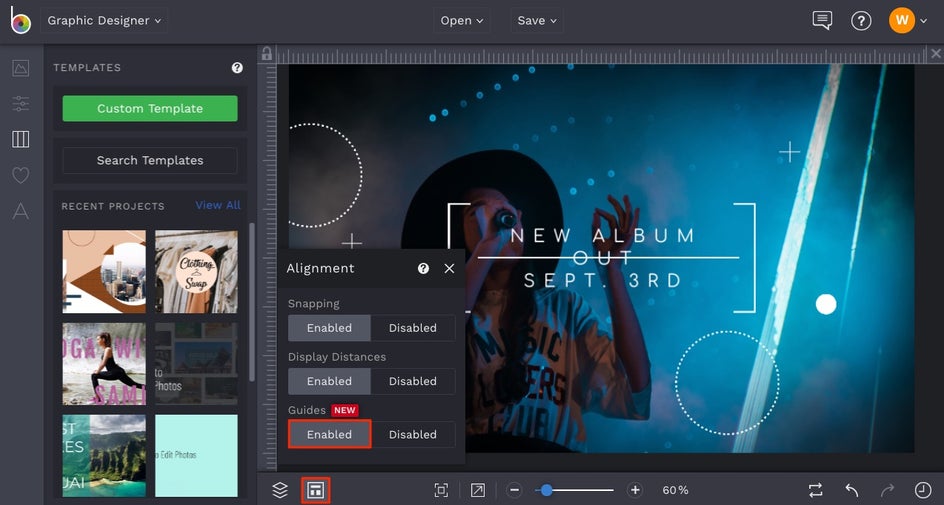
The new Guides tool can be found by clicking on the Alignment button in the bottom toolbar of the Graphic Designer. They’re also available to you in the Photo Editor and Collage Maker platforms, because graphic design happens there too. Whatever kind of project you’re working on, these handy new Guides are going to help you achieve graphic design perfection!
When to Use Guides
Whenever you customize one of our pre-designed templates, you can rest assured that our professional graphic designers established margins, safe areas, and proper alignment in the layout design process. In other words, they used Guides to help establish what spaces to keep important design elements within. Still, knowing where to set your own Guides is ultra-important, whether you’re customizing a pre-designed template or creating a design from scratch. Here are the cases when Guides truly come in handy:
Setting Margins
Some design layouts require the use of margins, especially when the end goal is to print them. For example, when it comes to trifold brochures, the layout needs to be split into three different sections with a set margin for each. That way, when the brochure is printed, each section will fold neatly without cutting off any important text or looking uneven.
If you’re working on a design that requires a margin, you can now set and lock the specific dimensions before you start getting creative. The Guides will ensure that you don’t waste any time designing outside of the limits.
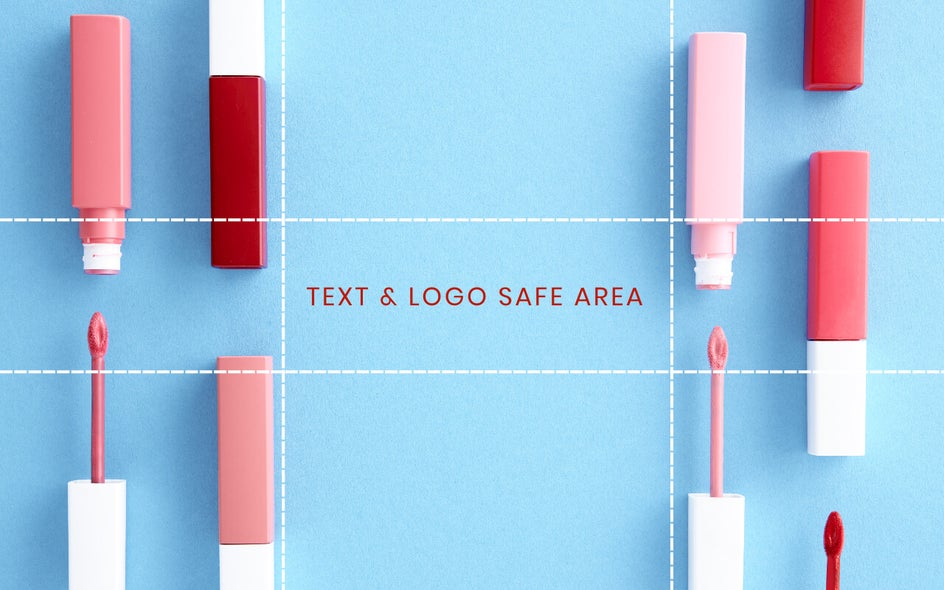
Designing within Safe Areas
Similar to setting margins, some layouts specify a “safe area” because the display area varies on different devices. One great example of this is YouTube Channel Art design. Since YouTube channels are viewed on mobile, television, computers, and tablets, the Channel Art ends up getting cropped depending on which platform viewers are using. This is why YouTube Channel Art should be designed on a 2560 x 1440 canvas, but the text and logos need to remain in the safe area, which is 1546 x 423 px.

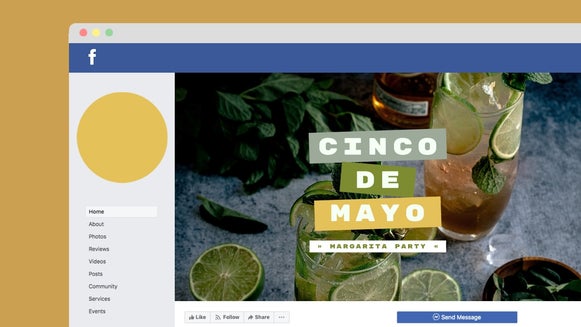
Instagram Story layouts also require a safe area, because when uploaded on Instagram, there are certain buttons and icons that block important text if it’s positioned too close to the top or bottom of the design. Whatever you’re designing, be sure to read up on where safe areas may be.
Creating Composition Grids
Did you know that most graphic design layouts begin with a composition grid? The gridlines are helpful for designers to either stay within their limits or break all the rules. One of the easiest and most common composition grids is the Rule of Thirds, where the template is divided into three rows and three columns to create nine equal sections.
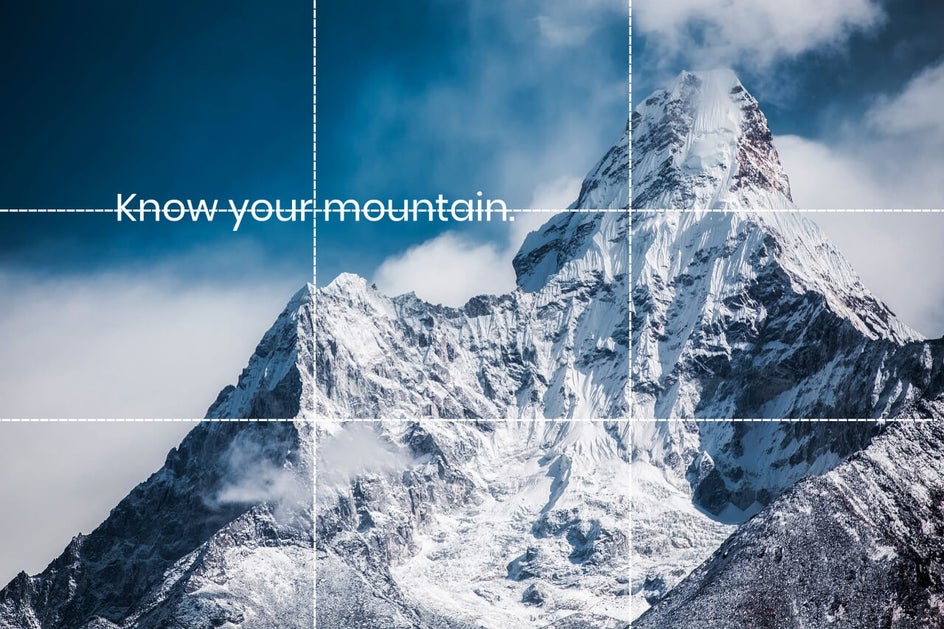
Following the Rule of Thirds, the most important design elements are placed at a guide intersection (that goes for the subjects in your imagery, too!), while the supporting design elements are placed within a few of the sections. As with all great designs though, rules are meant to be broken. So feel free to play with different compositions that feel right to you!
How to Set Guides for Precise Alignment
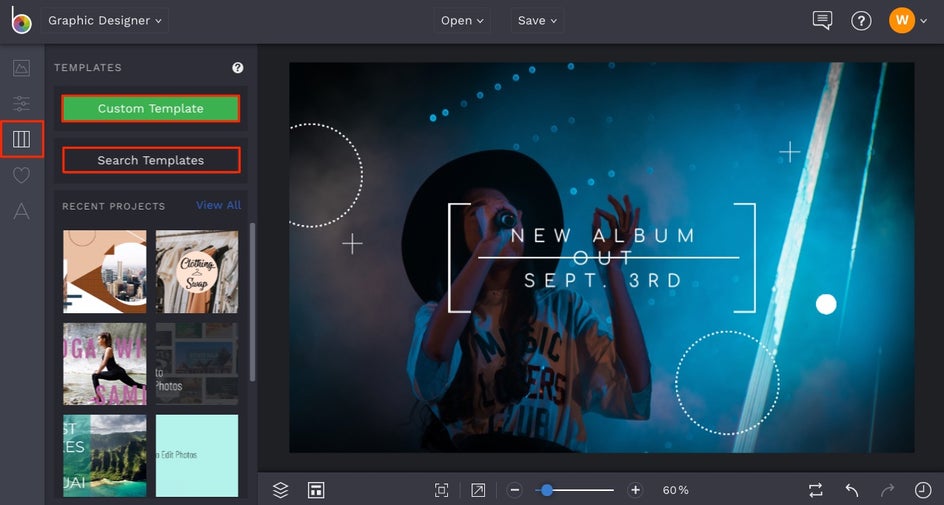
To get started, head to our Graphic Designer and click on the Templates tab. Upload one of our pre-designed templates by selecting the Search Templates button and finding the perfect layout, or create your own blank template by selecting the Custom Template button and typing in your own dimensions.
Next, click on the Alignment button in the bottom toolbar. This is where you can enable and disable any of our Alignment tools. For now, click the Enable button underneath Guides and you’ll see rulers appear on top and left edges of the design canvas.
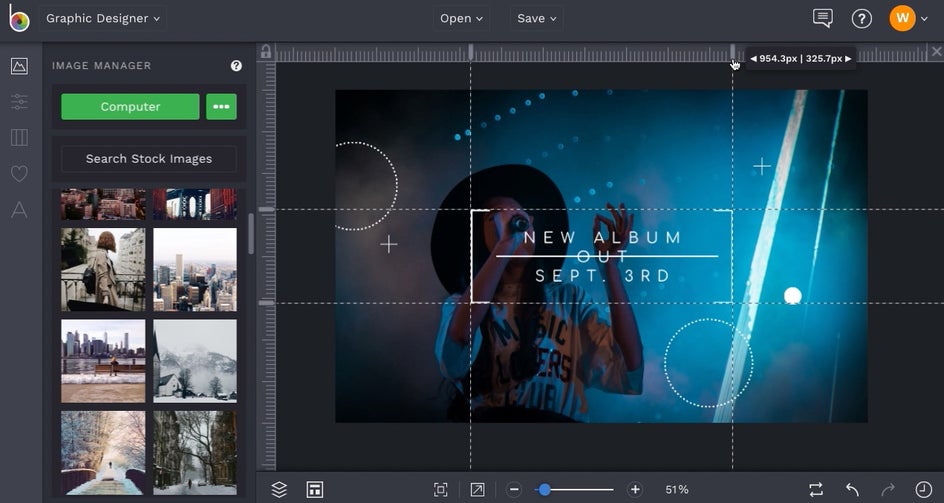
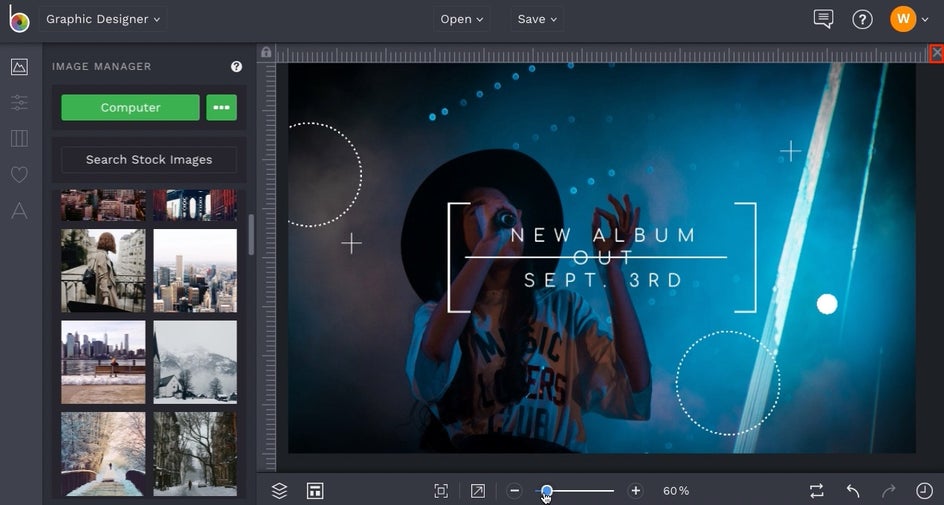
Clicking anywhere on the rulers will set a new Guide, which looks like a dashed line. You can click and drag the top of the Guide (the thick portion that sits on the ruler) to re-adjust where you want your guide to be. Notice that when you hover over this point, the pixel distance between the Guide and the edges of the template will appear. When you click and drag the Guide, the distances increase and decrease in real time.

Add as many Guides as you want to your design by clicking more points on the ruler and adjusting where you need them to be.
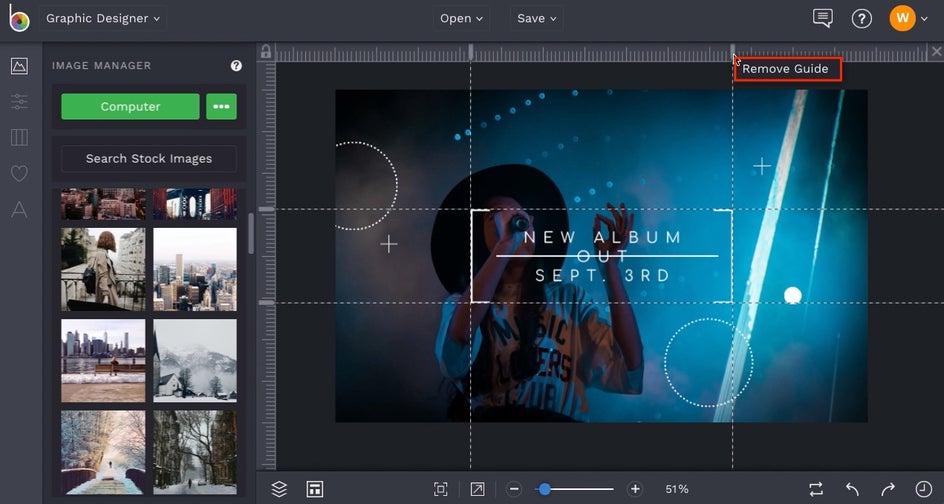
And if you need to remove a Guide, simply right click it and select Remove Guide from the menu that appears.
When you’ve got your Guides exactly where they need to be, click the Lock icon in the upper left corner of the canvas. This will lock the Guides and make them unmovable, so you can begin the design process without worrying about them shifting. If you need to adjust the Guides at any point, click the lock icon again to unlock the guides, move them as needed, and click the Lock icon again.

To clear the guides and start over at any point, click the X in the upper right corner of the canvas. This will get rid of any Guides you created immediately.
Once you’re finished with your design, all that’s left to do is save your work! When you’re ready, click the Save button at the top of the Designer to save your design to your chosen destination.
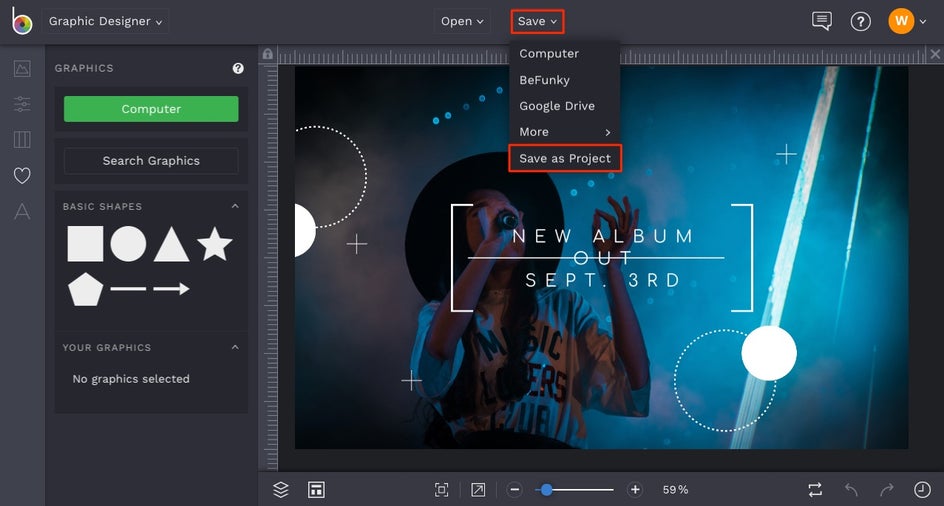
If you’re at a stopping point, but not necessarily finished with your design entirely, select the Save As Project option in the Save dropdown menu. This will save your design in editable format, so you can revisit it at any time. The best part is, the guides are saved in your editable project files, so once you reload them, you’ll see the same guides you were using to design with originally and won’t need to guess at where they were! Brilliant.
Ready to get started with Guides? We bet you are! Click the link below to design with more precision than ever before.