Now You Can Edit Image Layers Easier Than Ever
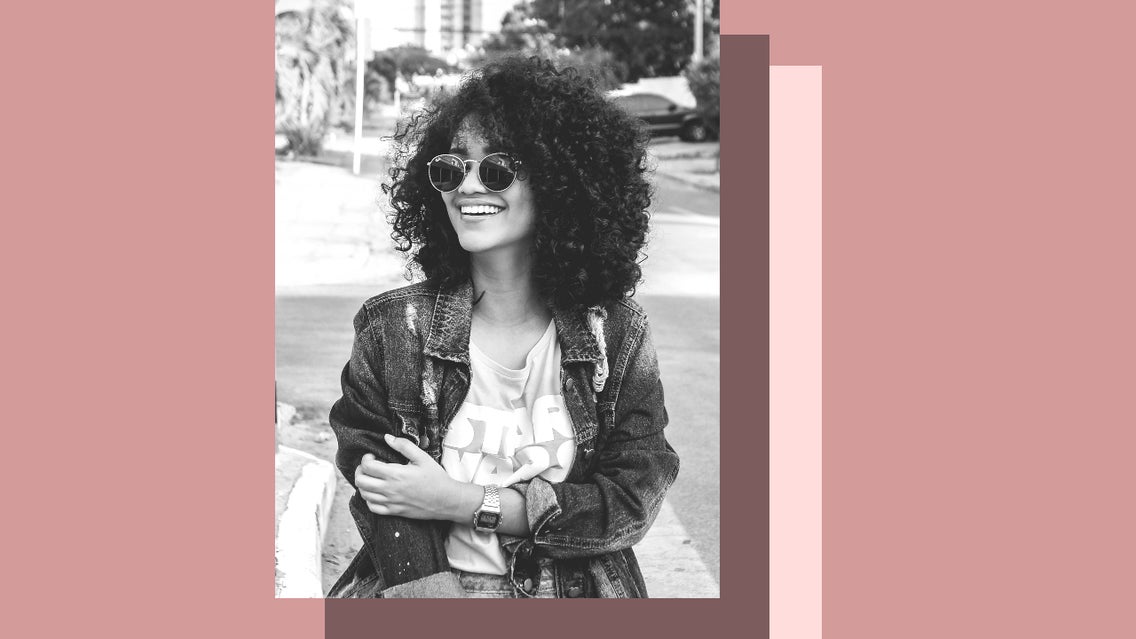
Let’s say you’re working on a graphic design project that has an image layer, but it doesn’t look quite right with the vibe or color scheme of your template. You could open the image layer in the Photo Editor, but how can you tell how it will look until you place it back onto your design template? What if it still doesn’t look right? Since we never want the back and forth between the Photo Editor and the Designer to suck up another ounce of your creative energy, we’ve come up with something way more convenient for you: instead of bringing your image layer to the Photo Editor, now we’re bringing all the power of the Photo Editor to your image layer!
Just one click of our NEW Edit Image button will bring all the essential editing tools and photo effects of our Photo Editor on demand, so you can edit that image layer and see how it looks with the rest of your project in real time! This way you can spend all the time you want tweaking your image layers and create within the context of your overall design. In other words, you’ll never have to leave your design template or background photo when you’re editing an image layer ever again.
The Most Convenient Way To Edit Image Layers
Anytime you want to edit an image layer on top of a photo or graphic design, simply select it. From the Image Properties menu that appears, select the green button titled Edit Image. This will bring all the powerful editing tools and effects you could need from BeFunky’s Photo Editor, right to your layer!
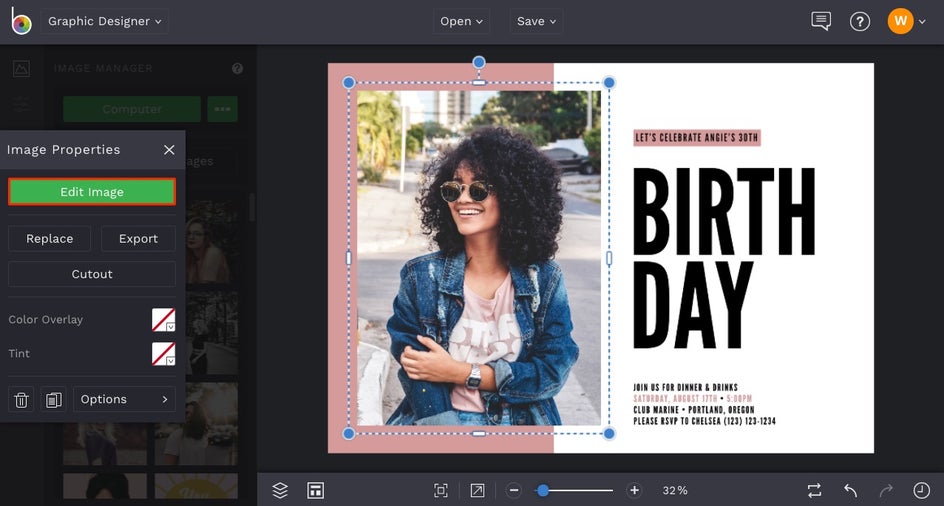
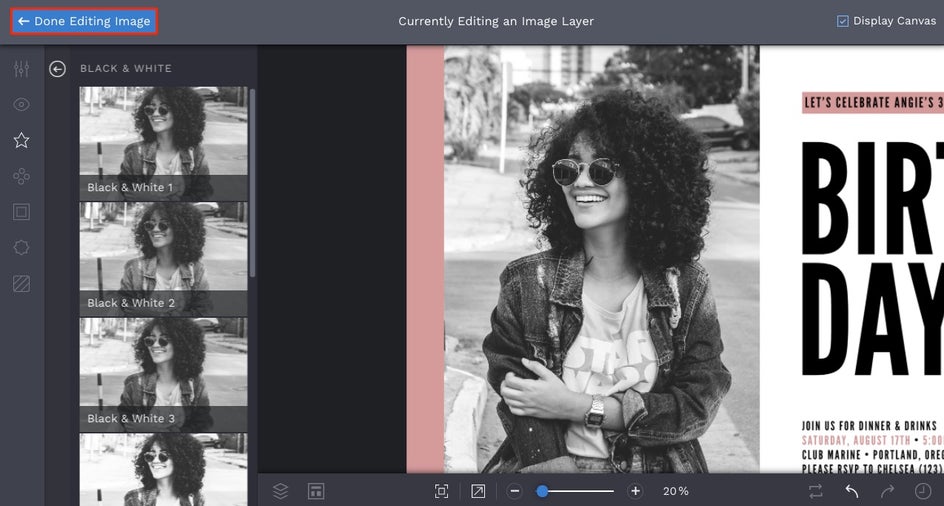
Now that you’re in Image Layer editing mode, you’ll see that the lefthand menu includes all of the necessary tools and effects from the Photo Editor (and then some). Click on any of the tabs and tools to edit your image any way you’d like. The best part is, you’ll be editing your image layer right on the background image or design template, so you can see how everything looks in context.

If you want to hide your background photo or design template and isolate your image layer for editing, feel free! Just uncheck the Display Canvas box in the upper right corner of the page.
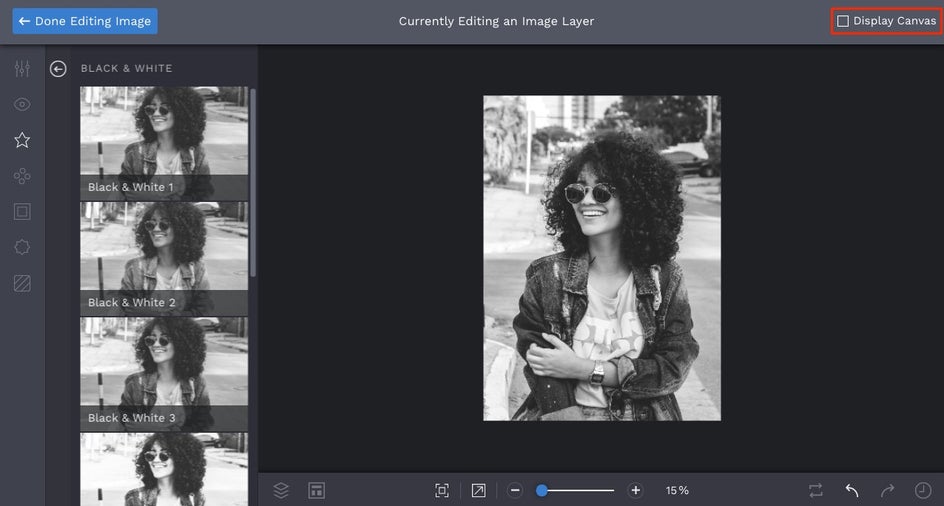
Make all the edits to your image layer that you want. When you’re finished, click the blue Done Editing Image button in the upper left corner of the page. This will take you right back to your project with all your image layer edits in tow!
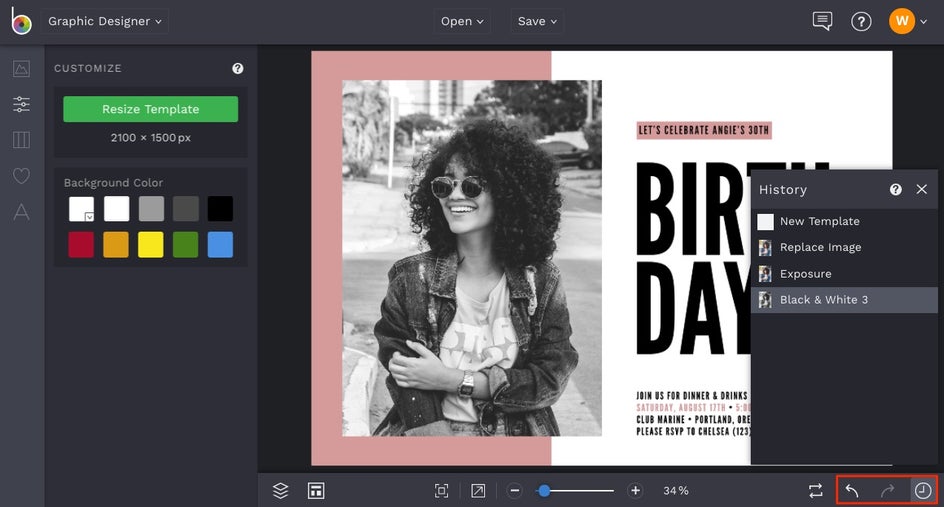
Another handy tip: when you do head back to your project, you can still use the Undo and Redo buttons to quickly flip through your image layer edits and make changes. Your image layer edits will also be shown in the History panel, just in case you need to retrace your steps.
How convenient is that? Keep in mind that you can use this handy new Edit Image button when working on image layers in either the Designer or the Photo Editor, so no matter what kind of image-related project you’re working on, we’ve got your edits covered. We think you’re going to love this! Click the link below to try it out in your next design or photo editing sesh.

