How to Edit Photos for Your Depop Store
Depop is where consumers go to discover unique fashion. BeFunky’s Photo Editor is where you’ll go to edit your photos to catch their eye. Online fashion is a rising niche with plenty of competition. Editing your photos with crisp lines, bright colors, and interesting angles will help make your online fashion store stand out from the competition. Keep reading for how to strengthen the brand of your online store through unique photography editing. It’s easy with the BeFunky Photo Editor!
Editing Photos for Online Fashion
The trick to editing online fashion photos well is to quickly learn what works for your products and store – then apply it across all your photos. Consistency is key here. The biggest factors to consider are backdrop, colors, and alignment. Consumers want to see a product photo that is brightly lit and well-positioned. It should be easy on the eyes and highlight the features of the product that make it worth your customer’s attention. Here is how to use BeFunky to edit your Depop product photos.
How to Edit You Depop Photography With BeFunky
By following this guide, you'll have perfectly cropped, high-quality photos to display your closet with!
1. Remove the Backdrop
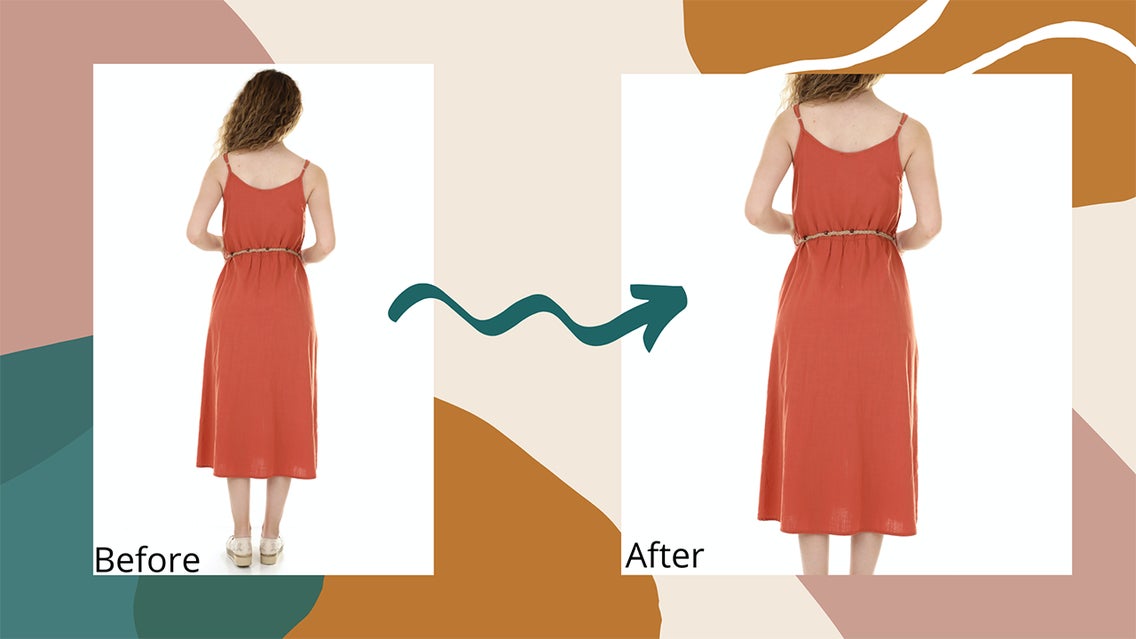
A simple white background is your best option when editing product photos. If you’re starting with a photo that doesn’t have a plain backdrop, navigate to the Cutout feature in the Essentials menu. Click the green Remove Background button and watch as BeFunky's editor recognizes the product in your photo and isolates it from the background. With the push of one button, you have a product photo that is ready to edit.
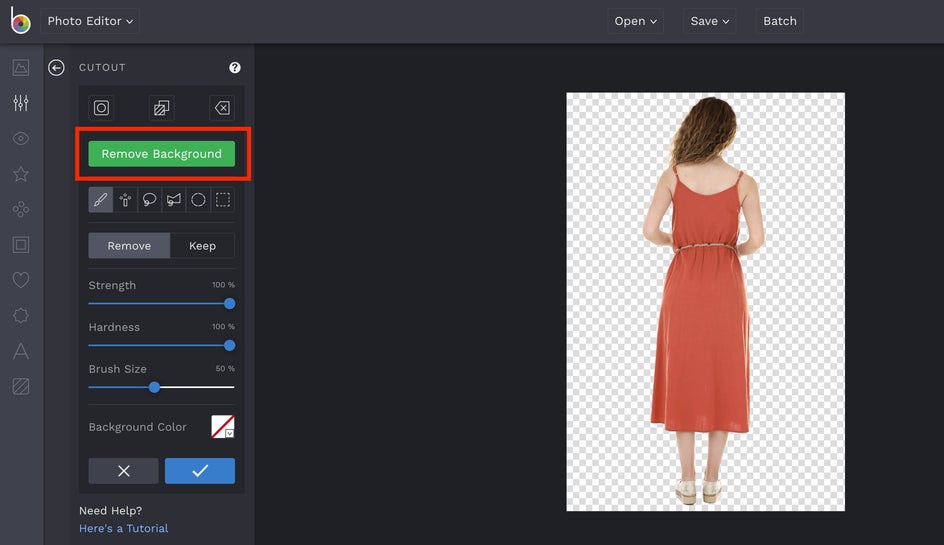
2. Resize Your Photos for Depop
After you’ve removed the background, it’s time to work with resizing your product photo. Use Rotate under the Essentials menu to adjust the angle of your product so the top is facing up. Next, navigate to Crop to adjust the size of your photo by using the dropdown menu and selecting Square 1x1. Depop requires product photos to be square at a 1:1 ratio. Make sure your photo size aligns and the product is centered within the frame.
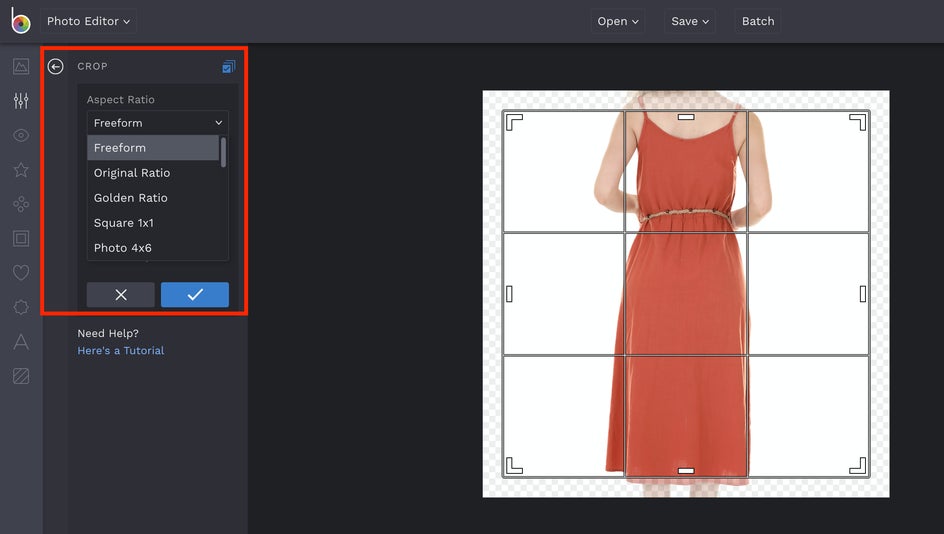
3. Adjust the Lighting
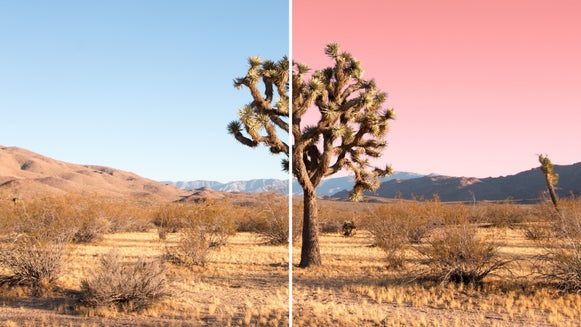
One of the most important factors of any product photo is the lighting. A photo with shadows will look unappealing and attract fewer buyers. Go to Exposure, then move the sliding bar on Brightness, Shadows, Highlights, and Contrast. The goal here is to minimize shadows and brighten the image to reveal a balance of light and dark. Use caution when adjusting the highlights and shadows. You don’t want to change the lighting of the photo so much that it no longer accurately resembles the actual product.
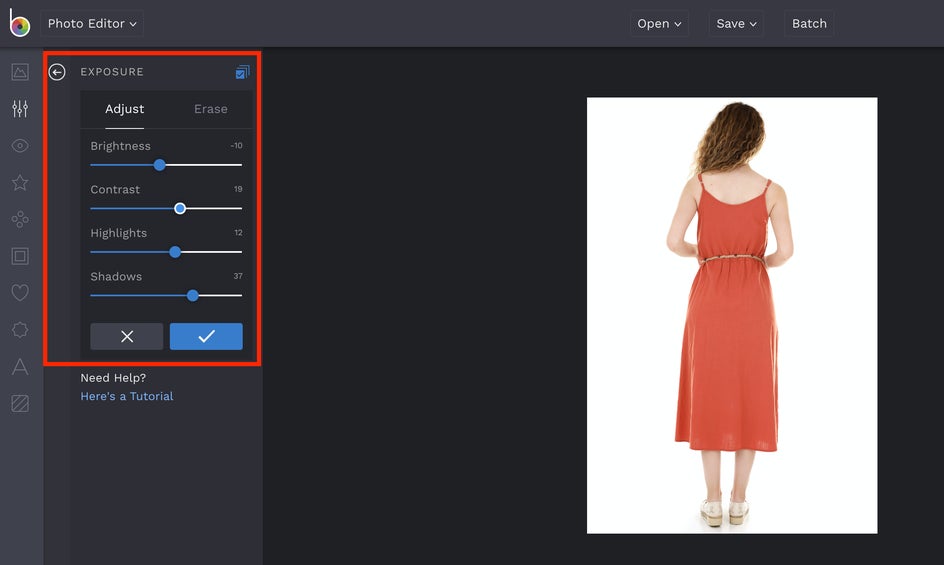
4. Sharpen the Lines
Two tools in the BeFunky Photo Editor can be used to sharpen lines: Clarity and Sharpen, both located within the Essentials menu. First, navigate to Sharpen and use the sliding bar to make the lines on your product photo crisp. When this is complete, go back to Clarity and do the same. The main difference between Clarity and Sharpen is what parts of the photo they target. Clarity is more fine-tuned to the lines within the subject of the image whereas Sharpen takes the photo as a whole into consideration.
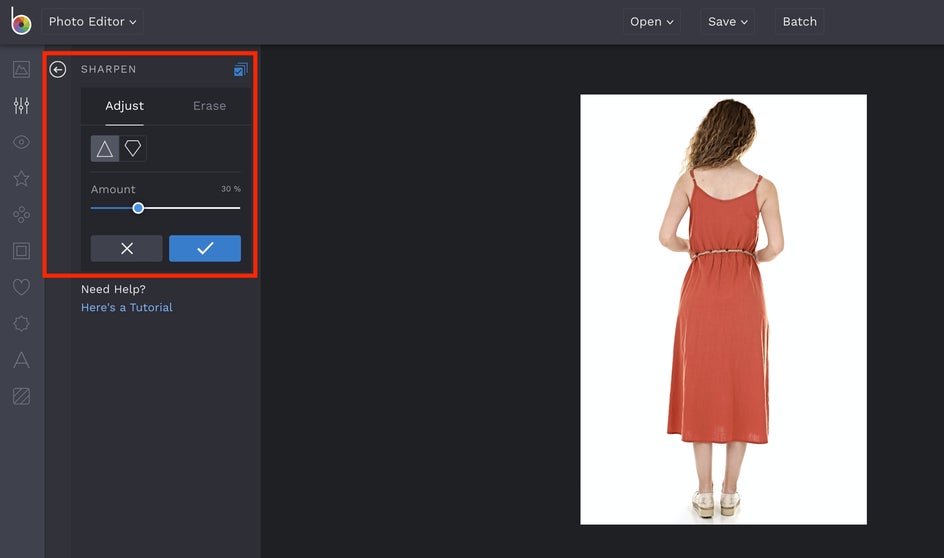
Final Tips for Your Depop Photography
1. Avoid Intense Filters
Using filters is misleading to potential buyers. You want your product photos to be as clear as possible so customers know exactly what they are getting.
2. Don’t Use Collages
Collages can be confusing and don’t allow you to post close-up images of your product. Instead, post a series of photos, each highlighting a different angle or part of the product. This will help potential buyers have an accurate sense of what they're buying.
3. Make Sure Your Photo Looks Like the Actual Product
This is one of the most important things to keep in mind for your Depop photography. You are editing product photos to make the product look good, but the edits must also make the product look accurate.
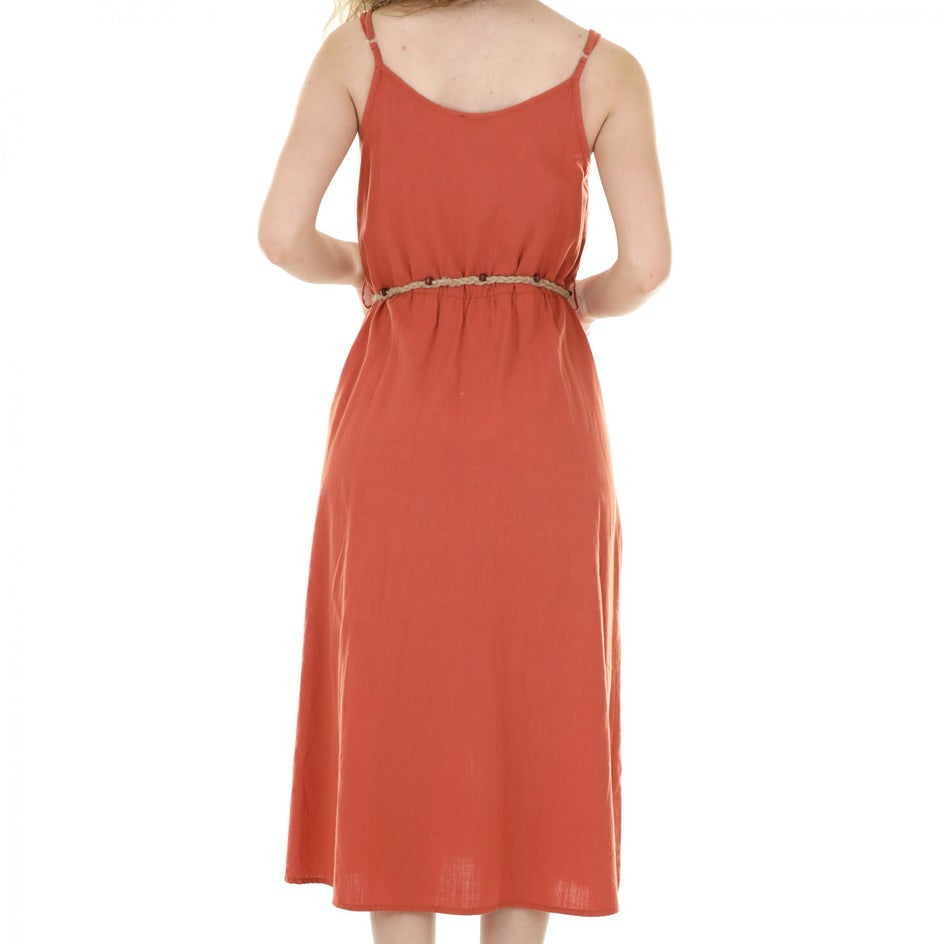
With BeFunky's Photo Editor, it's easy to elevate your personal brand. So what are you waiting for? Get selling!
