How to Take and Edit Shopify Photos

A dazzling product photo is what draws a potential customer to a Shopify profile. A photo that is colorful, well-lit, and clearly shows the product with all its features is vastly more appealing to customers than a product photo with shadows and a blurry frame. To craft these expert images, you need a photo editing software that will support you and your business on Shopify. This is where BeFunky comes in.
BeFunky offers a range of photo editing features that help you edit your Shopify photos to perfectly reflect your brand and authentically show the characteristics of the product. You can adjust lighting, contrast, background, blurring, and much more to make your product photos as stylish and eye-catching as possible.
This is how you can use BeFunky’s photo editing software to enhance your Shopify store.
How to Take Photos for Shopify
Now that you’ve established your business profile on Shopify, it’s time to take photos of your products. Product photos are the first thing that draws a potential customer to your Shopify profile. When it comes to taking photos of your products, there are a few things to keep in mind.
You don’t need any fancy or expensive tools to take and edit excellent product photos. However, here is what you will need:
- Camera
- Tripod
- White background
- Tape
- Well-lit space or photography lights
Set up your equipment somewhere that is well-lit by either natural or artificial photography lights. The white background can be a large piece of paper or a sheet – it just needs to be plain white. This highlights the product sitting on top of it and makes editing easier if you’re doing cutouts. Next set up your camera and tripod. While taking your product photos, you should take a wide variety of shots from different angles so you have plenty of images to work with when editing.
How to Edit Your Photos for Shopify
Are you ready to create some professional-quality photos for Shopify? Let's get started!
Step 1: Upload Photos to BeFunky’s Editing Software
From the Open dropdown menu at the top of the BeFunky Photo Editor, select “Computer.” This will allow you to upload photos from your computer to BeFunky.
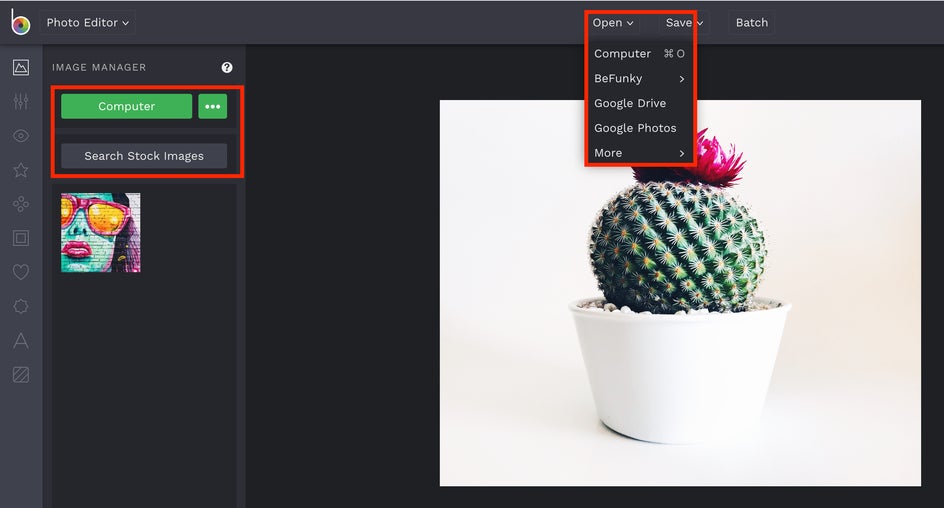
Step 2: Drop Shadows and/or Background
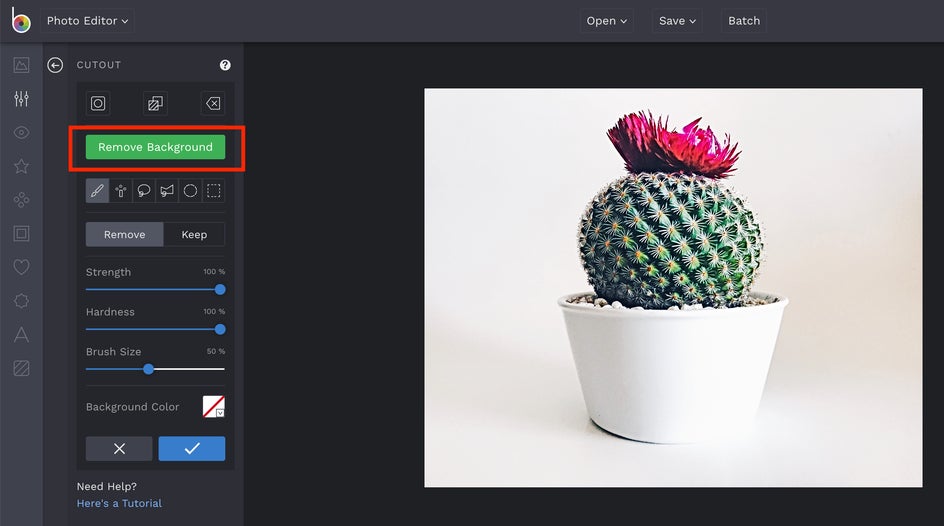
The best place to start editing your product photo after uploading it to BeFunky’s Photo Editor is fixing any undesirable background or shadows. You may want to isolate the product from its background when listing it on your Shopify website. Navigate to the Cutout tool located in the Essentials submenu. You can use the pen or lasso tool to create a dotted path around the product that can then be separated from the background by selecting the Remove Background button.
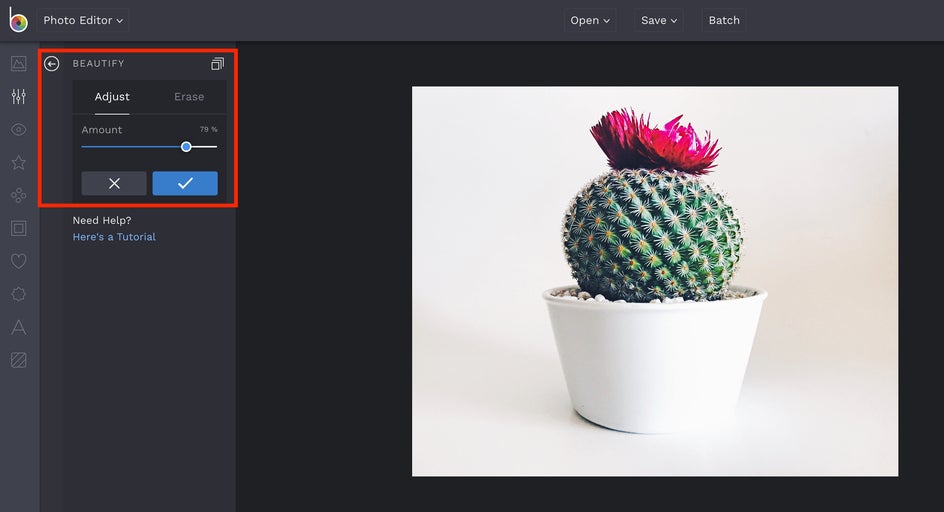
If you choose to keep the background, make sure there are no shadows distracting from a potential customer’s view of the product. Two tools help accomplish this: Beautify and Exposure, both are located within the Essentials dropdown menu. Click into each of these places and use the sliding bar to adjust the product’s brightness and contrast. The Beautify tool can also be used to help with color correction.
Step 3: Color Correct
Now that you’ve made the necessary adjustments to the product photo’s background and shadows, it’s time to address the color of the photo. The Beautify tool helps liven the colors on the image. If you’ve already done this, navigate over to the Color tool. Use the temperature sliding bar to give the product more warmth or use the saturation sliding bar to make the colors pop. Keep in mind that saturation should always be adjusted with caution. A highly saturated photo looks unrealistic and could push potential customers away from your product.
Step 4: Retouch
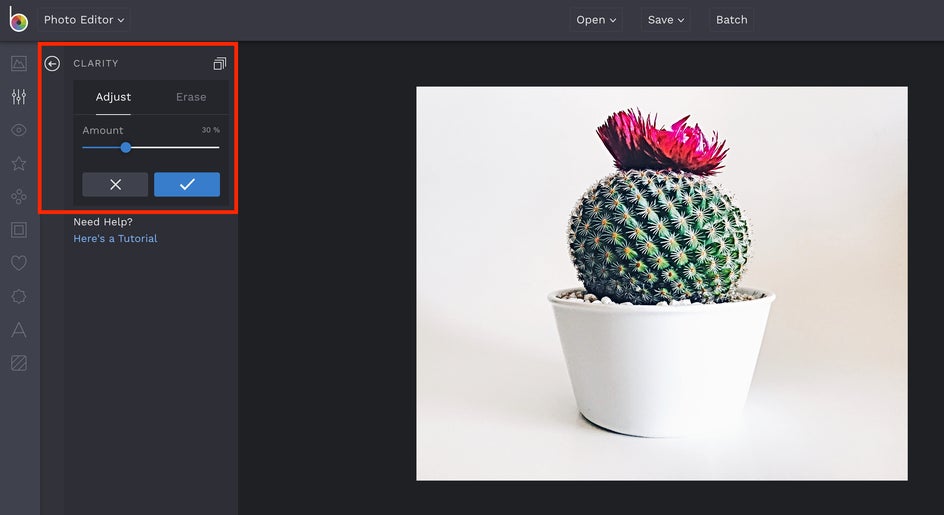
At this point in the editing process, you should only be making minor touch-ups to the product. Return to the main menu, scroll toward the bottom of the Essentials menu and enter the Sharpen tool. Use this sliding bar to make sure the lines in your product photo are crisp. The Clarity tool directly beneath the Sharpen tool has a similar effect. In photo editing, clarity works on a smaller scale, working to correct the lines and colors on individual components in the image. The sharpening tool does this across the entire photo.
Step 5: Optimize for Shopify
With a product photo edited and ready for consumer eyes, you now need to optimize it for Shopify. Step one is to make sure you’re saving the photo as a small file size. This will make sure it loads faster so the buyer isn’t waiting for a photo to load on the page. JPG should be saved at 30 kb. Be sure to optimize your alt attributes with keywords related to your shop or product. This can help your product rank better in search. The same goes for naming your image file – use basic language with keywords to help your search rankings in Shopify.
Grab Their Attention, Every Time
Now, you know how to take and edit a photo that will catch a customer’s eye. Using these photo editing techniques in BeFunky’s Photo Editor will help your Shopify shop stand out against the competition.
