2 Ways to Replace The Sky in any Photo
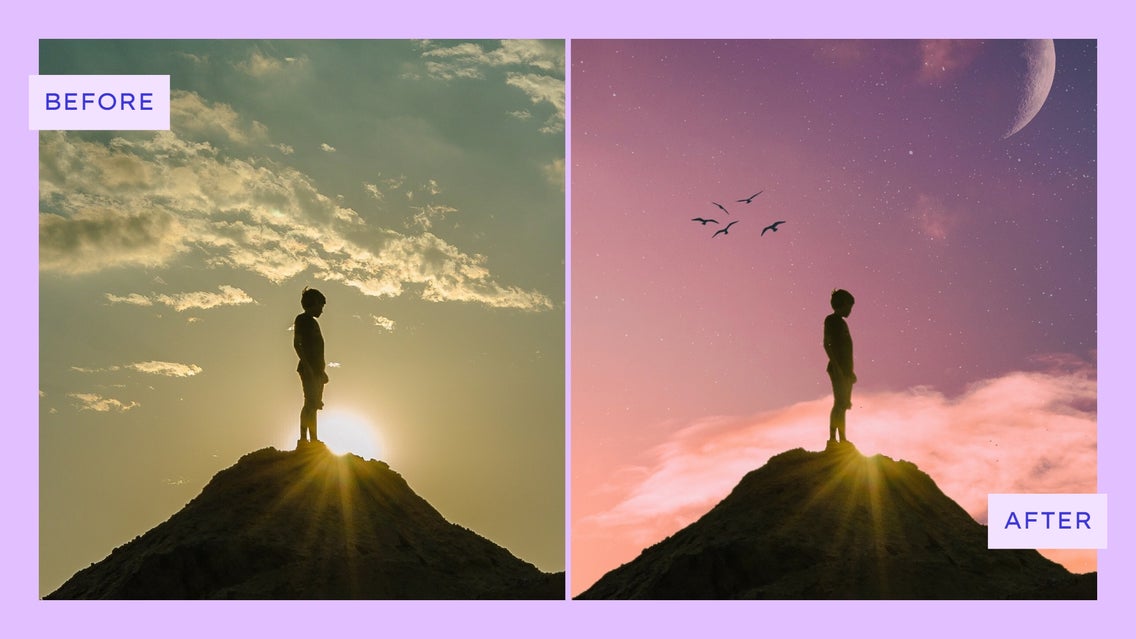
Have you ever taken a photo of a beautiful beach scene or landscape, only to realize that everything in the foreground is crisp at the sacrifice of the sky being overexposed? Because the sky is often the brightest part of a photo, it’s common for it to become completely washed out in order to retain the rest of the image’s clear details.
In situations like these, one of the best ways to correct the shot is to replace the sky entirely. Don’t worry, it doesn’t have to be difficult, nor does it require expensive software. BeFunky’s Photo Editor has all of the tools you need to replace the sky in a picture – no learning curve required! All it takes is a BeFunky Plus account and just a few minutes of your time.
Keep reading, because we’ll show you how to edit a different sky into any image!

Method 1: How to Replace the Sky Using the Cutout Tool
If you’re looking to replace the sky in a picture featuring an unobstructed skyline, then the Cutout tool is the best option for doing so. Head to the Photo Editor, then follow these steps to learn how!
Step 1: Open Your Desired Sky Picture
In the Photo Editor, click Open at the top of the screen, then select your new sky image.

Step 2: Add Your Existing Sky Image as a Layer
We’re then going to layer our original sky image over our desired sky picture so we can eventually fuse the two images together.
Navigate to Image Manager from the main menu on the left, then click Computer to locate your image file. Alternatively, you can click the three dots (“…”) to upload an image from your BeFunky account or Google Photos.
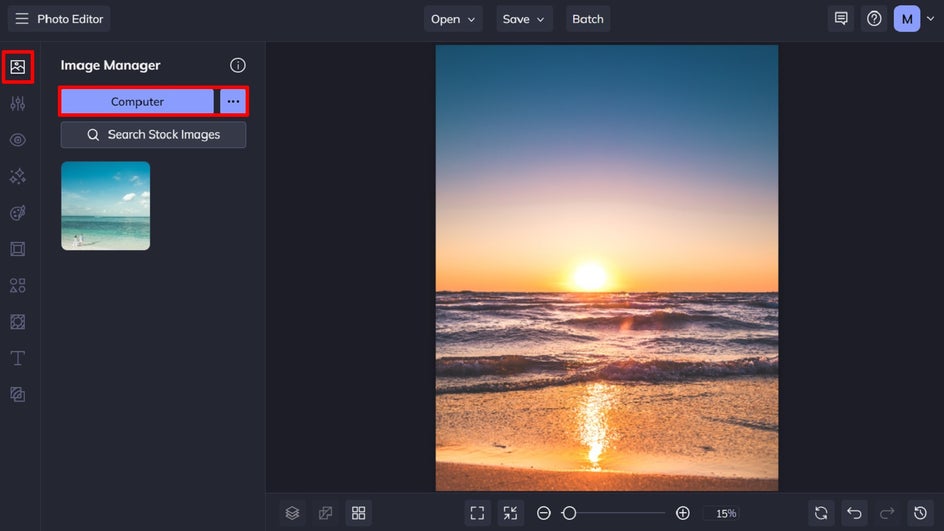
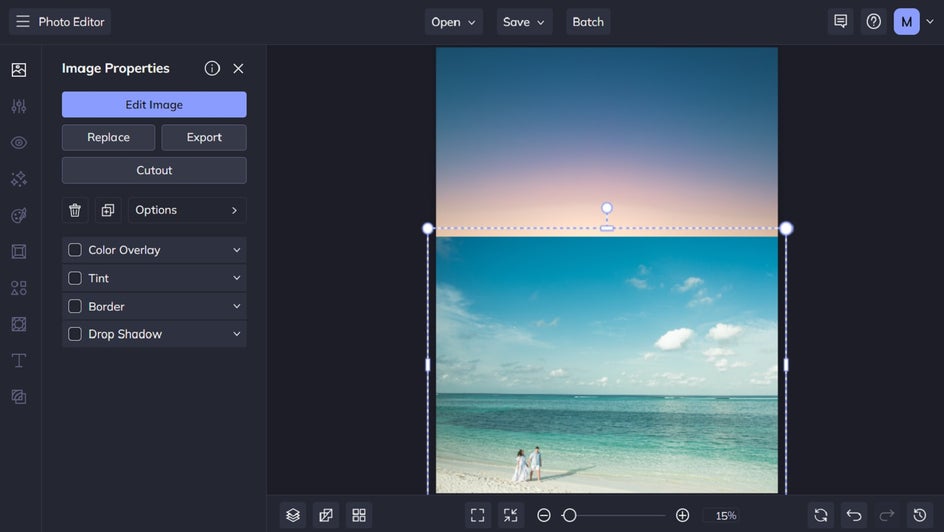
Once uploaded, you can then use your cursor to drag it over to your sky image and layer it on top. Simply drag the corners of the image inwards or outwards to resize.
Step 3: Use the Cutout tool to Remove the Existing Sky
Next, we’re going to use the Cutout tool on your existing sky image to remove the sky we don’t wish to keep. When you click on your layered image, you’ll see an Edit Image button located within the Image Properties panel. Click this button, then click on Cutout within the Edit menu that appears.
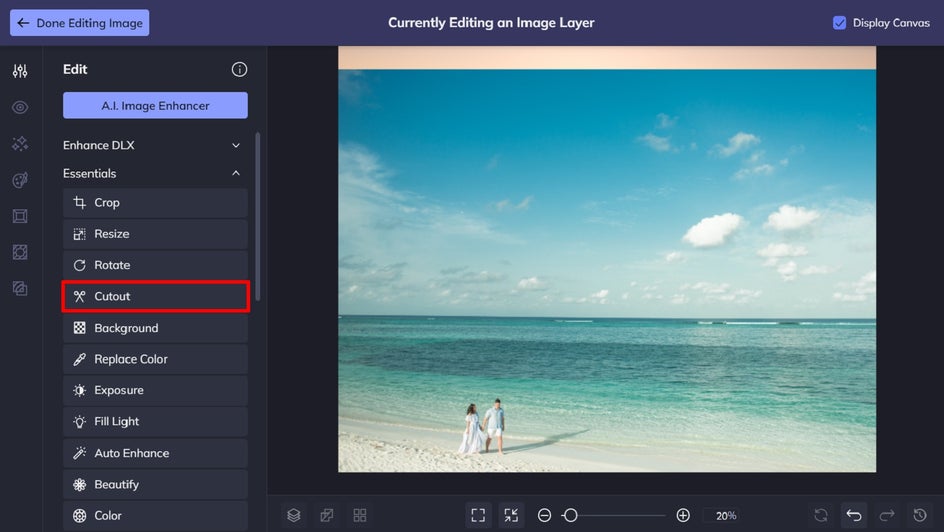
When your image features a clean skyline without anything obstructing the horizon (such as a person, tree, or mountain), then you can just use the rectangle cutout option, as pictured.
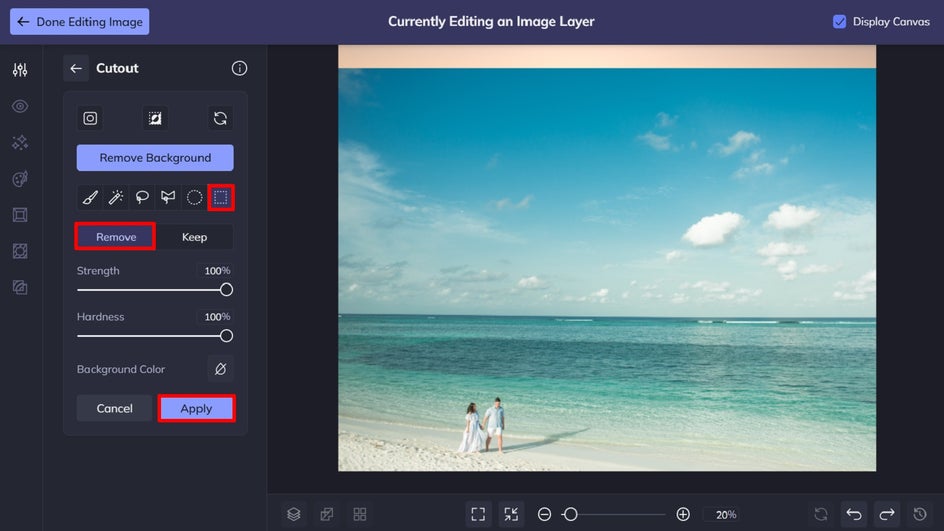
If your horizon isn’t exactly straight, you can simply zoom right in and continue using the rectangle cutout option to remove any remaining portions of the existing sky.
Click Apply to apply your changes, then click Done Editing Image.
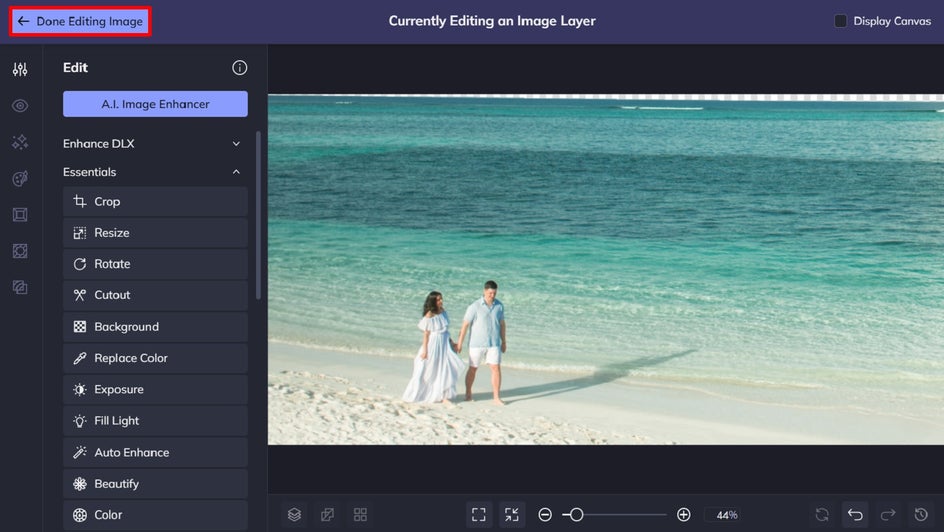
Step 4: Arrange Your Layers, Then Flatten and Crop
You’ll now have a sky-less layer of your existing image that you can reposition over your desired sky picture to create the perfect photo.
Once in place, you’ll then want to flatten your layers so they become the one image. To do this, click Flatten at the bottom of the screen.
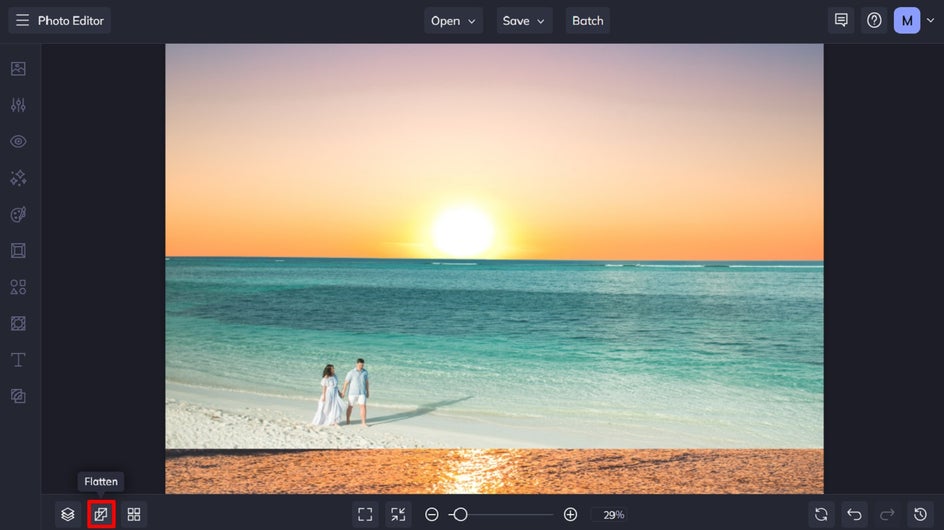
Now that your image layers are flattened, you’ll want to crop your image to add the final, realistic touch. Click on Edit from the main menu on the left, then select Crop. Once you’ve made your crop selection, click Apply.
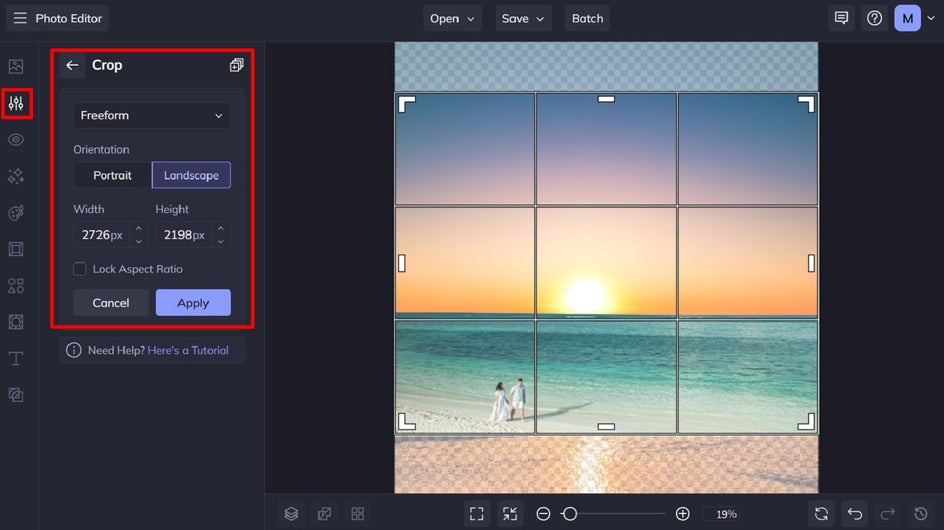
Step 5: Save Your New Sky Picture
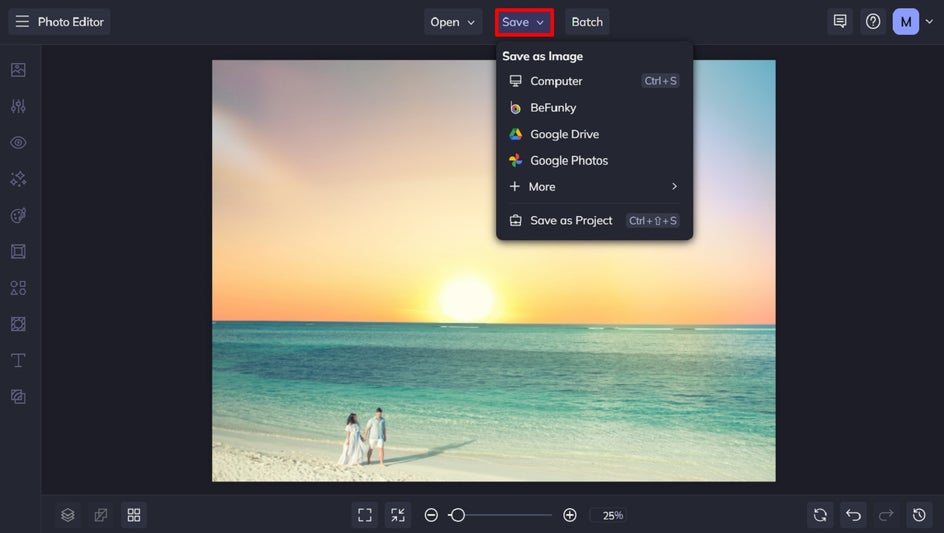
You can then choose to add BeFunky’s Photo Effects to your image (we’ve gone with Summer 2 to tie both layers together more), or if you’re happy with your image as-is, it’s time to save it. Click Save at the top of the screen, then select your desired save location.
Replace Sky Method 1: Before and After
With the cutout tool, we've replaced the daytime skyline with a sunset to better fit the desired mood. Next, we're going to show you how to do the same thing with the Background Remover. Stick around to decide which method is best for you!


Sky Replacement Method 2: The Background Remover
What about if the sky you’re looking to replace contains other objects in front of it, such trees, people, or mountains? While this may seem more difficult, it’s still a quick and easy process using BeFunky’s Background Remover tool.
To begin, head to the Photo Editor and open your desired sky picture. This will be the image you want to layer on top of your existing photo.
Step 1: Add Your Existing Sky Image
Similar to the tutorial above, you’ll then want to add your existing sky picture as an image layer. Navigate to Image Manager in the menu on the left, then click Computer or the three dots (“…”) to open your file.
Then, simply drag it onto your canvas and adjust it using your cursor.
Step 2: Edit Your Image Layer Using the Background Remover Tool
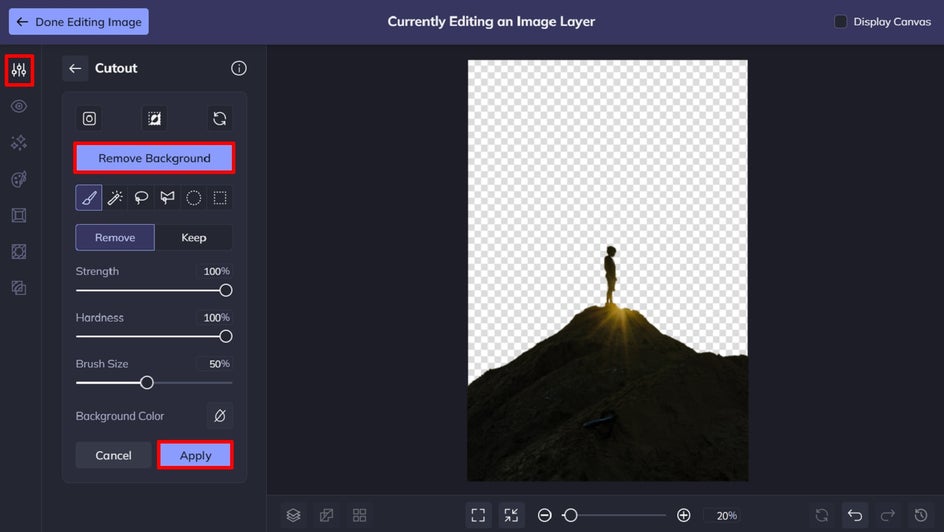
In the Image Properties panel, click Edit Image. Then, once the Edit menu appears, click Cutout. Unlike the first tutorial, however, we’ll be using the Background Remover tool within Cutout. Simply click on the Remove Background button to let the tool work its magic.
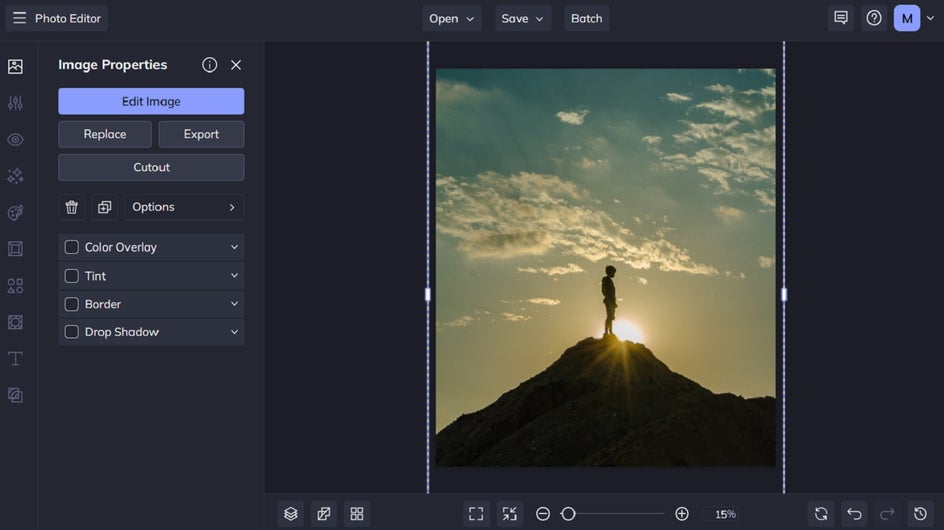
If you need to make any adjustments, you can do so with the Remove and Keep buttons. Once you're done, click Apply to apply your new changes, then select Done Editing Image in the top-left of the screen.
Step 3: Arrange Your Layers, Then Flatten and Crop
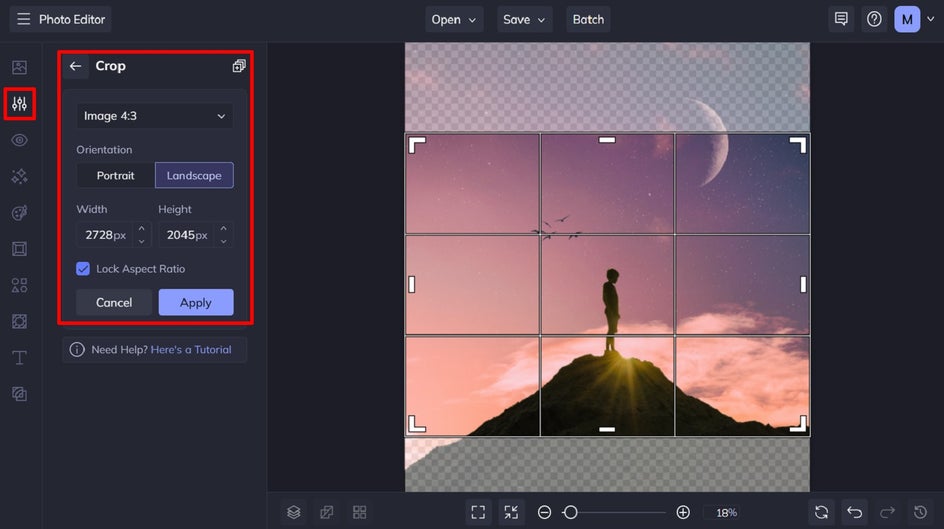
Just as in the first tutorial, you’ll want to position your layers in a way that makes them look the most realistic. You’ll also need to click the Flatten button at the bottom of the screen, then use the Crop tool to crop your final image, if required.
Finally, all that’s left to do is save your new sky picture!
Replace Sky Method 2: Before and After
As you can see, the Background Remover method may be better for more complex images that need precise care. But whichever you prefer, it's easy to replace the sky of your photos with BeFunky.


What About Changing the Sky's Color?
Wondering how to change the color of a sky in an image, rather than opting for total sky replacement? Or perhaps you’ve already replaced the sky in your photo using one of the two methods above, but still wish to alter its color?
Either way, this is extremely easy to do using the Replace Color tool in the Photo Editor. We’ve got a helpful tutorial that takes you through each step!


Sky Replacement, the Easy Way
With BeFunky’s Background Remover and Cutout tools, both of which are available in the Photo Editor, sky replacement has never been so easy! Whether you’re looking to change the sky color or edit a different sky entirely, BeFunky has got you sorted.
Ready to replace the sky in a picture? Check out the Photo Editor today to see just how helpful it is!


