The Perfect Birth Announcement Templates to Introduce Your New Addition

When you welcome a new bundle of joy into your family, there’s just nothing sweeter than introducing them to your friends and family for the first time. Whether you plan on doing a meet-and-greet sooner or later, it’s still a great idea to send out a baby announcement card that your loved ones can cherish for years to come.

We get it though: new parents have a few more pressing things keeping them busy (like a tiny human) and might not even know where to begin when it comes to creating their baby announcement card. Well, we’ve got some good news for you. BeFunky’s Graphic Designer has the perfect birth announcement templates to help spread the baby joy. Plus, with drag-and-drop simplicity, you can have yours ready within just minutes!
Baby Announcement Inspiration
Thankfully, not all baby announcement cards need to look the same. In fact, we encourage you to think outside of the box and make yours as unique as your newest addition! The Graphic Designer’s templates are all incredibly different, offering multiple themes, color schemes, and layouts. Here are just a few of our favorites to inspire you!
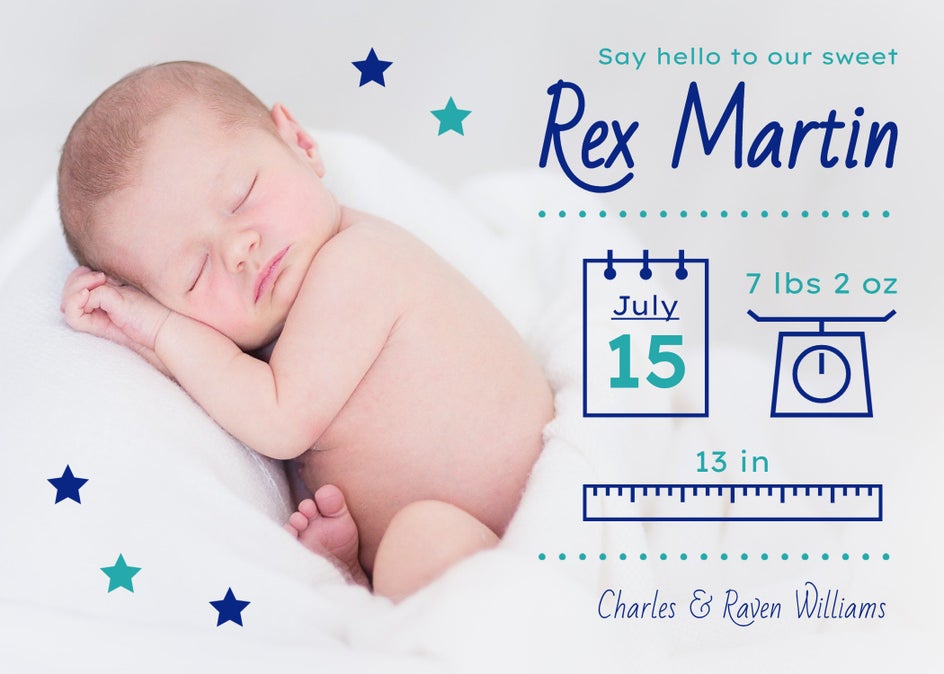
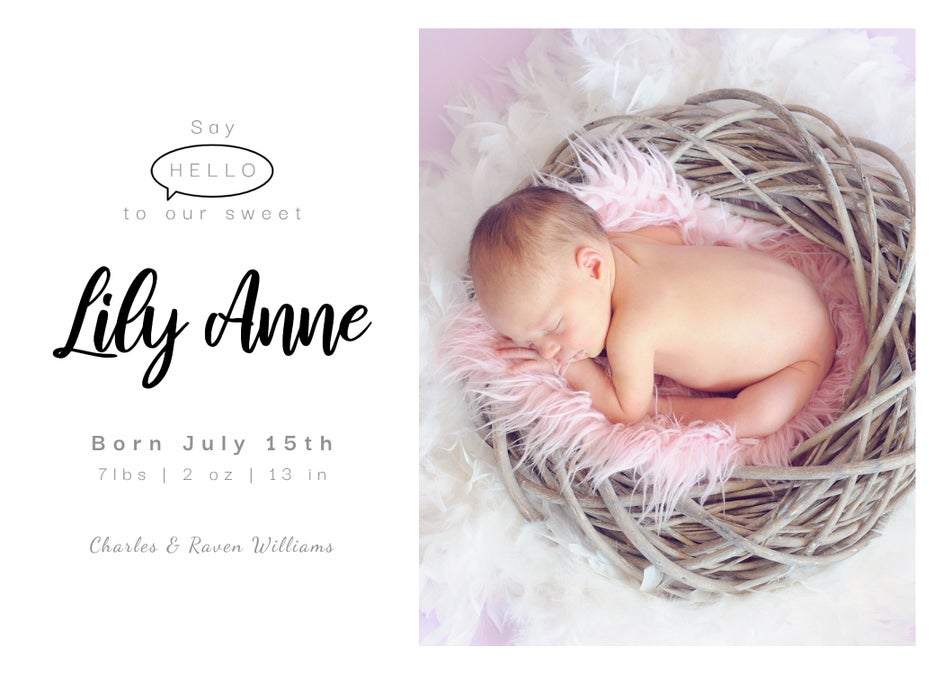
Photo Background
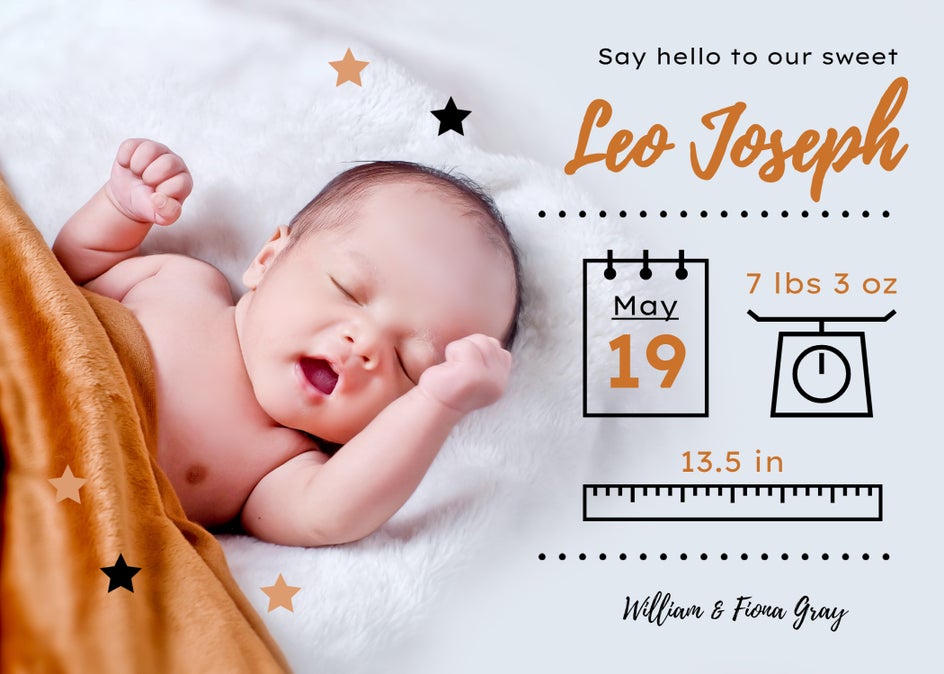
Let’s face it, there’s one main thing your loved ones want to see when they receive their baby announcement card in the mail, and that’s a big, gorgeous photo of your newborn. Sure, their weight, height, and arrival time are all important details, but nothing can beat the ‘oohs’ and ‘ahhs’ generated by a cute close-up. Thankfully, there are numerous templates which put your little angel front and center. Just swap out the template’s existing photo and details and you’re good to go!
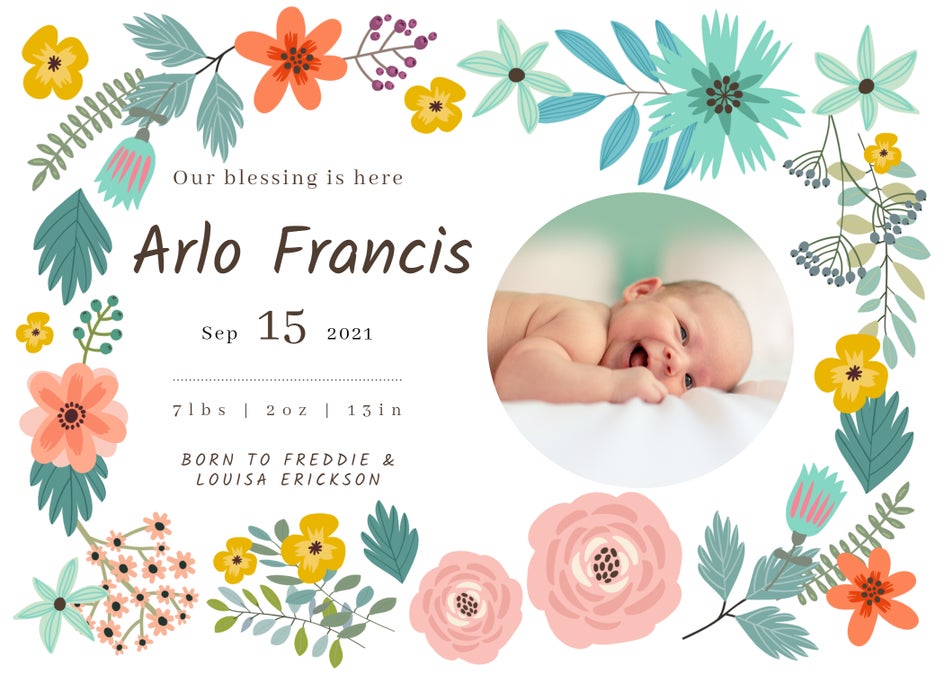
Delicate Florals
If you’re hoping to add an on-trend, designer look to your baby announcement card, look no further than a template featuring delicate floral motifs. They instantly elevate the design and their color can be customized to suit any look you’re going for – whether masculine, feminine, or gender neutral. Floral graphics are also a great way to delicately frame your template’s photo, if you’re including one.
Keep it Minimal
If large design elements or colorful palettes aren't quite your thing, then that’s ok! The Graphic Designer is also home to minimal and elegant Baby Announcement Card templates that you’re sure to love. Keep your baby as the star of the show with an eye-catching photo, then pair back the rest of the design with minimal graphics and a more monochromatic color scheme. Simple, yet stunning!
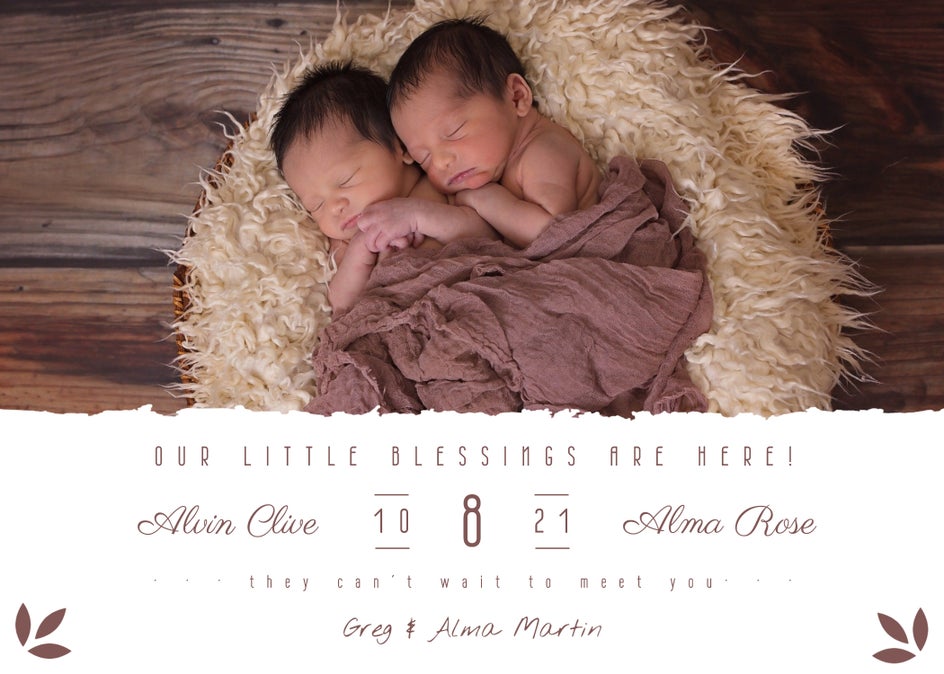
Double the Fun
What if your baby announcement card is more of a babies announcement card? If you’re celebrating double the joy and welcoming not one, but two (or three, or four…) newborns into your family at once, then take a deep breath and rest assured – our templates are also twin-friendly. Utilize one of the clever collage-style layouts to showcase multiple photos, or simply include a single photo featuring both siblings together. With a few quick clicks, you too will be finished tweaking your Announcement Card in no time!
How to Design a Birth Announcement Card
Now that you’ve got some ideas up your sleeves, it’s time to head to the Graphic Designer to create your own Birth Announcement Card!
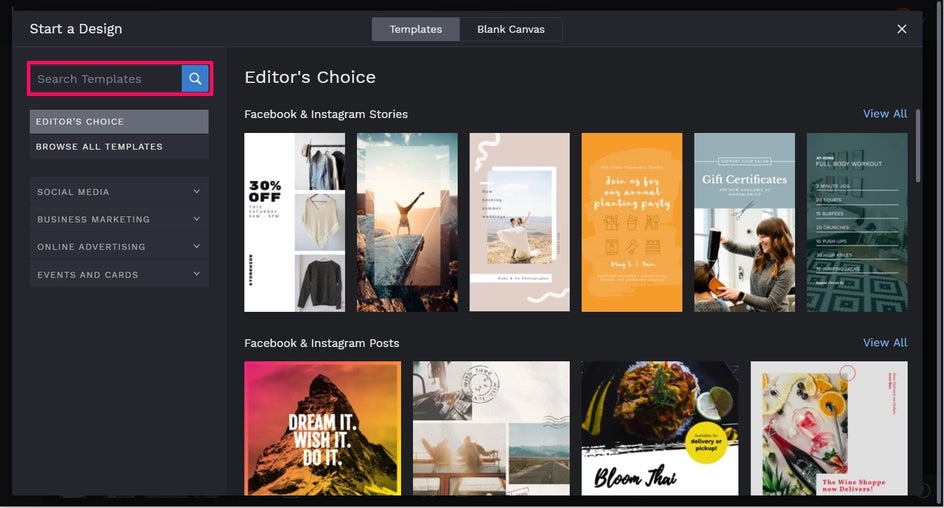
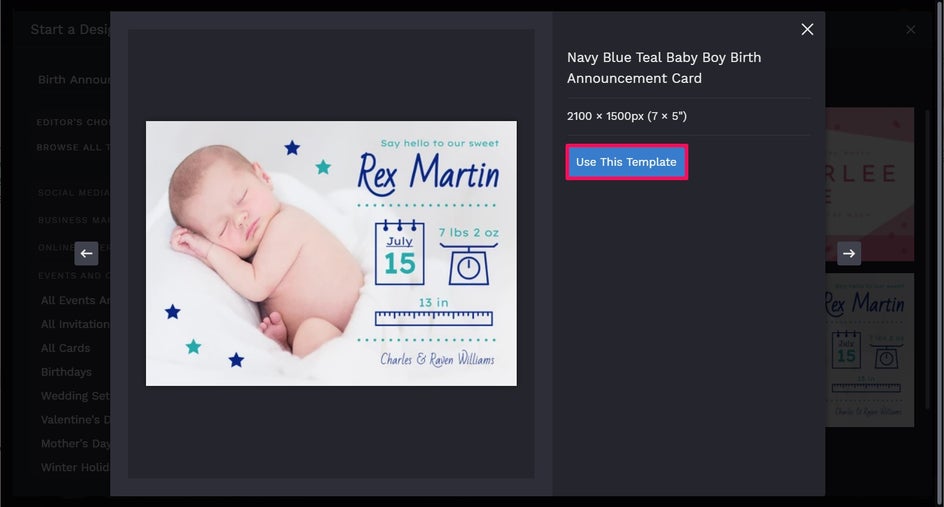
In the Template library, type Birth Announcement into the search bar in the top left of the screen then hit Enter.
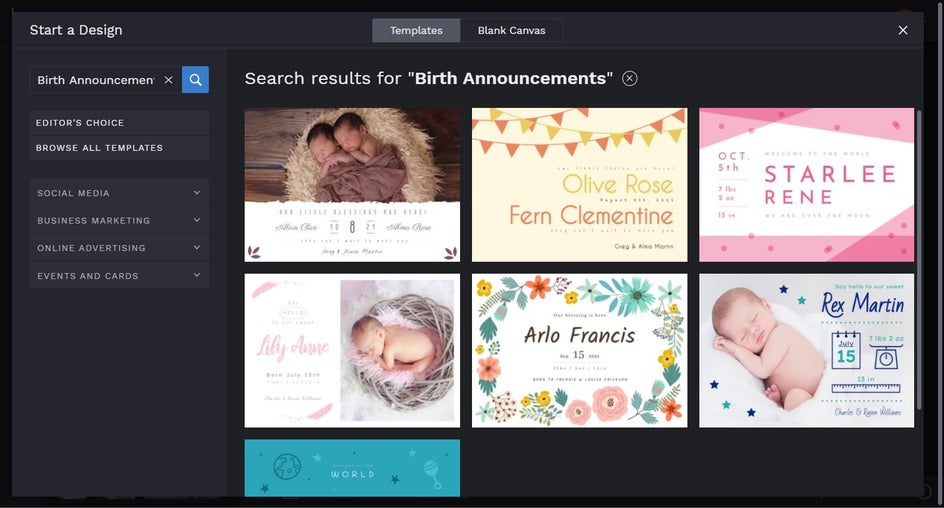
Simply click on the template that takes your fancy, then click Use This Template to begin.
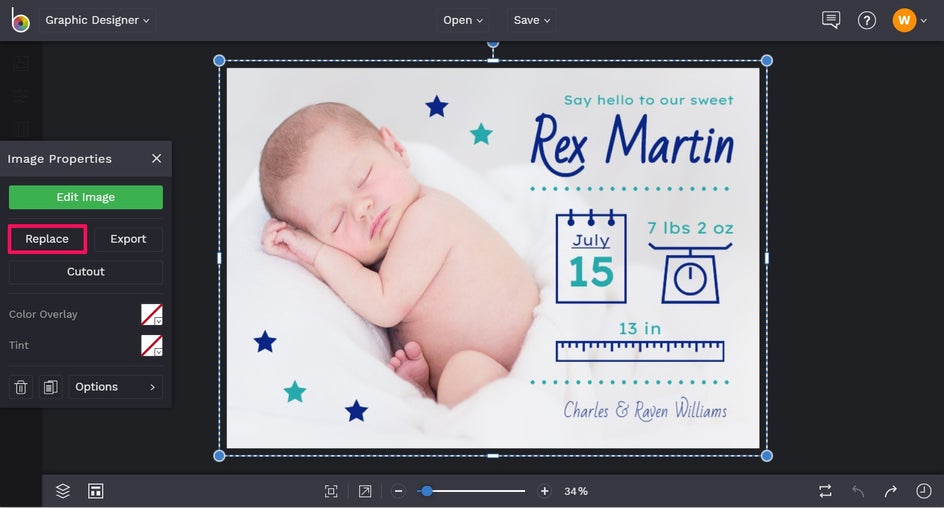
Firstly, you’ll want to swap your template’s existing photo for one featuring your own bundle of joy. To do this, click on the photo, then from the Image Properties menu that appears, click Replace. This lets you select a photo directly from your Computer’s files.
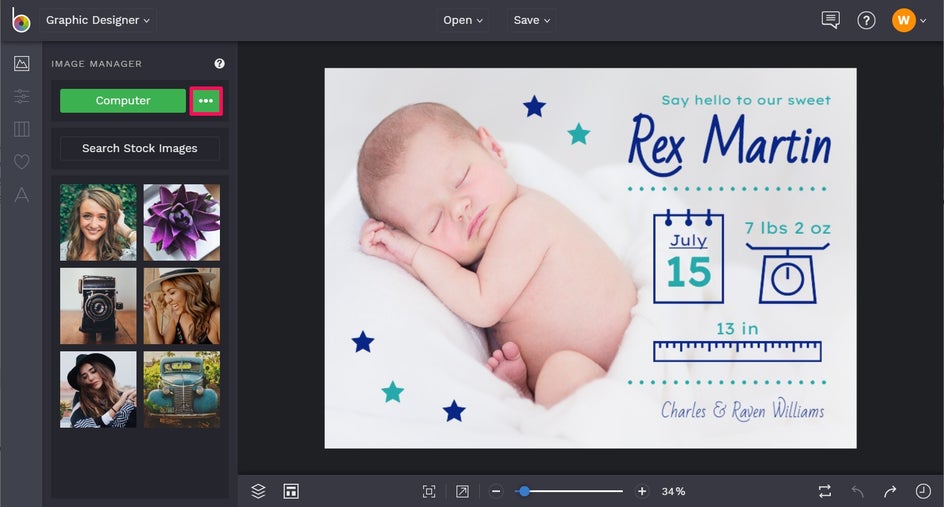
Want to upload an image from your BeFunky account instead? To do this, navigate to Image Manager in the main menu to the left. Then, click the green button featuring three dots. You can also upload an image from your Facebook or Google Photos from here too. Once you have your photo in the Image Manager, select the image you want to use in the card and drop it into the template to replace it!
With your new photo in place, it’s time to edit the existing text to reflect the details of your own baby. Simply double-click the text box you wish to change, then begin typing. Repeat this process for as many text boxes as necessary.

You’ll also notice that when you click on a text box, a Text Properties menu appears. From here, you can alter elements such as Font, Text Size, Text Color, Spacing, and more. In the Fonts, for example, you’ll notice plenty to choose from, including those with additional options such as Thin, Regular, Bold, and more. Here, we’ve changed our font to Playlist Script, which is a premium font available to anyone with a BeFunky Plus account.
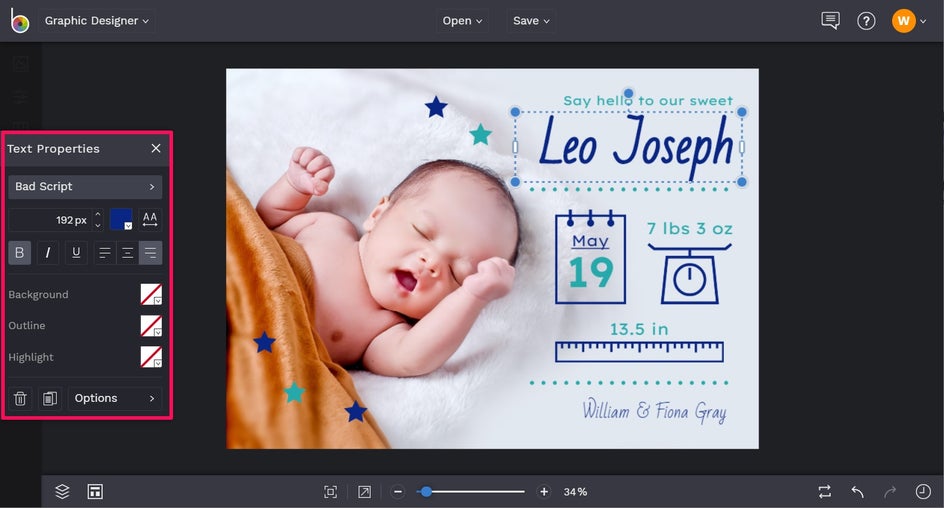
Additionally, we’ve changed the color of the existing text. To do this yourself, just click the colored square next to the Font Size. This lets you choose a shade directly from the Color Palette. Alternatively, you can type in your specific color’s HEX Code or use the Eyedropper tool to select a color already present in your design.
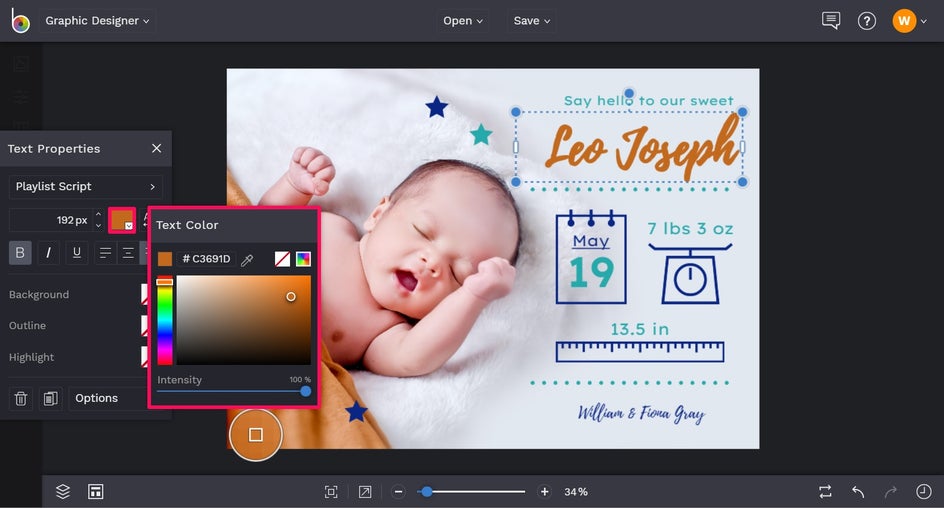
You can also use this process to change the color of graphics in your template. Click on the graphic you wish to change the color of, and from the Graphic Properties menu, click the square next to Color Overlay. This too will open the Color Palette.

We’ve also repeated this process for the stars present in our template, using the Eyedropper tool to recreate the soft orange color in our photo.
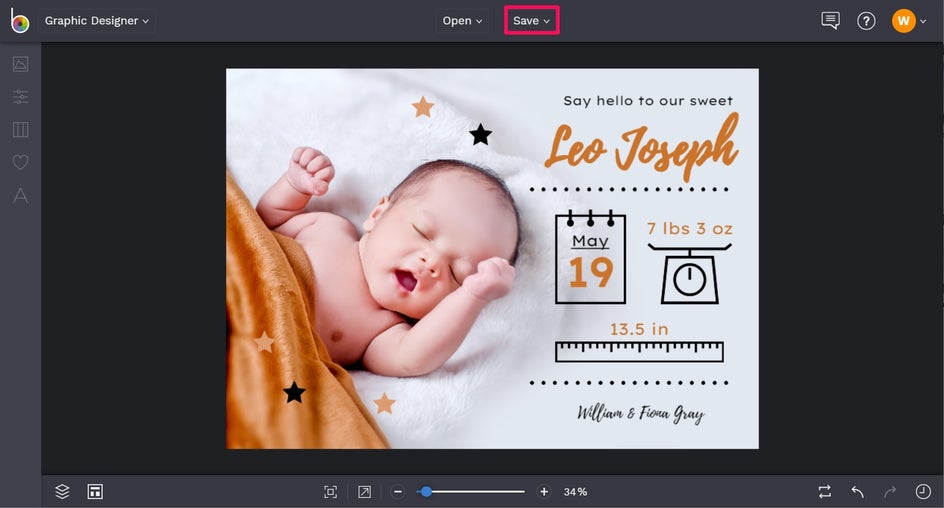
Once your Birth Announcement Card is complete, it’s time for the final step: saving your design! Click Save at the top of the screen and choose your desired save location. To save your card in the best resolution, we recommend saving it in PDF format. Simply select Print if you’ll be printing your card to send a physical copy, or Web if you’ll be sending it digitally.
Next Steps
What you do next is all dependent on which medium you wish to send your Birth Announcement Card – either printed or digitally. If you’ll be printing your card to mail out, send your PDF file to your chosen printer and make sure you’ve got all of your recipient’s addresses. Alternatively, if you’ll be sending your Birth Announcement Card digitally, ensure you’ve got your recipient’s email addresses or phone numbers ready to go!
Announcing your new bundle of joy has never been easier!