Spook Your Friends With This Ghostly Photo Edit
Halloween is the one time of year where you can really get your spook on. We celebrate by dressing up in crazy costumes, throwing parties with elaborate decorations, and eating lots of candy (ok, this is honestly starting to sound like our year-round vibe). Since it happens to be the most haunting time of the year, we thought it would be appropriate to incorporate some spookiness into a photo editing project: turning photos of people into photos of ghosts.
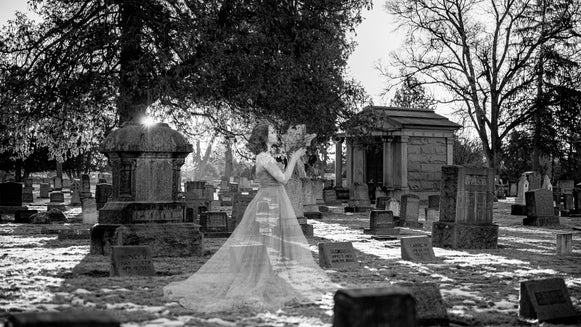
Are you spooked yet?
We’ve talked all about creating double exposure photography and using blend modes, and creating a ghost photo involves both of those things. The thing that makes this frightening photo editing technique a step beyond is the Cutout tool in our Photo Editor. It allows you to cut an object out of one photo (in this case, a person), and add it to another image as a layer. This way, you can insert your ghosts into spookier surroundings. Let’s get started, shall we?
Step 1: Use The Cutout Tool To Create Layers
First things first, you’ll need to find images that include the people you want to turn into ghosts. It could be a photo of you, your friends, a stock image, or all of the above! Head to BeFunky’s Photo Editor and upload a photo by dragging and dropping the image directly into the interface, or use the Open button at the top to select an image file from your Computer.
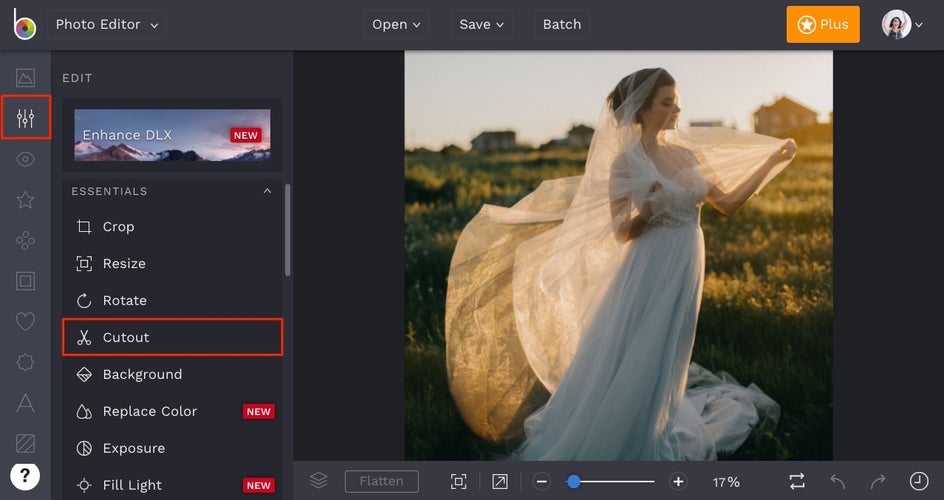
Next, select the Cutout tool from the Edit menu on the left. This technique works best if you use the Cutout tool in paint mode, so click on the Paint icon. Adjust the Brush Size and Feather sliders (more Feathering makes your edges sharper, and less will soften the edges around the object you’re painting over) and use your mouse to click and drag over the person in your photo.
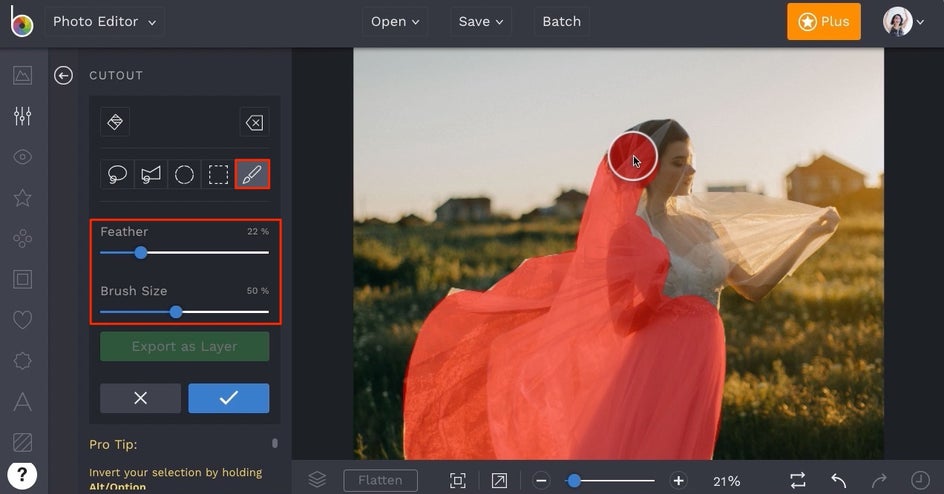
It really helps to zoom in to your image (use the Zoom bar at the bottom of the Photo Editor) so you don’t miss any details while using the Cutout tool. If you’ve accidentally painted over areas you didn’t intend to, use the Erase button in the Cutout tool menu to erase the effect from those parts of the photo.
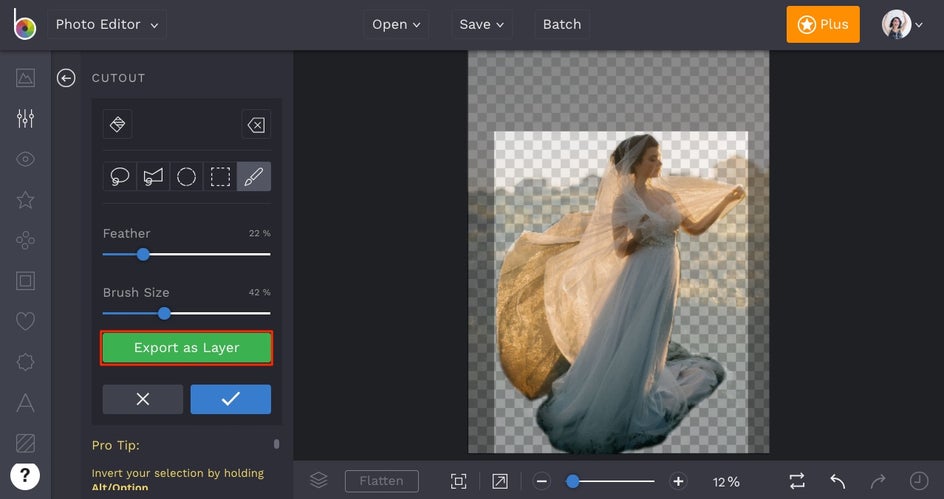
When you’re finished, you’ll see a blue dashed box around your cutout. If you’re happy with it, click the green button in the Cutout tool menu that’s titled Export As Layer. Your layer will now be available in the Images/Layers tab as a thumbnail for adding to another image.
Step 2: Find A Spooky Background
Now you’ll need to find a more frightening scene to place your layer. If you have a photo readily available, you can drag-and-drop it right into the Photo Editor interface to upload it, or use the Open button to upload the image. If you’d rather search for a stock photo, BeFunky offers over a million free stock images from Pixabay and Pexels to use in your projects! Just click on the Images/Layers tab and select the Search Stock Images button.
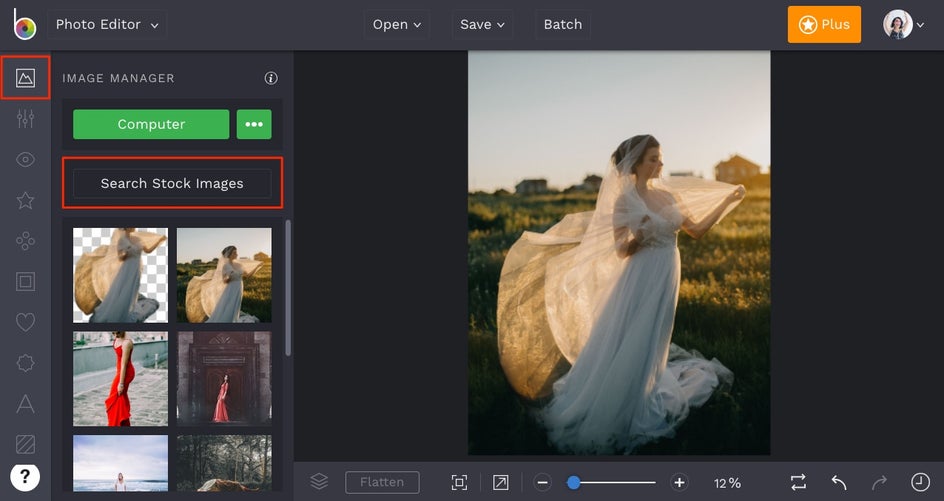
Type in a search term (we searched “graveyard”) and click on any search result that looks like a good background for your ghosts.
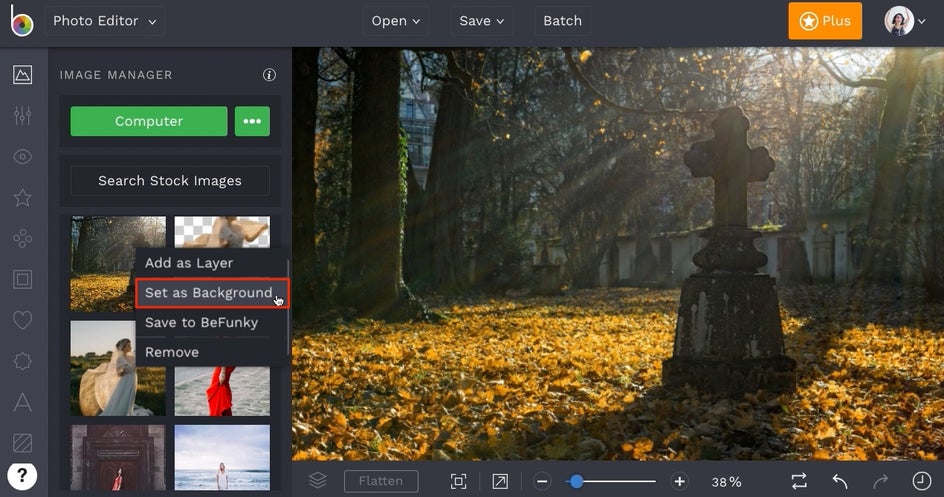
Each result you click will appear as a thumbnail in the Images/Layers tab. Click on the one you want to use and select Set As Background.
Step 3: Create A Ghostly Effect
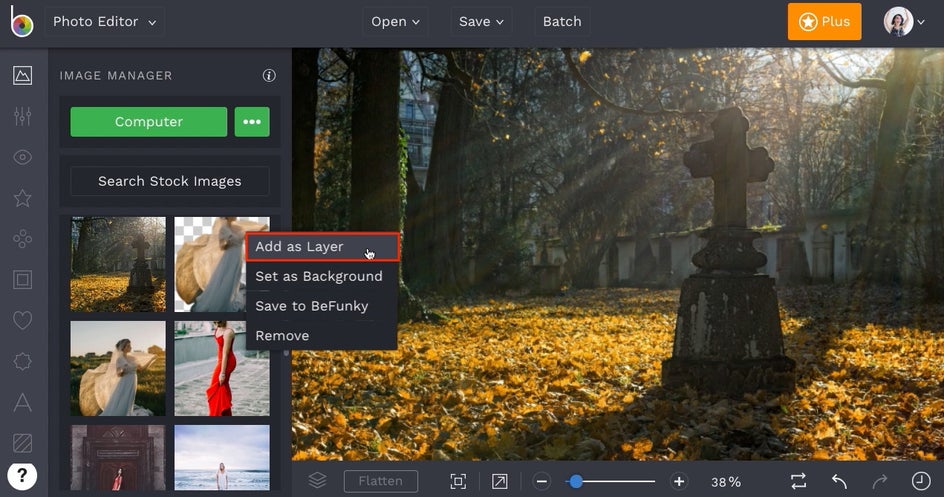
Once you’ve got your background squared away, it’s time to turn people into ghosts! Head to the Images/Layers tab if you’re not already there and click the image thumbnail that displays the layer you’ve cut out in step one. Select Add As Layer from the menu that appears and you’ll see it added directly onto your background image.
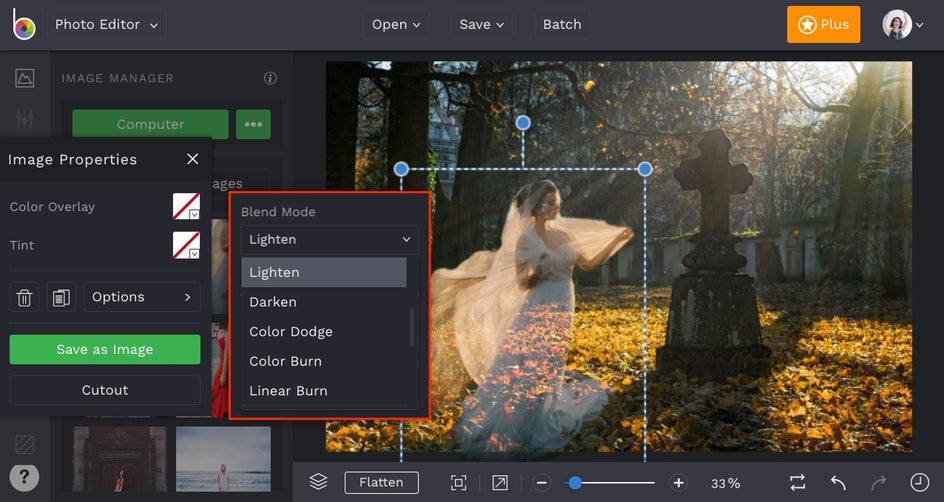
Next, click and drag the blue circles around the layer to resize it. Once you’ve got it proportional to your background image, click Options in the Image Properties menu that appears when your layer is selected.

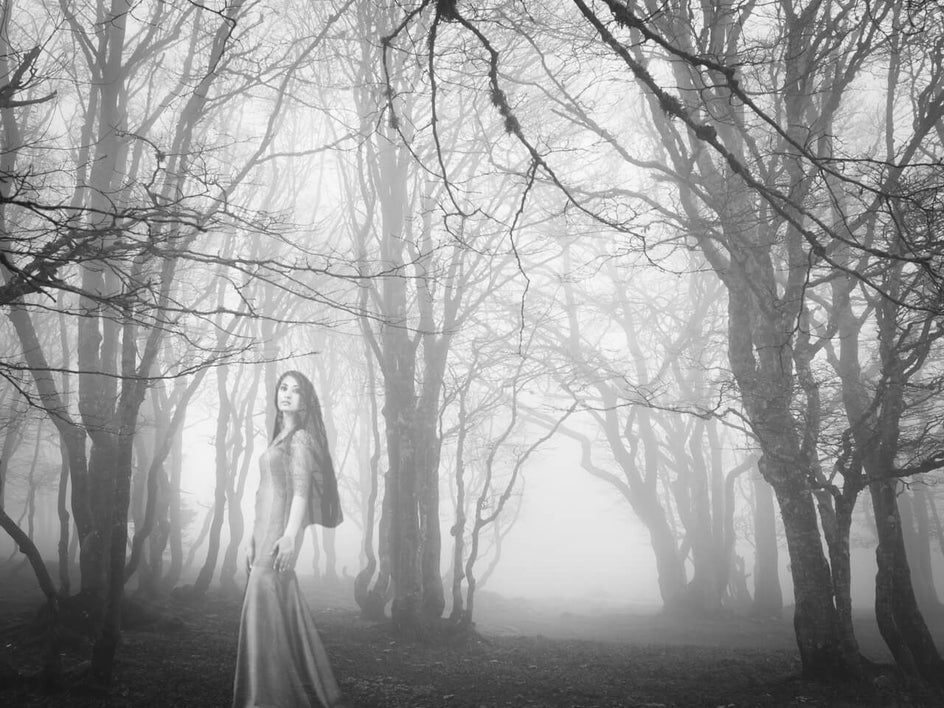
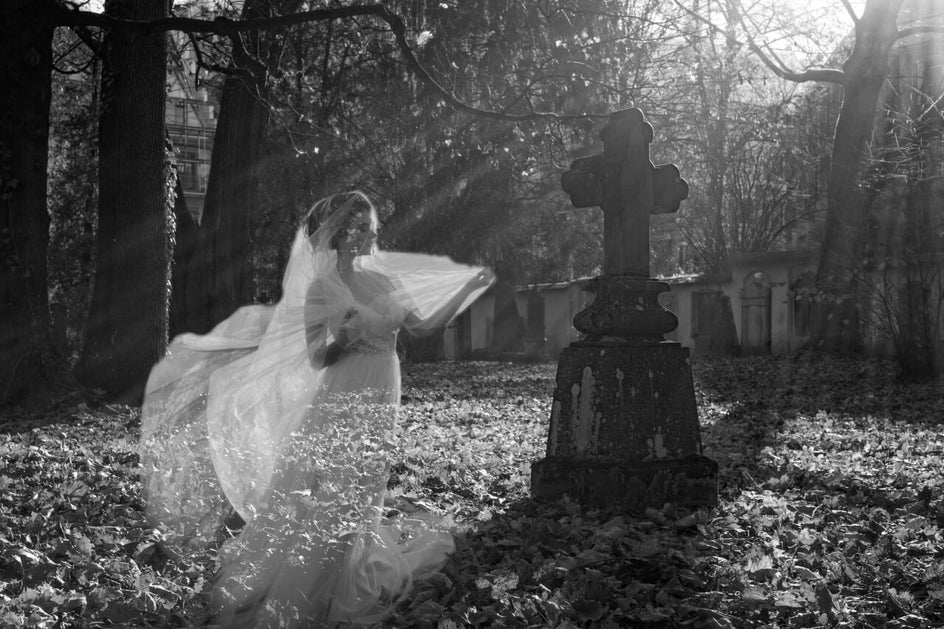
Once you’ve clicked Options, you’ll see a dropdown menu for Blend Modes where you can choose an effect that will turn the layer into a ghost. We’ve gone with the Lighten effect, which gives our layer a translucent glow.
If you’re happy with the look of your image in color, you’re good to go! We think things look even spookier in black and white, so follow on to the next step if you want to up the spook factor.
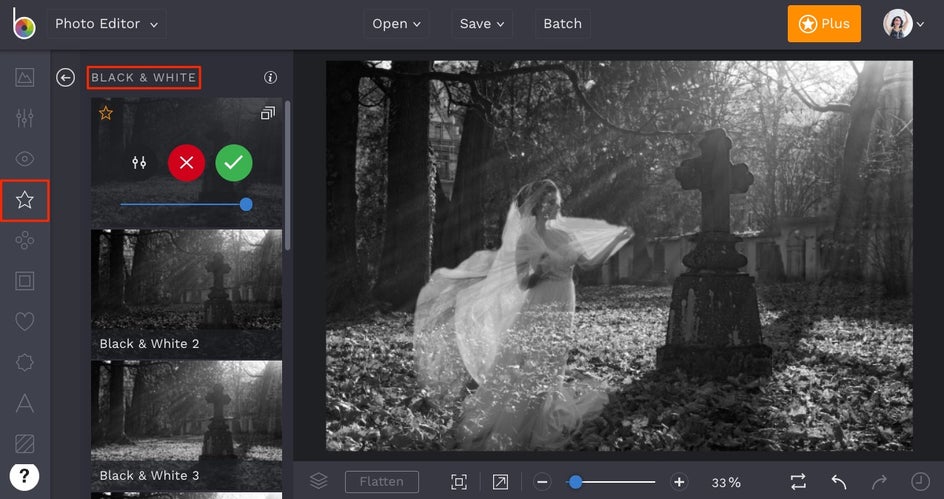
Step 4: Add A Black And White Filter
To add a frightening photo filter, first click the button in the bottom toolbar that says Flatten Layers. This will essentially glue your ghost layer onto the background and create one image for editing.

Click on the Effect tab in the main menu on the left (the star icon) and you’ll see plenty of photo filters and effects to add to your image. We’ve chosen a filter from the Black And White filter category (Black And White 1).
When you're happy with how your photo looks, all that's left to do is save it! At the top of the Photo Editor, you'll find a Save dropdown menu that will allow you to save the image to your Computer or directly to social media.
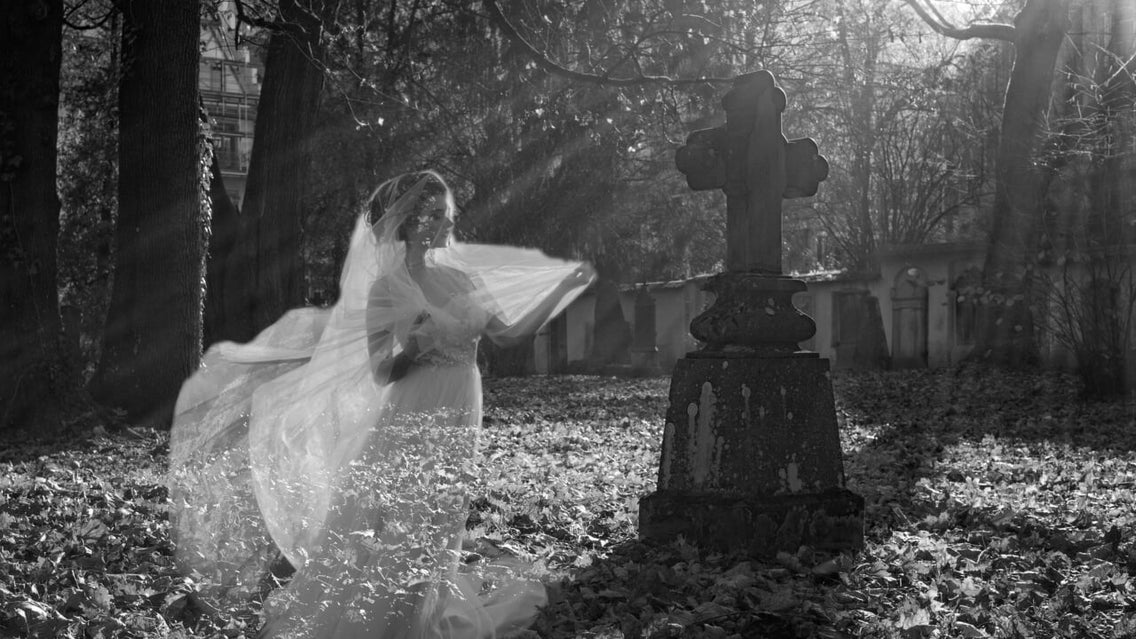
How scary does this photo look?
With BeFunky’s Cutout tool, it’s so easy to create photo manipulations like a pro! After creating a ghostly photo like this, you’re on your way to being a Cutout tool master. Happy Halloween month!