Turn Any Photo Into a Comic With BeFunky

Comics are a quintessential part of growing up, and so many of us feel the nostalgia of flipping through comic books or grabbing the page out of the newspaper. With BeFunky’s Cartoonizer, you can capture that look with one-of-a-kind cartoon filters. With just a few clicks, you will find your image jumping straight out of your favorite comic book pages!
How to Turn Your Photo Into a Comic
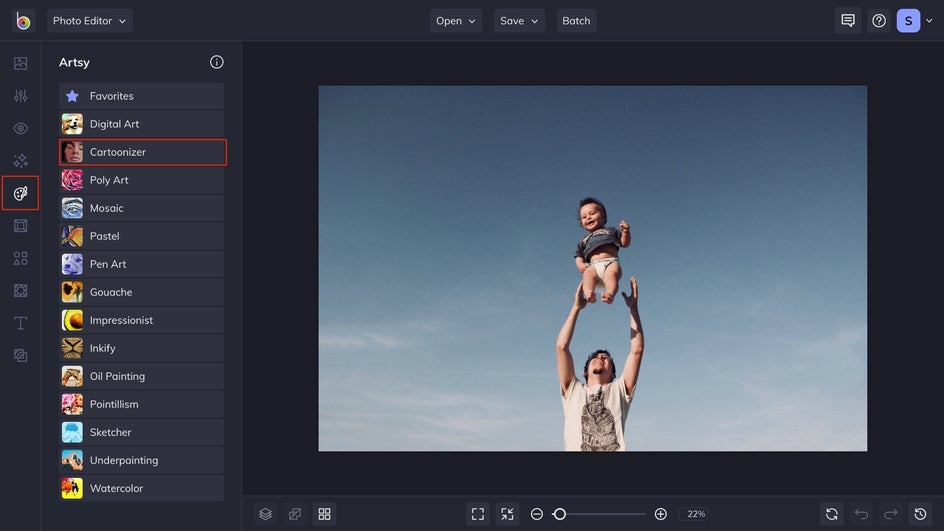
Feeling like it's time to turn your photos into a comic? Click here to head to the Artsy tab of the Photo Editor. Drag your photo directly onto the canvas, or choose one from your Image Manager.
Step 1: Apply the Cartoonizer Effect to Your Photo
For this tutorial, we're using a photo with a pretty solid background. But if you choose a photo that has a busier background, you can remove it with the Background Remover, one of our most popular photo editing tools.
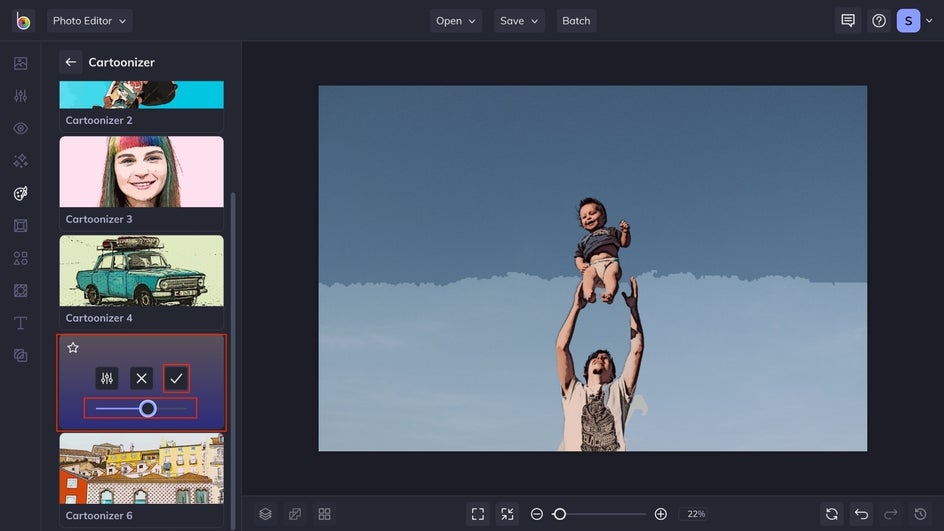
Select the Cartoonizer effect from the Artsy tab that fits your comic style the best. You may like the image to look more like an illustration, or a bit less. Click on the Settings icon (far left, above the slider) to bring up more customization options. Otherwise, you can simply adjust the strength of the effect with the slider. When you've achieved the right comic effect, click the checkmark to apply the effect.
Step 2: Apply a Sunburst Effect
Next, select the Effects tab on the left-hand side, followed by the Sunburst category. For this tutorial, we are going to use Sunburst 2.
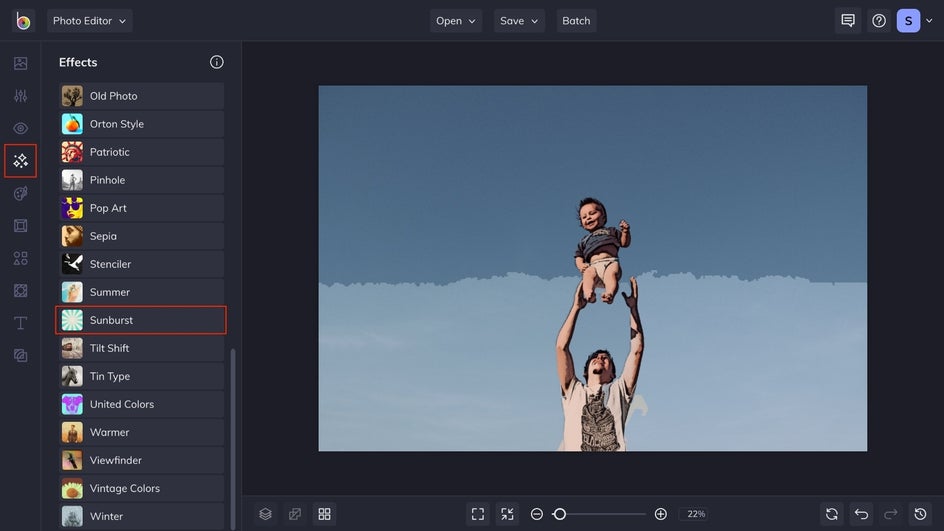
In this image, we are going to adjust the impact of it, using the slider. You are able to adjust the effect to be the perfect amount for your image, before applying.
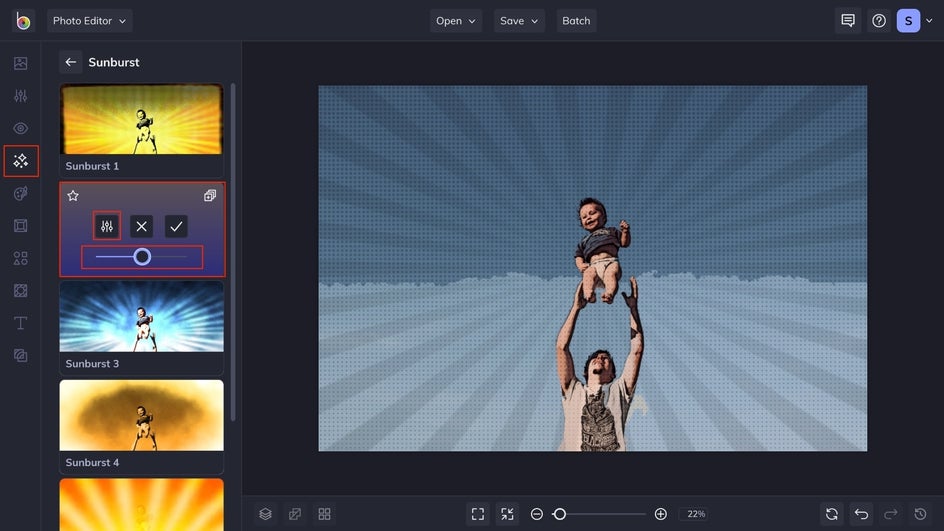
To make the people stand out more, we are going to remove the Sunburst effect from the subject. You are welcome to keep them if it’s closer to your desired result. To do this, click on the Settings icon. Then, select the Erase option, followed by Isolate Subject. A pop-up window will show up with the completed image. If you need to make adjustments, you can do so by using the Remove and Keep tabs. Once it looks perfect, then select apply.

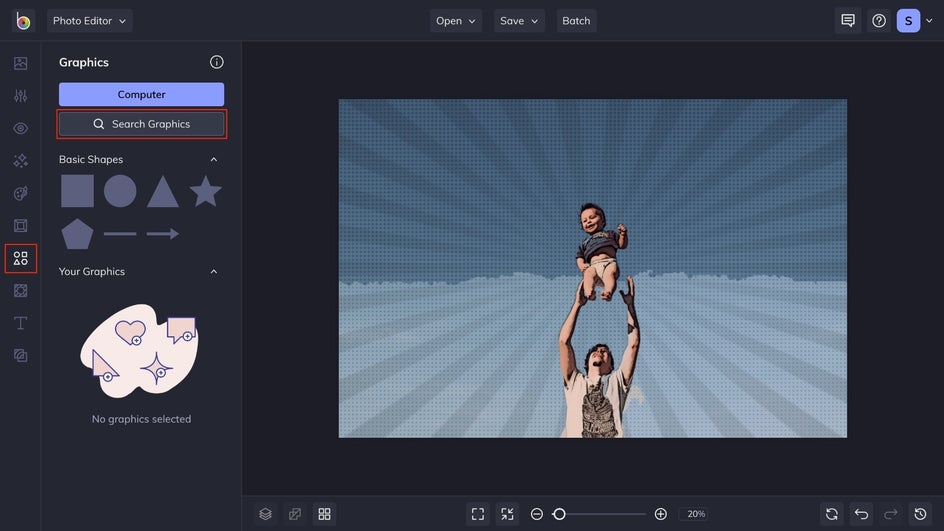
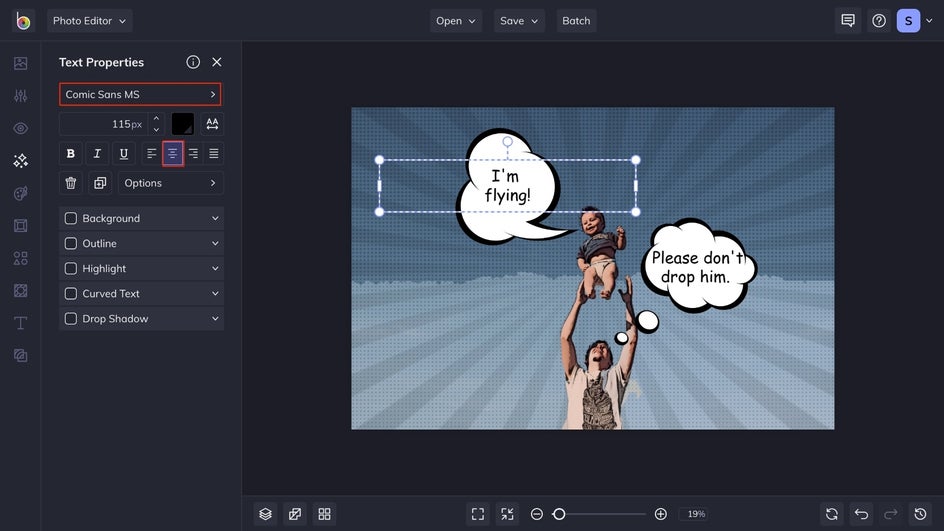
Step 3: Add Speech Bubble Graphics
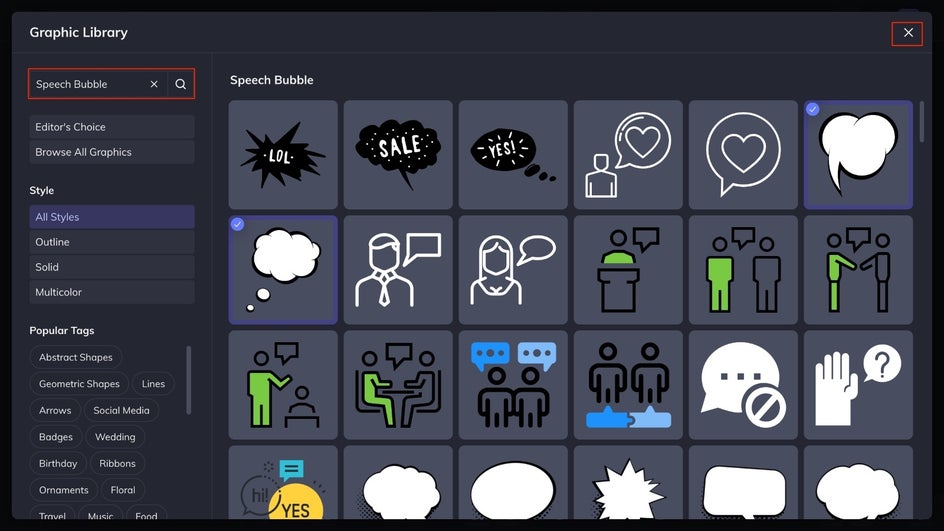
To add some speech bubbles to your image, select the Graphics tab and click the search box, and type “speech bubble” to find your perfect comic book speech bubble.
Next, you will select the graphics that will be the perfect addition to your comic, and then click the X in the upper right-hand corner.
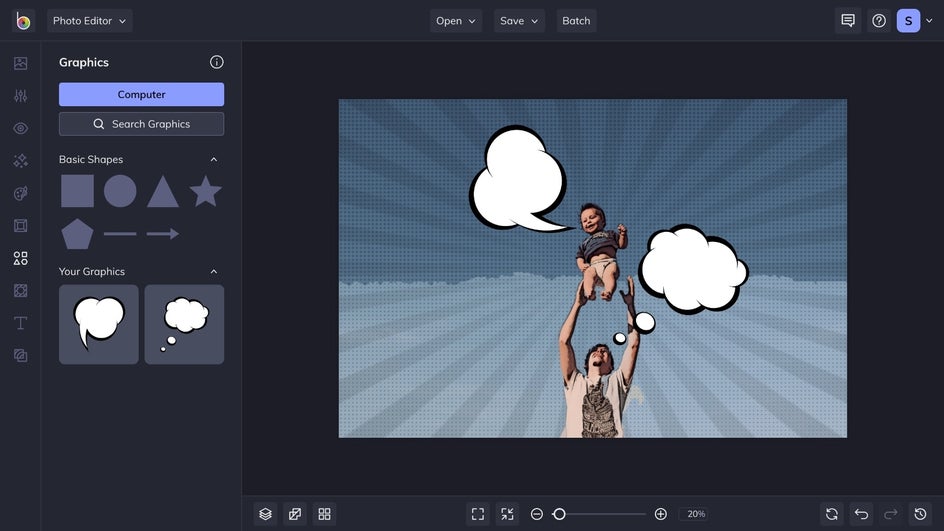
Once you exit the Graphic Library, you will be able to drag your speech bubble from the Graphics Manager onto your canvas and adjust them to the perfect position.
Step 4: Add Text
To add text to the speech bubbles, select the Text tab, followed by Add Text.

A text box will pop up where you are able to write what fits your comic panel the best. In this example, we are using the font Comic Sans to give the authentic comic book feel, but feel free to select the font that fits your aesthetic the best. Centering the text within the box will allow for it to fit within the speech bubble. You are able to move the text around so that it fits within the bubble to tell your story!
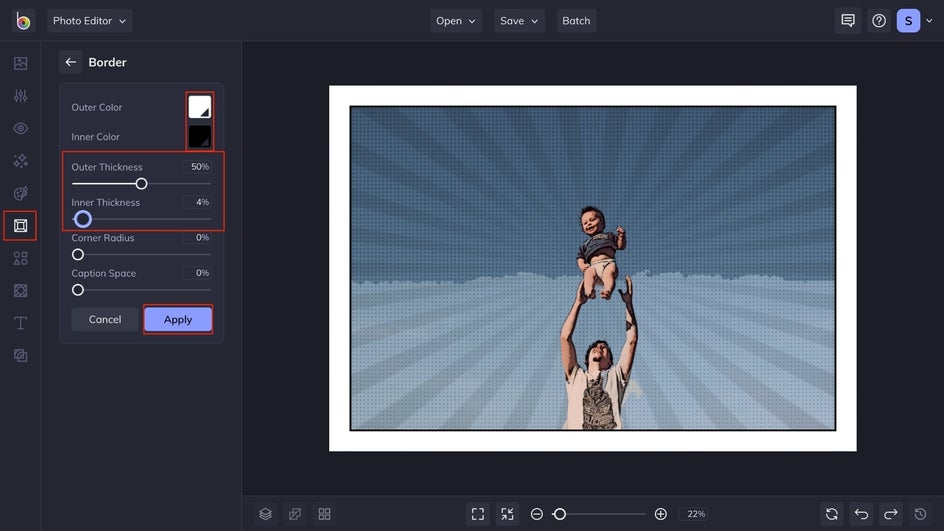
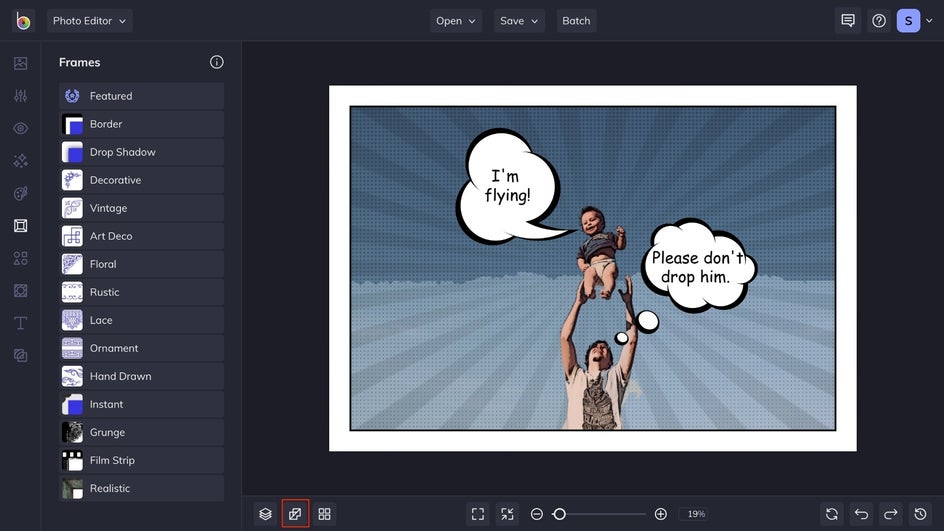
Step 5: Add a Border to Your Comic
Adding a border to your image will help it come off the page like your favorite comic. To do this, first select the Frames tab, followed by the Border effect. For this tutorial, we used white as the outer border color and black as the inner border color. We changed the inner border thickness to be 4%, but you can decide the right thickness for your comic panel. Then, click the Apply button.
Step 6: Flatten the Layers
Before we continue onto the next step, we are going to flatten all the layers to a single one to make it look more realistic. To do so, just click the Flatten icon, found at the bottom of the page.
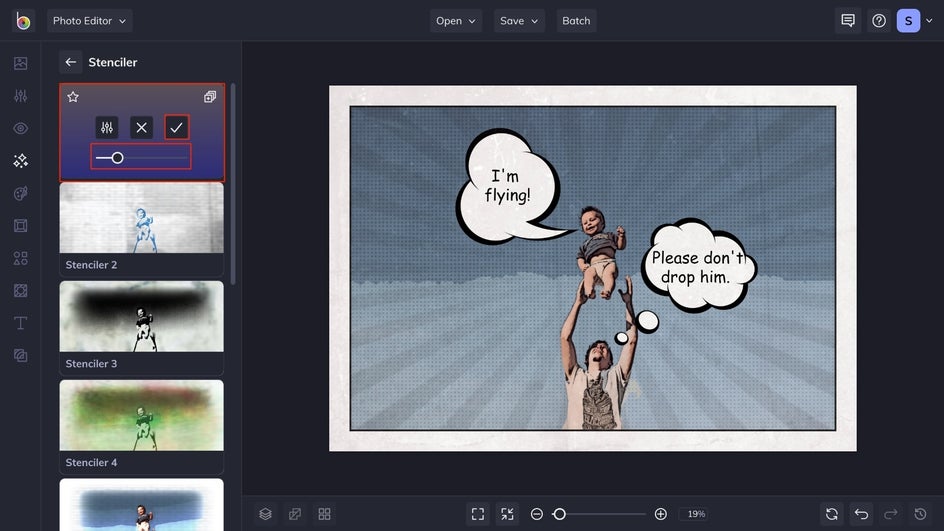
Step 7: Age Your Comic With the Stenciler Effect
To add an extra level of nostalgia, add the Stenciler effect to make it look like it is out of one of your favorite comic books. To do this, head to the Effects tab, followed by Stenciler.
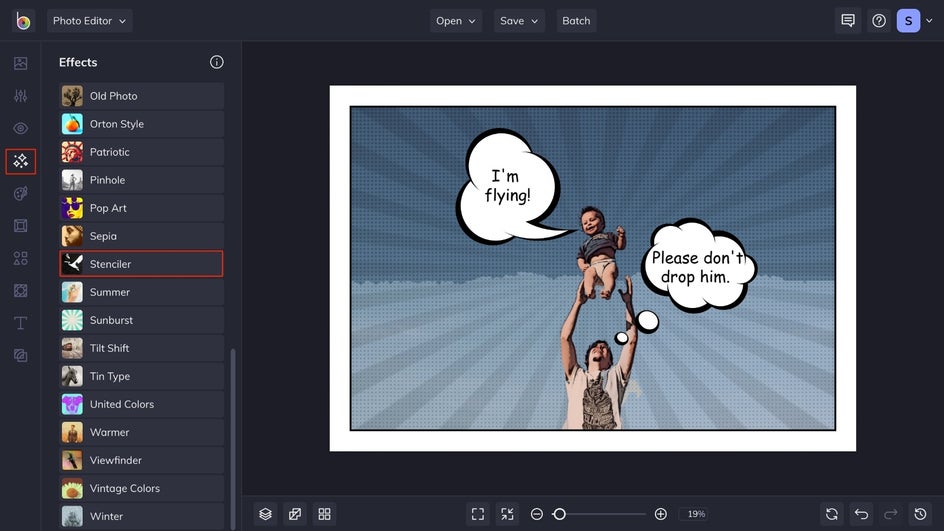
We used the Stenciler 1 effect and adjusted the slider to the desired effect. After you reach the perfect amount of aging to your comic panel, click apply.
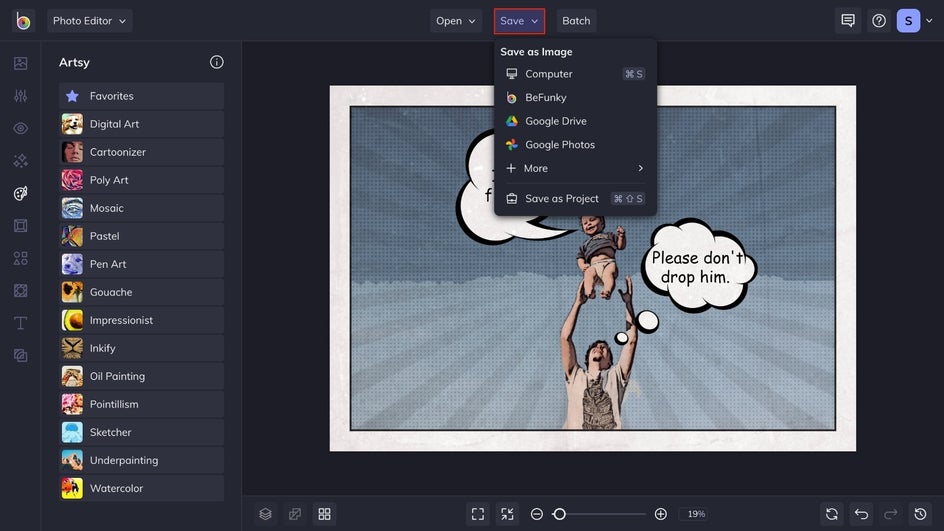
Step 8: Save Your Comic
Once you are finished perfecting your comic, you are ready to save it. Click Save at the top of the canvas, then select your preferred save location and file type.
Final Results
In just 8 easy steps, you are able to turn your favorite photos into a comic. Take a look at how we turned this photo into a comic!

Turn Your Photo Into a Comic – the Easy Way
The final results look like your photo was taken right out of your favorite comic book. You can do this with photos of pets, family, or anything in between! Get started with turning your photos into comics by using BeFunky’s Photo Editor and a handful of Artsy and Photo effects. You can go a step further and create multipaneled comics with our Collage Maker!