Create Photo Filters & Duotones With The Tint Tool

When you’ve been editing photos for awhile, your processes and procedures can become so routine that you get caught up applying the same adjustments over and over without venturing into other tools and techniques. Sure, it’s important to have a cohesive look throughout your photography and social media feeds, but if you feel like you’re lacking in the creativity department, it might be time to switch things up! After all, learning new things is always a good thing for exercising your creative muscles.

Whether you want to challenge yourself as a photo editor or take a more creative approach, our Tint tool is one of the quickest and most powerful ways to change up the look! From creating your own custom photo filters to duotones and split toning, the Tint tool in our Photo Editor gives you total control over the tints and tones in your images. Not only is it the perfect tool to up your photo editing creativity, it’s great for color correcting as well. Let’s take a moment to shine the spotlight on this one, because it’s about time it gets some well deserved attention!
Our Favorite Ways To Use The Tint Tool
The coolest thing about the Tint tool is that it allows you to assign one color to the highlights of your photo (Color Value 1) and a separate color to the shadows (Color Value 2) of your photo. This photo editing technique is also known as split toning, and you can use it for subtle color correcting or getting crazy with your colors for a totally unique look! Here are our favorite ways to use the Tint tool:
Create Custom Photo Filters
Knowing how to create custom photo filters is such a useful tool when you are a photographer. Doing this allows you to create consistency between your images and give them a look that’s totally you. While it’s commonplace to add your favorite photo filter from the Effect tab or mobile app, you can really stand out and have more control over your colors with the Tint tool.


By simply selecting a color for your highlights and a separate color for your shadows, you are able to adjust the color relationship between the two. You can keep it as subtle or as eye-catching as you want depending on the colors you choose, and since there are thousands of color combinations you could choose from, you can create a truly custom look that no one else has.
Enrich Tones and Replace Colors
The Tint Tool is also able to enhance the colors in specific areas of your photos. For example, you can choose to selectively adjust the color of your shadows and leave the highlights alone (or vice versa), or edit only the shadows, apply the Tint tool, then come back and separately edit the highlights. Either way, you can really control the overall tonality of your photo.
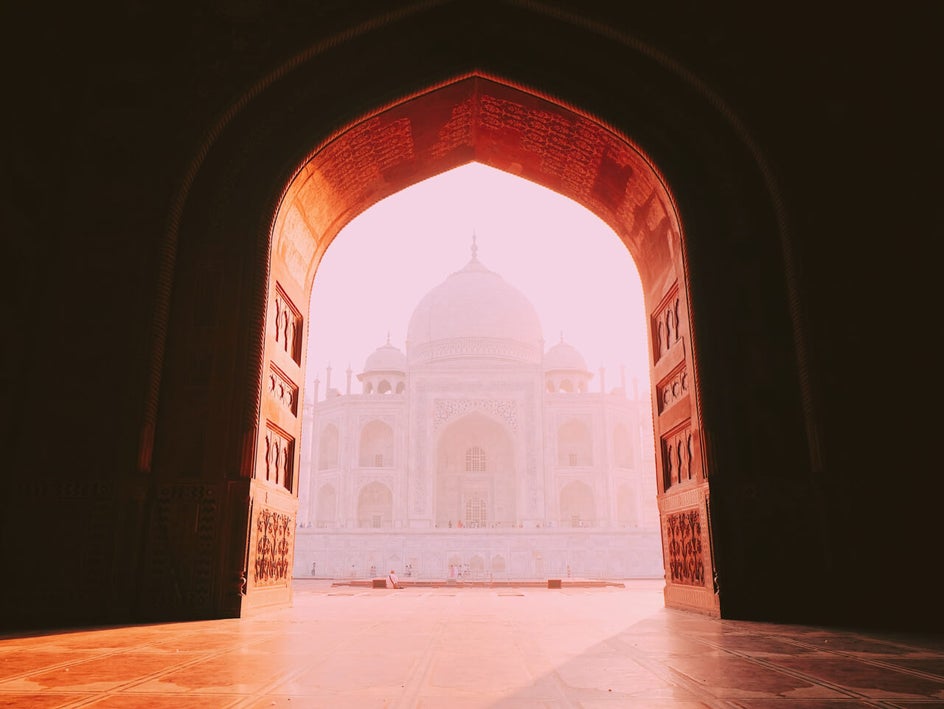
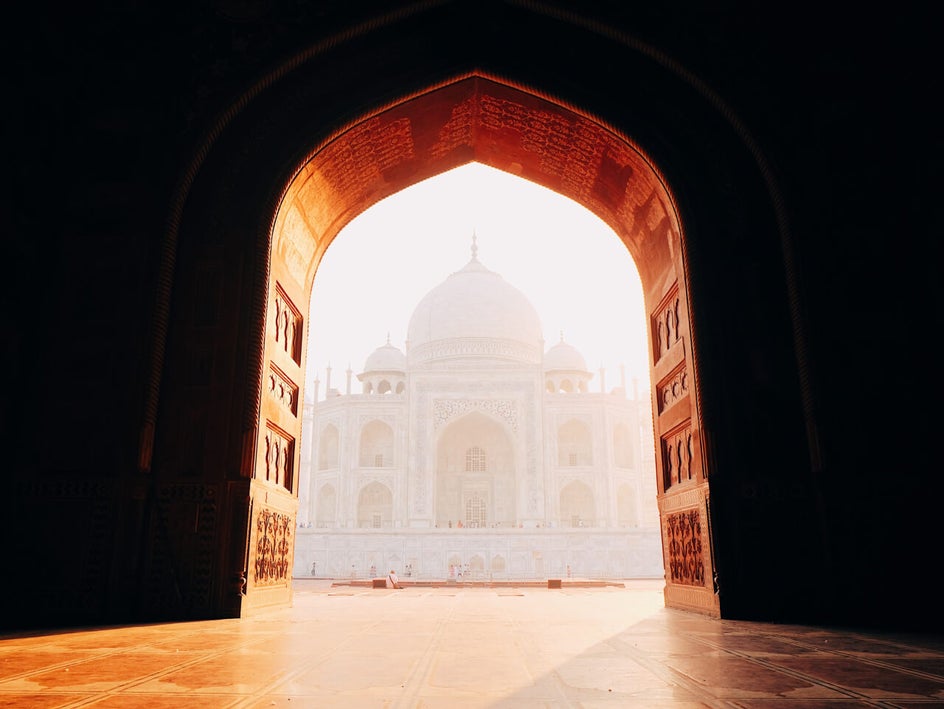
For example, if you take a photo of a sunset that is showing up very yellow, but you are wanting it to be more red, the Tint Tool can essentially rescue your photo by allowing you to manipulate the tonality and replace yellow with red! You can tweak the tones of your photo for color correcting, or create a totally surreal color palette. Whatever look you’re going for color-wise can be accomplished with the Tint tool!
Create Eye-Catching Duotones
Duotones are just what they sound like (two tones!) and they’re one of the most fun ways to use the Tint tool! When creating a duotone, you’d select bold colors for both the highlights and shadows, creating a totally surreal and eye-catching image. The technique is used widely in designing graphics for advertisements, posters, social media campaigns, and so on. By applying colors that have a relationship on the color wheel, you can create really aesthetically pleasing graphic elements with just a few clicks.


Whether you want to create your own photo filter, do some color correcting, or make colorful duotone graphics, the Tint tool can do all of it! The best way to learn it’s capabilities is to jump right in and start playing around with colors, but we’ll give you some guidance on how to make subtle and not-so-subtle edits with the Tint tool next.
How To Use The Tint Tool
When you’re ready to have a little fun with split toning using the Tint tool, head to BeFunky’s Photo Editor and upload a photo by selecting your file from the Open button at the top of the screen or by simply dragging-and-dropping it onto the interface. Select Tint from the Edit tab on the left (it’s under the Miscellaneous category at the bottom).
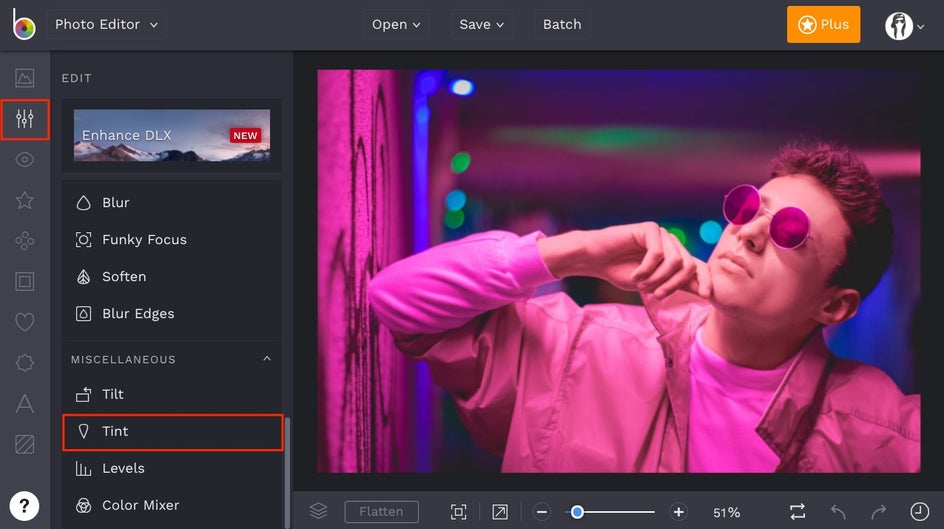
You’ll notice that your photo immediately turns black and white, but we’ll show you how to get those colors looking just right. First, turn the Opacity slider down to about 25%. This will allow you to subtly manipulate the colors in your image and create a custom photo filter. We

Next, click the box next to Color Value 1. This color will correspond with the highlights in your image, so use the color palette to choose the best color for the look you’re going for. If you have no idea where to begin when it comes to choosing colors, referencing the color wheel to find complementary colors is a good start. Another starting point is choosing a lighter color for Color Value 1 (especially because this color will be assigned to the highlights in the image) and planning a darker color for Color Value 2.
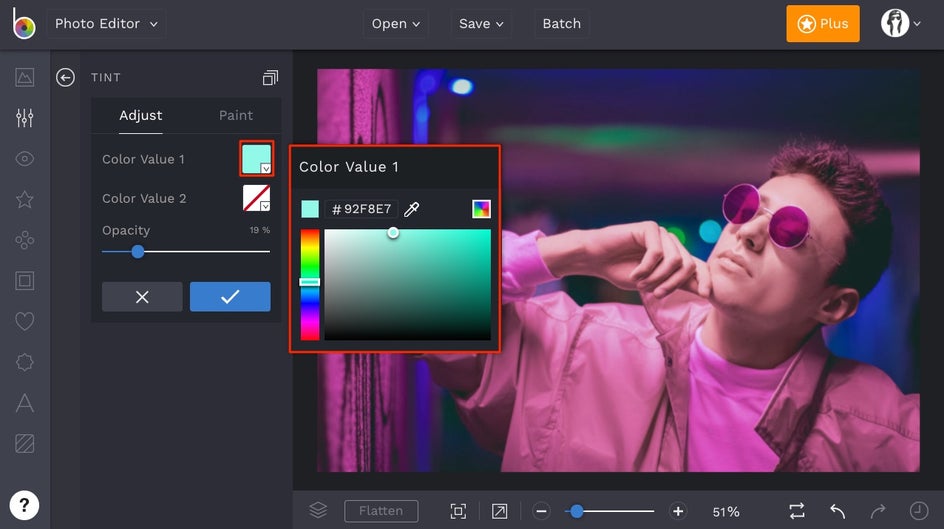
When you’ve got a good starting point with Color Value 1, click the box next to Color Value 2 and choose a color to assign to the shadows in your image. Try experimenting with different color choices until you find the perfect one to give you the look you’re going for.
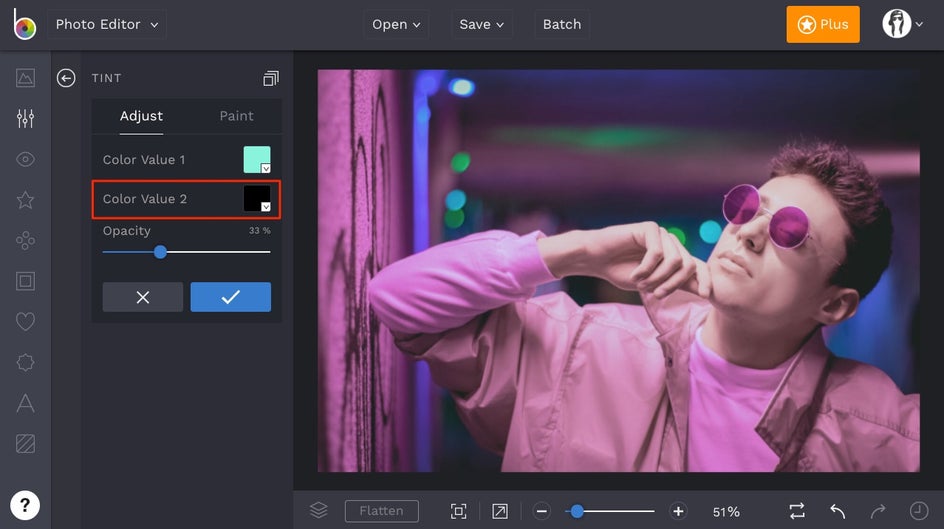
Keep in mind that you can make your custom photo filter more subtle by decreasing the Opacity slider, or more bold by increasing it. Here’s the custom photo filter we created for this photo to make it look more vintage and muted:


If you’re wanting a more dramatic look, like a duotone, increase the Opacity slider to 100% and choose a bold color scheme for Color Value 1 and Color Value 2, making sure that you assign the darker color to Color Value 2. Once you land on the perfect color scheme, you can play around with the Opacity to see what looks best.
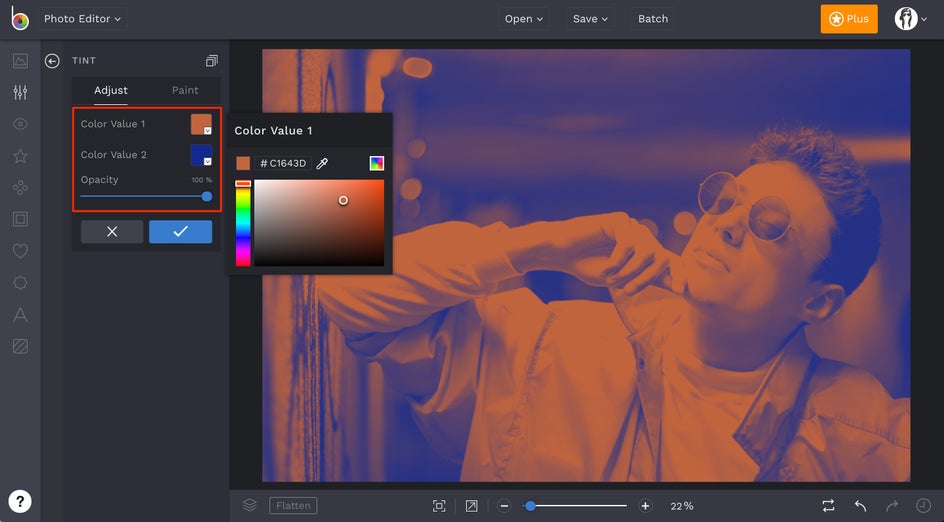
When things are looking perfect, click the blue checkmark to apply the edits you’ve made with the Tint tool. From here, you can continue layering photo edits or use the Save button at the top of the Photo Editor to save your image.
We're amazed at how the Tint tool transformed this image into an eye-catching duotone in a matter of seconds:


Whether it’s color correcting, a custom photo filter, or duotone you’re after, the Tint tool can help you achieve it all in a few clicks. It’s the perfect way to get out of a creative rut, or challenge yourself in your photo editing journey. Click the link below to start using it on your photos:

