New Feature: BeFunky Collage Maker (Finally!)

You may have noticed some slight design changes at BeFunky.com, I talk about that in another post... Right now, I want to show you our Precious... Our highly anticipated Collage Maker!
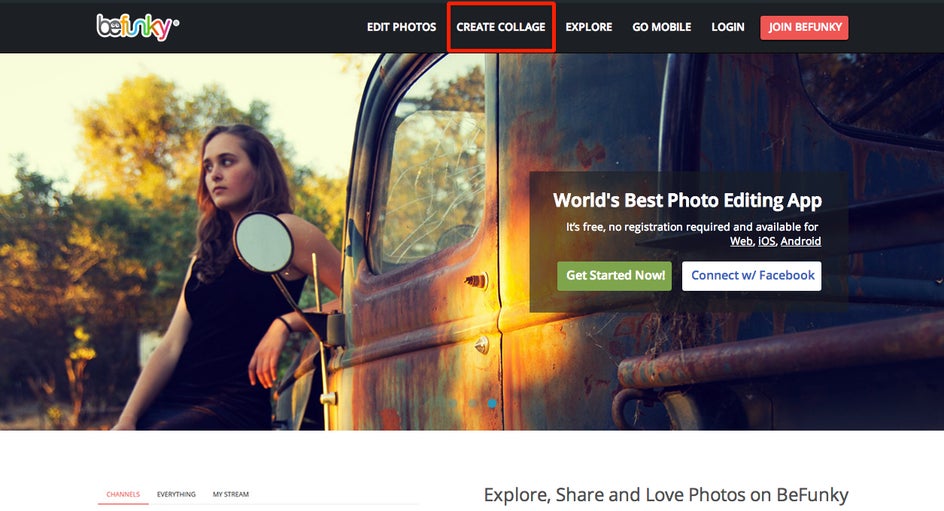
At the top of the New and Improved BeFunky.com you'll see a brand new option: 'Create Collage', click that to open right to the Collage Maker (or you can click right here!).
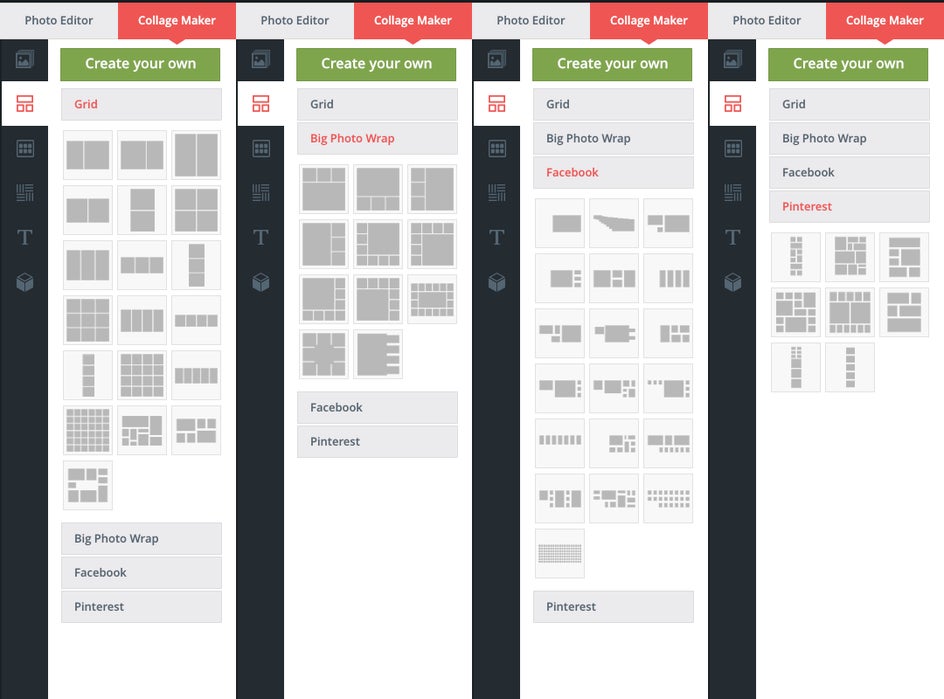
We have 54 Templates for you to choose from (or you can create your own custom Collage), including some fantastic Facebook Timeline Cover Photo Templates and some pretty awesome Pinterest Templates.
There are a quite a few ways for you to start your Collage workflow, I encourage you to experiment and find a flow that works best for you (there are no wrong ways to start a Collage!)... For this demo, I started by choosing my Template first.
So if you're still with me, you've chosen a Template (I picked a Facebook Cover Photo Template), now it's time to upload some photos (unless you already did that!). You can click Upload in the very top tool bar, or you can select the Photos Tab on the far left just under the Photo Editor button. Then just pick where you want to upload your photos from and follow the prompts.
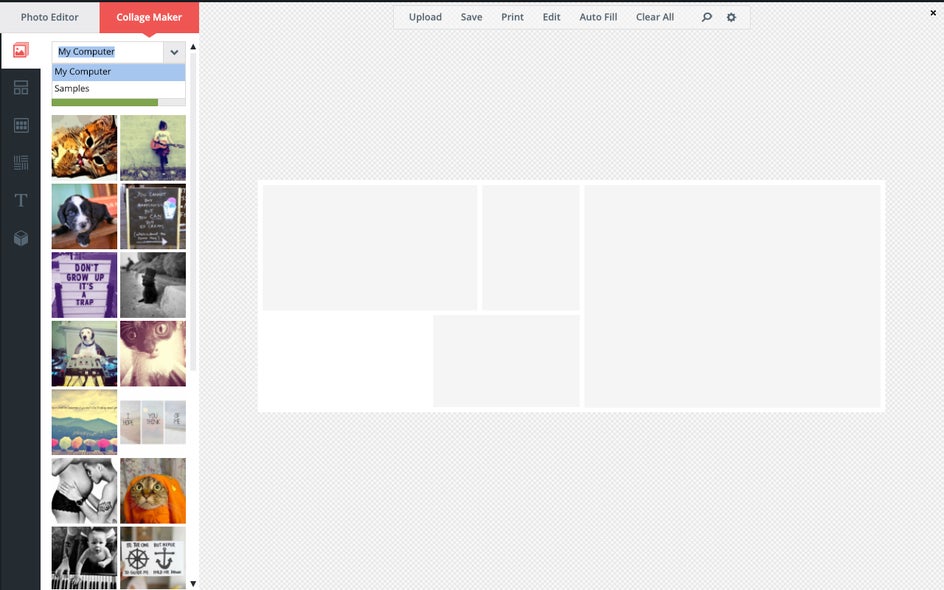
Now that you've uploaded some photos, you can just drag and drop them right into the boxes of your Collage.
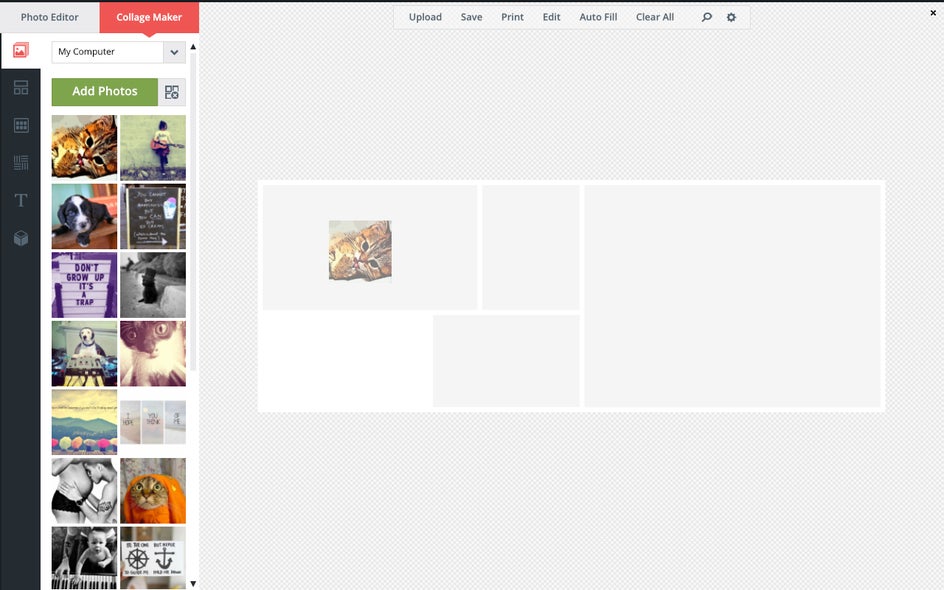
...And this is where the real fun begins :) Now that your Collage is full of photos, you can click and drag the photo around to reposition it and if you decide you want to move the photo somewhere else, just click it and drag it to the box you want! (if there's already a photo there, they'll swap places)
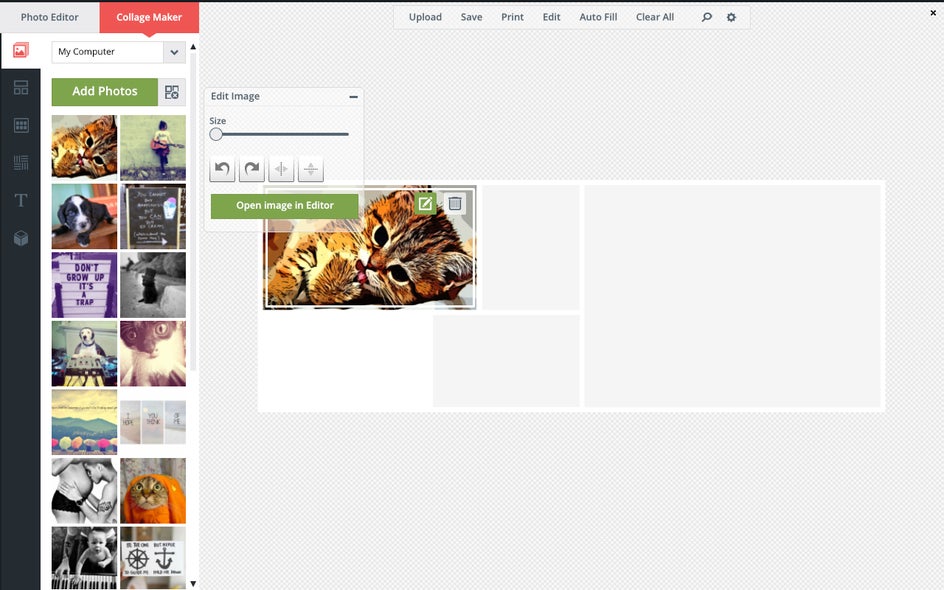
When you click an image in your Collage, you get a couple options in the upper right corner of the image: 'Edit' and 'Delete'. Delete is pretty obvious. When you click Edit a toolbox opens with a slider that lets you resize your photo, buttons to rotate it 90º left or right, buttons to flip it either horizontally or vertically, and a button that will open the photo in the Worlds Best Photo Editing App (ours, duh!) We've made it really easy for you to seamlessly go between our Photo Editor and Collage Maker!
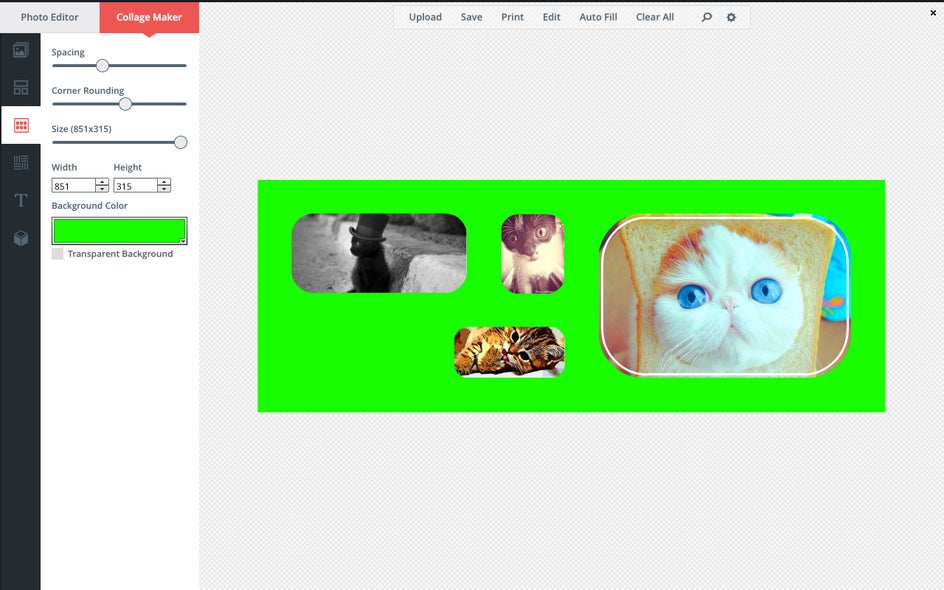
Now that you have your layout dialed in, time to BeFunky that Background! You can round the corners of your photos, add spacing between the photos, and choose a solid background color or make it transparent if you want (you'll have to save your collage as a .png with this option).
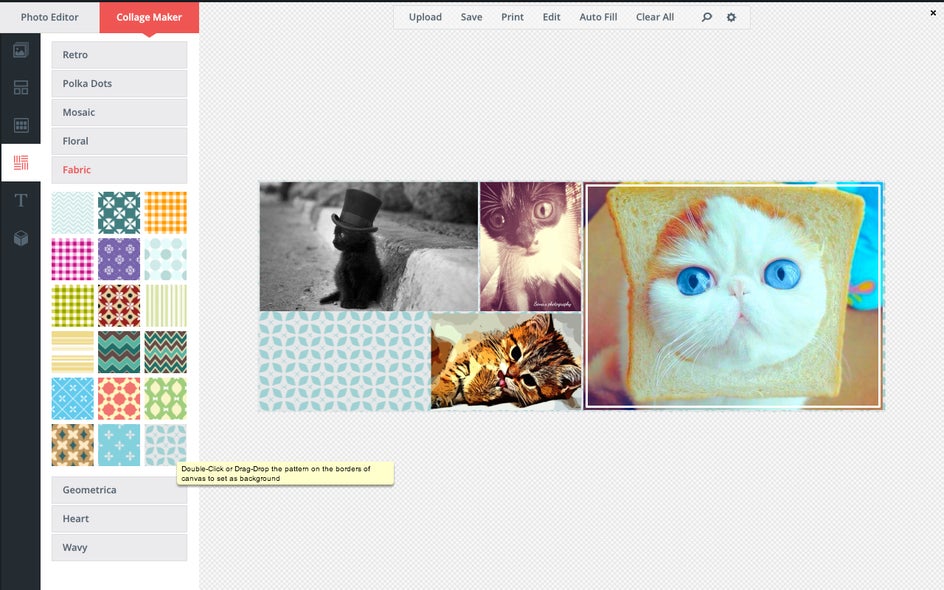
Solid color backgrounds are cool and all, but if you really want to BeFunky that Background we've added a bunch of Patterns for you to choose from!
Text is kind of a big deal right now... And yes, you can add text to your BeFunky Collage. The text feature works exactly the same as in our Photo Editor. Some of our Templates have space specifically for text, but we like to give you the option to do what you want, so you can add text ANYWHERE on the Collage you want. If you decide to put text in one of the photo boxes instead of a photo, it'll look gray while you're creating the Collage but will be the same color or pattern of your background in your saved image (you can preview what it'll look like by clicking Edit in the top tool bar (between 'Print' and 'Autofill'), when you're done previewing just click Collage Maker).
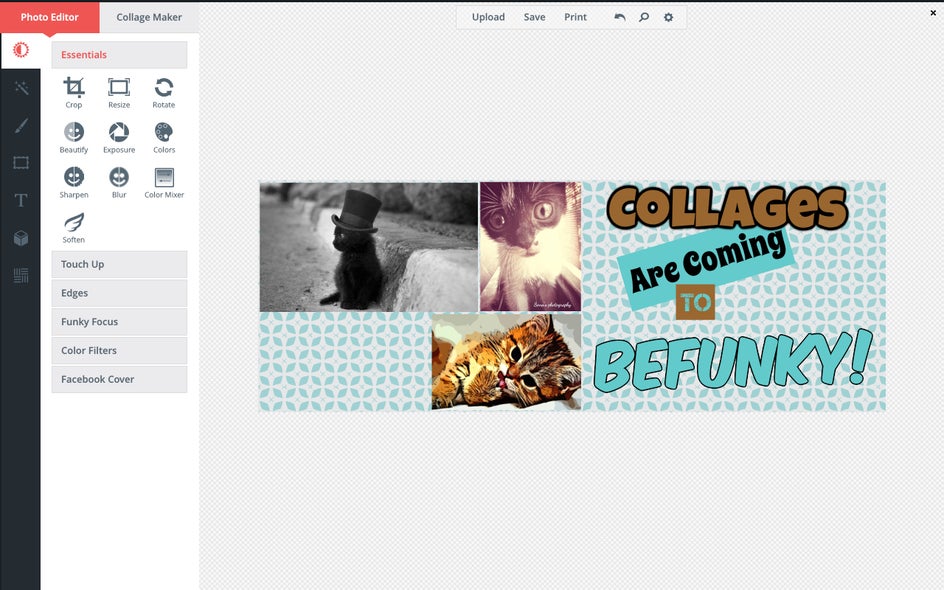
If you want to really BeFunky your Collage, you have a ton of Goodies at your disposal. These work the same as in our Photo Editor.
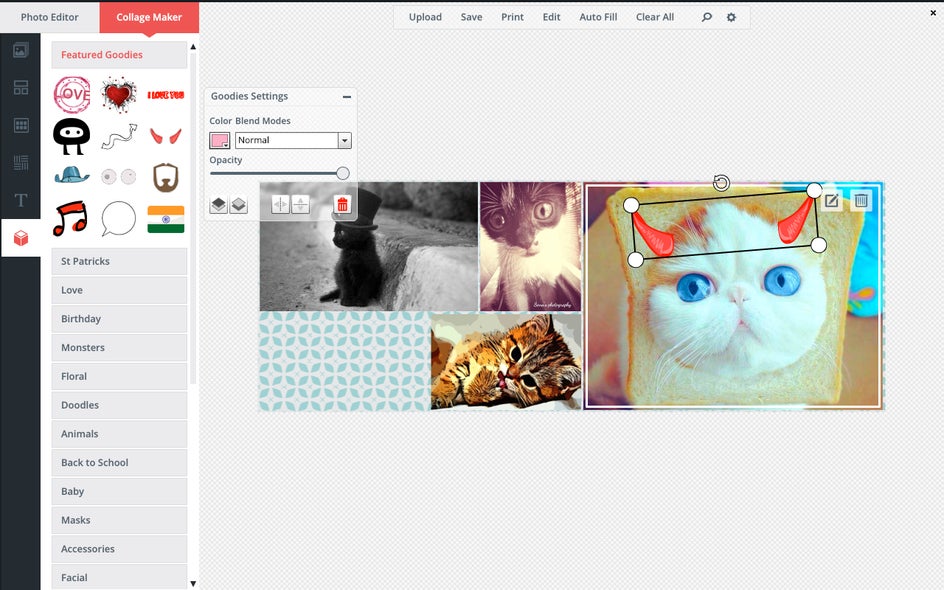
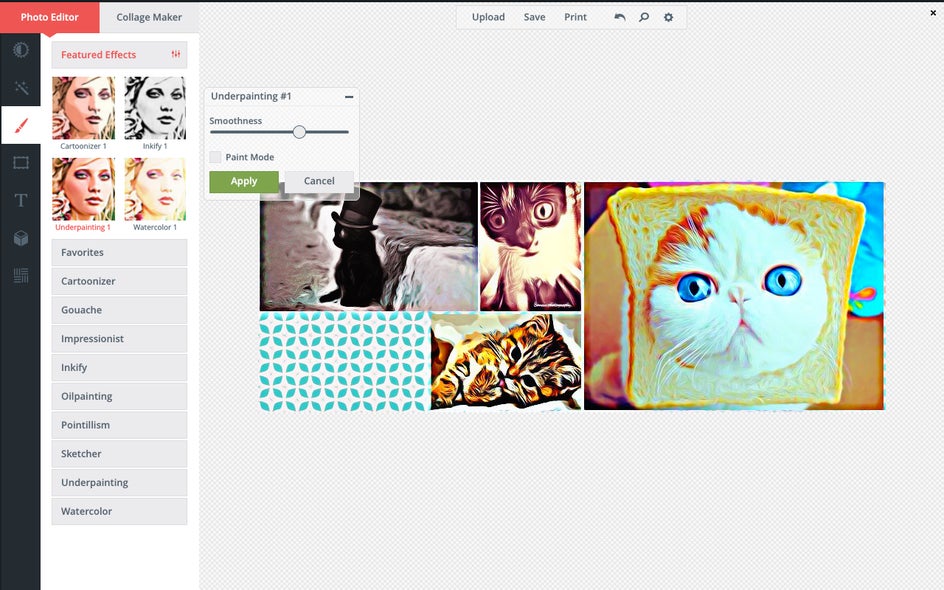
Now that your Collage is done (or is it?) you can hit 'Save' in the top tool bar... Or you can hit 'Edit' and open your Collage in our Photo Editor and get even more Funky with it!
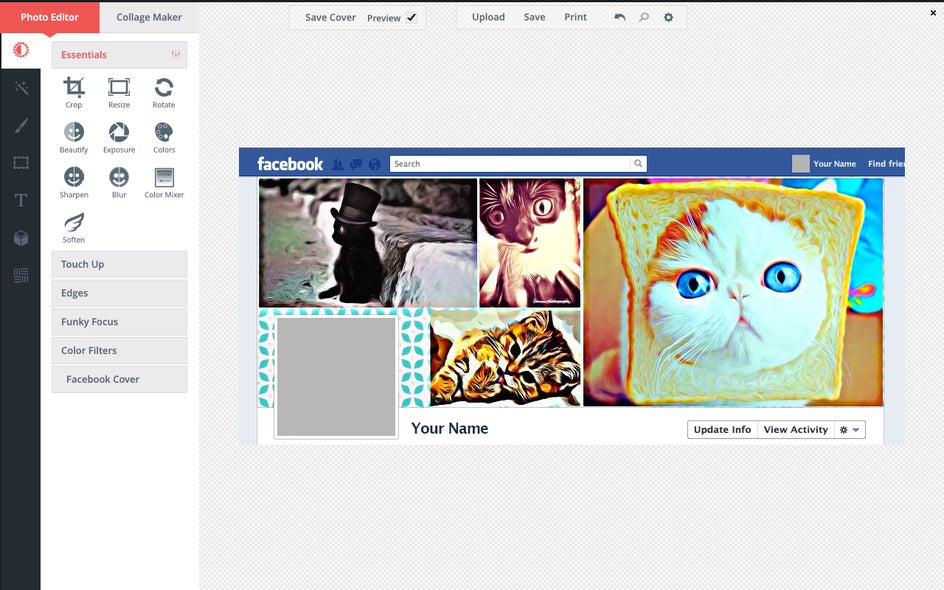
If you're creating a super sweet Facebook cover photo (like I am!), you can preview what it'll look like in our Photo Editor, just click the Facebook Cover button under Essentials and check the box at the top that says Preview.
Now go have some fun with the BeFunky Collage Maker!! And make sure to tell all your friends how fantastic it is! If you ever need help, just ask!
As with everything at BeFunky, let us know if you have an idea on how we can make it better. We're always listening to you!
Stay Funky :)


