How to Add a Background to a Photo

Have you ever come across a photo where the person(s) or objects in the photo looked great, but the photo's background kept it from being an out-of-this-world photo? If you have, then I'm here to show you how to add an amazing background to a photo that will make it both Instagram- and Facebook-worthy.
Step 1: Choose Your Subject
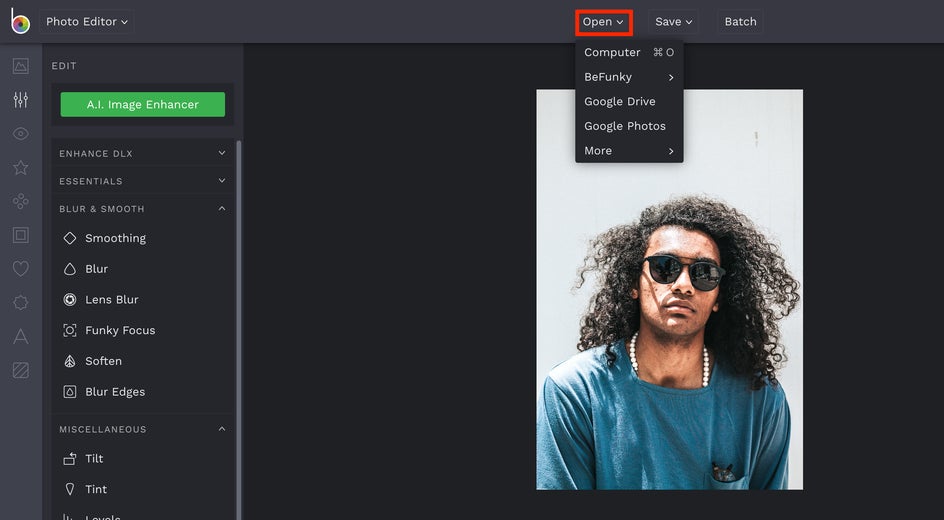
First, you need to find a photo that is in dire need of a new background. A photo with a blurred, busy, or distracting background is a perfect fit. On the other hand, a photo like this one with a single-color and simple background will also do fine. Upload this photo to BeFunky’s Photo Editor by clicking Open then Computer. This will allow you to select a photo from your computer’s library of images.
Step 2: Isolate the Subject of Your Photo
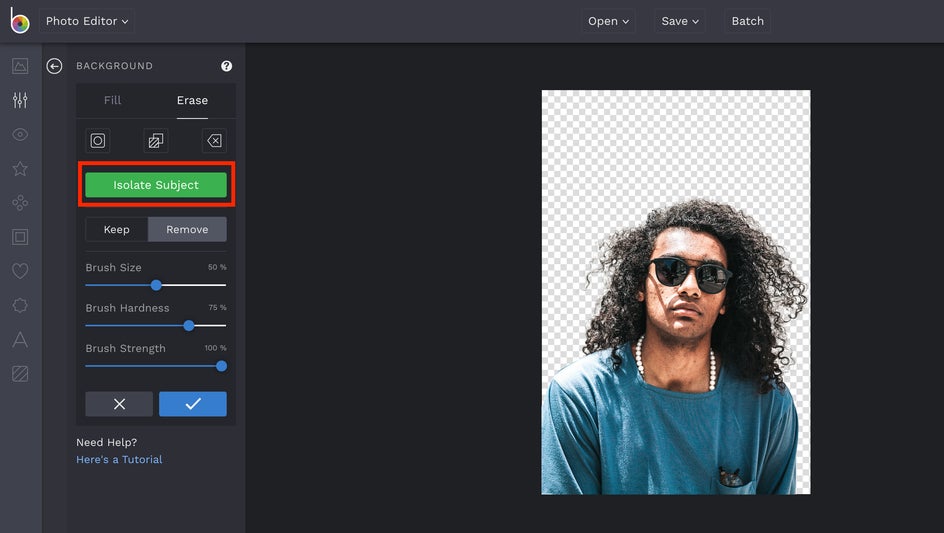
Now let's make the background of your original photo transparent. After you’ve uploaded your image, the first step is to remove the background of your current image. Click into the Background tool found within the Essentials menu. Make sure you’re in the Erase tab at the top of the tool then select the green Isolate Subject button. The photo editor can recognize the subject of a photo and will be able to isolate it while deleting the background.
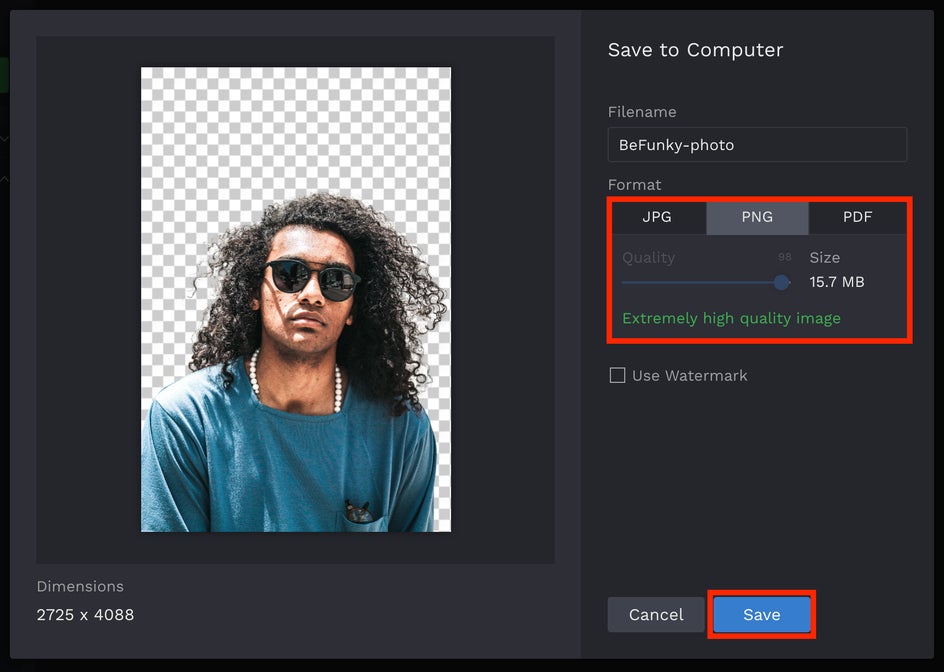
Now you must save this image as a .png on your computer. This step is important in being able to add a new background as a new layer later on in the process. Click the Save button at the top of your screen to do this. Save this .png of your original image wherever on your computer makes sense to find it easily.
Step 3: Choose Your Amazing Background
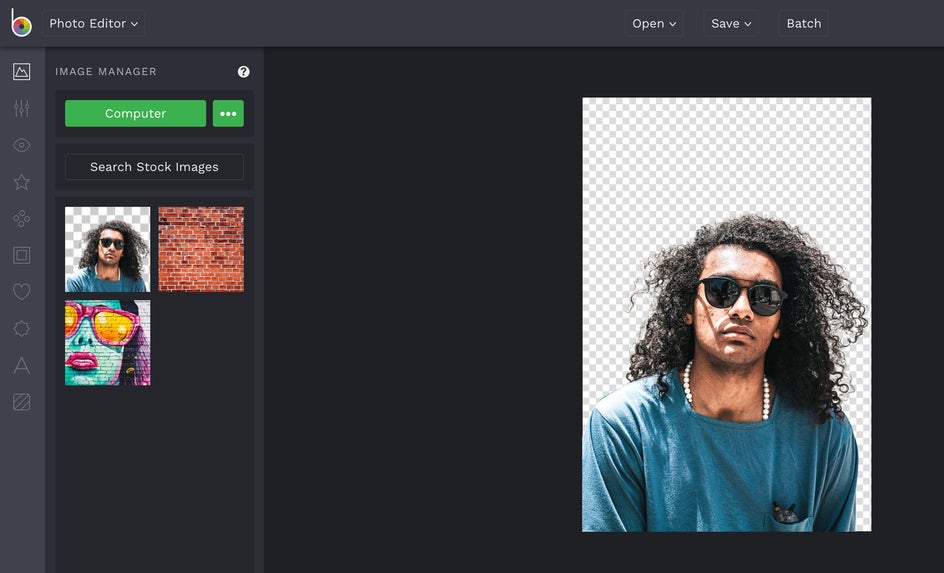
Now that you’ve saved your .png image, it’s time to choose what kind of background you want behind the isolated subject in your original photo. Select an image from BeFunky’s stock image photo library or upload your own. Upload the .png to the Image Manager by clicking the top icon on the left panel and selecting the green Computer button. This will give you access to the photos on your computer to upload.
Once you’ve done this, open your chosen background just like you uploaded your original photo at the beginning of this process. You should now have your background image at the main photo on the editing screen and your .png with no background uploaded to the Image Manager on the left-hand side.
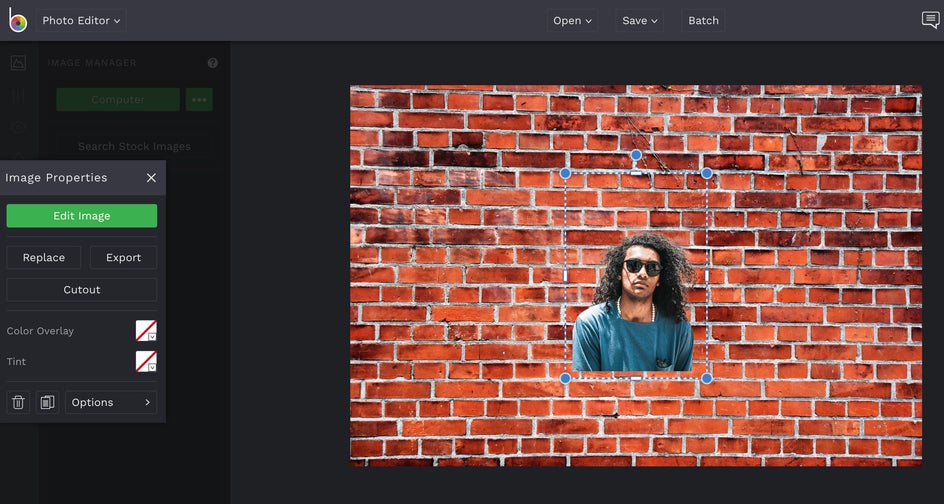
Step 4: Add and Adjust Your Background
Click on the thumbnail of your original photo currently in the Image Manager then select Add as Layer. This will open the .png of your original photo as a layer on top of the background you’ve selected.
Now simply use your cursor to adjust the size and orientation of the top layer to your liking. You’ve just easily added a new background to your photo.
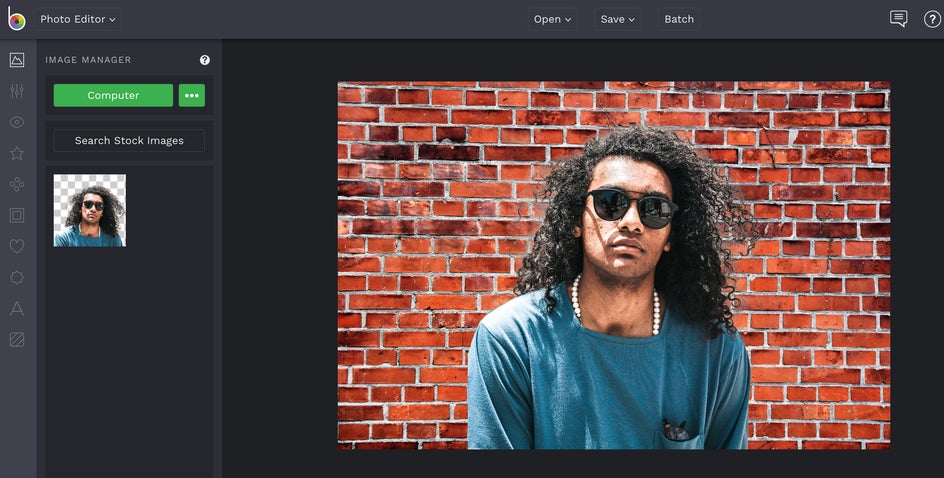
The Final Product
Here is your final product! You have the power when it comes to editing your photos with BeFunky’s Photo Editor. If the background isn’t exactly what you want, you can easily adjust it to be perfect to your liking. Now, what are you waiting for? Get editing!